How to use PPT to draw slightly floating disc graphics? Use graphic gradient and shadow settings to get it done!
ppt template article recommendation:
How to use PPT to draw a triangular expression with radians?
How to use ppt to make hand-painted chalk characters
How to make countdown animation with ppt
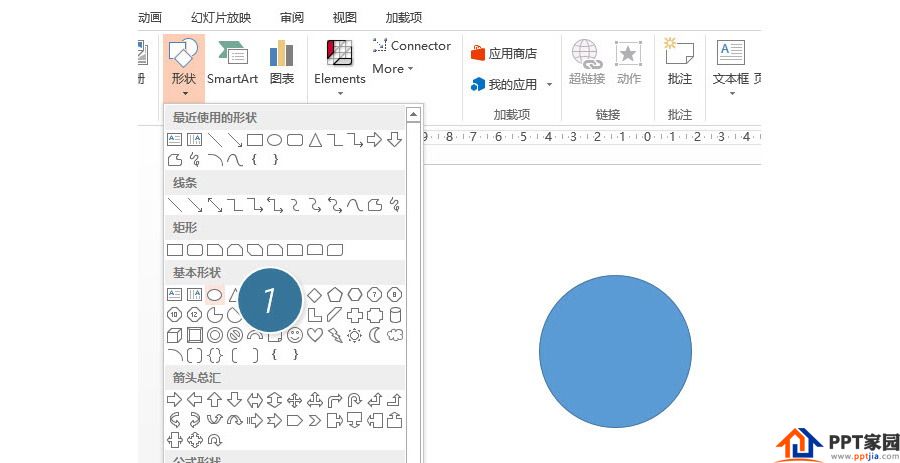
1. Create a new slide, in "Insert--Shape-Ellipse" (picture 1 below), hold down the Shift key and drag a perfect circle.
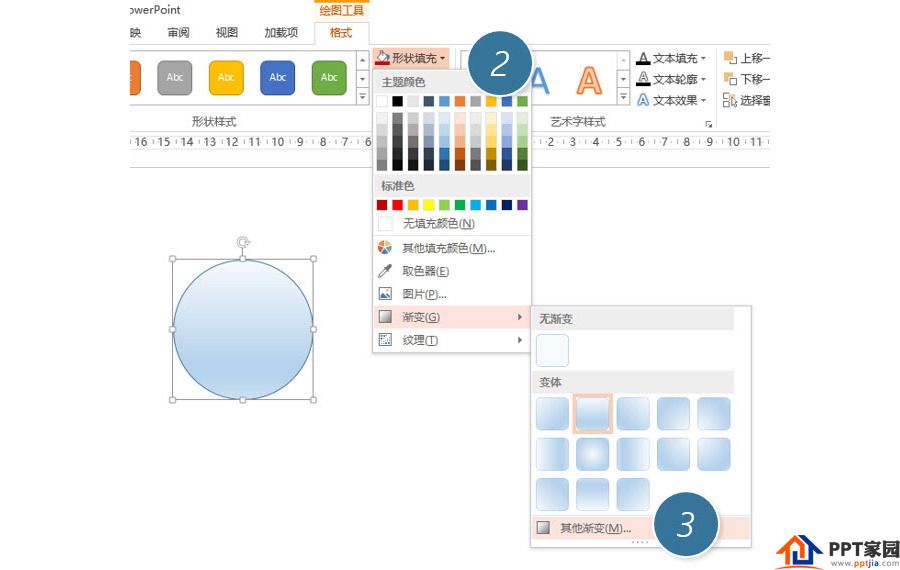
2. Select the circle, and select "Gradient-Other Gradient" in "Shape Fill" (the 3rd place in the figure below)
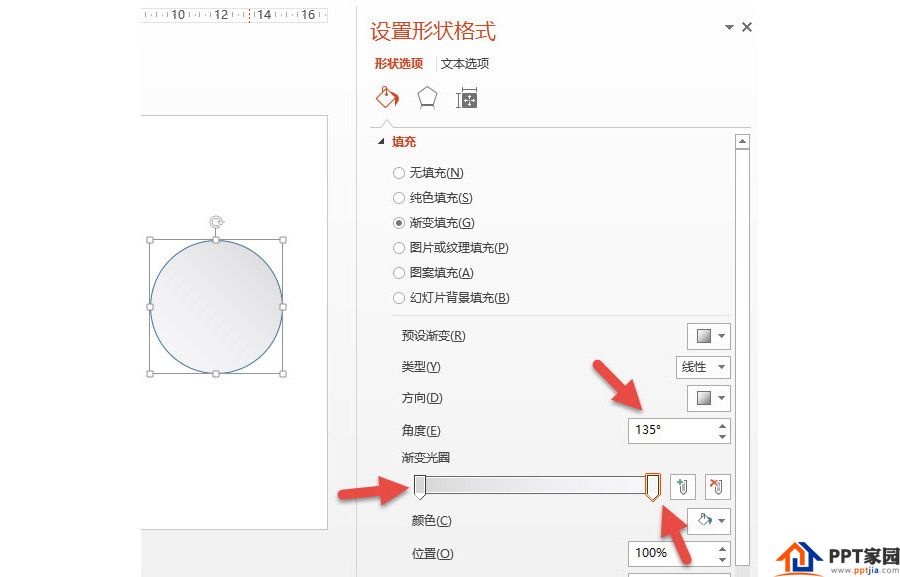
3. Set the following parameters in the gradient setting interface, and set the angle to 135 degrees. The left side is set to gray and the right side is set to white. (see the arrow in the figure below)
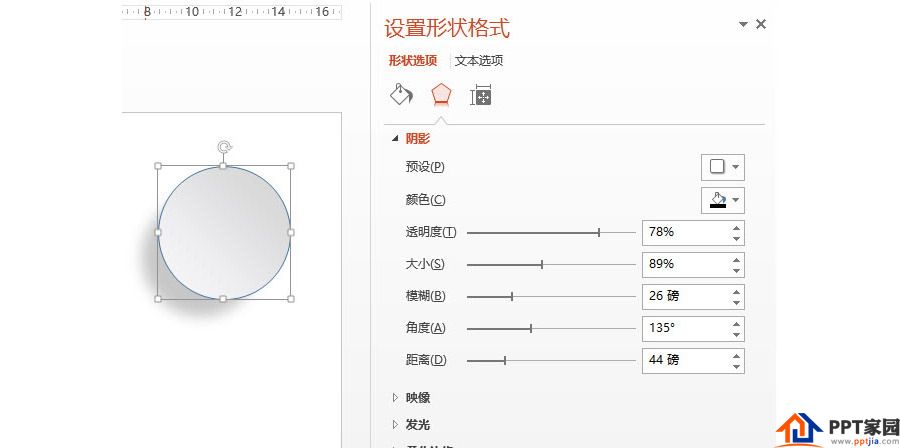
4. Next, set the shadow, select the circle, and set all the parameters as shown in the figure below:
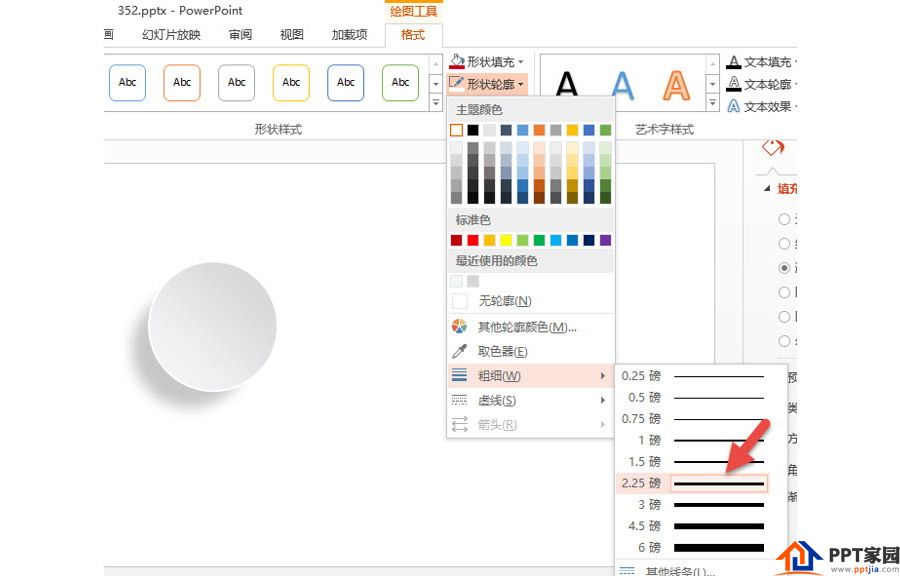
5. Finally, set the circular outline to white, here is a detail, the outline can be set to a thickness of 2.25 pounds. (arrow in the picture below)
Articles are uploaded by users and are for non-commercial browsing only. Posted by: Lomu, please indicate the source: https://www.daogebangong.com/en/articles/detail/How%20to%20draw%20microfloating%20disk%20graphics%20with%20PPT.html

 支付宝扫一扫
评论列表(196条)
测试