
https://www.linux.com/learn/ intro-to-linux/2018/5/how-manage-fonts-linux
Author | Jack Wallen
Translator | cycoe ?? Total translations: 6.0 Contribution time: 637 days
I write not only technical documents, but also novels. And since I'm comfortable with tools like GIMP, I've also (LCTT Annotation: This should refer to using GIMP) created covers for my own books (and did graphic design for a handful of clients). Creating art depends on many things, including fonts.
While font rendering has come a long way over the past few years, it is still a problem on Linux platforms. If you compare how the same font looks on Linux and macOS platforms, the difference is noticeable, especially if you're going to be staring at a screen all day. While the perfect font rendering solution has yet to be found on the Linux platform, one of the things open source platforms do well is allow users to easily manage their fonts. By selecting, adding, scaling, and adjusting, you can use fonts on the Linux platform fairly easily.
Here, I'll share some of my tips over the years that have helped me expand "font power" on Linux. These tips will be of particular help to those making art on open source platforms. Since there are so many desktop interfaces available on the Linux platform (each of which handles fonts differently), I'll focus primarily on GNOME and KDE as desktop environments become central to font management.
Having said that, let's get started.
Add a new font
I have been a font collector, some would say obsessive, for quite some time. Since my early days with Linux, I've always added fonts to my desktop the same way. There are two ways to do this:
Since my desktop never has other users (other than myself), I just use the font settings available per user. However, I will show you how to accomplish both settings. First, let's take a look at how to add a new font to the user. The first thing you need to do is locate the font files, both True Type fonts (TTF) and Open Type fonts (OTF) can be added. I chose to add fonts manually, that is, I created a new hidden directory called ~/.fonts under the ~/ directory. This can be done with the following command:
mkdir ~/.fonts
When this folder is created, I move all TTF and OTF font files into this folder. That is, any fonts you add in this folder will be available in installed apps. But remember, these fonts will only be available to this one user.
If you want to make this font collection available to all users, you can do the following:
sudo cp *.ttf *.TTF /usr/share/fonts/truetype/ and sudo cp *.otf *.OTF / The usr/share/fonts/opentype command copies all fonts. The next time the user logs in, they'll have all these beautiful fonts available to them.
Graphical interface font management
You have many ways to manage your fonts on Linux, how this is done depends on your desktop environment. Let's take KDE as an example. With Kubuntu 18.04, which uses KDE as the desktop environment, you can find a pre-installed font management tool. Open this tool and you can easily add, remove, enable or disable fonts (and of course get detailed information about all installed fonts). This tool also lets you easily add and remove fonts on a per-user or system-wide basis. If you want to add a specific font for users, you need to download the font and open the "Font Manager" tool. In this tool (Figure 1), click on "Personal Fonts" and click on the "+" sign to add the button.
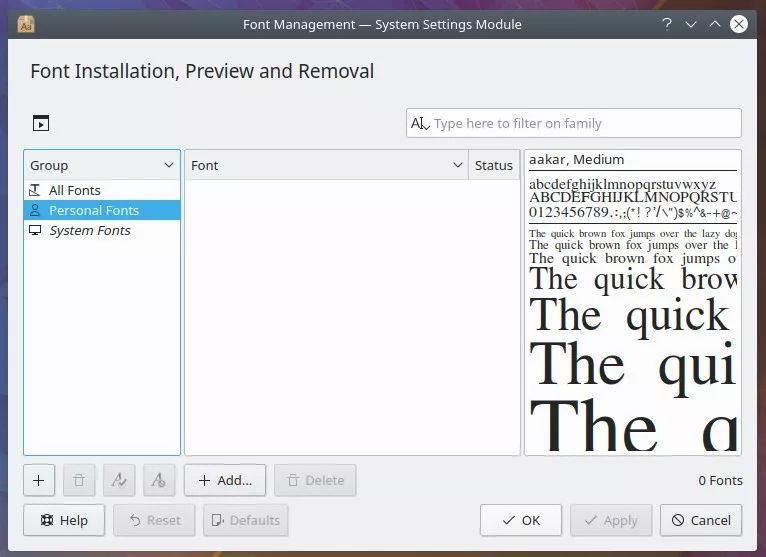
Figure 1: Adding personal fonts in KDE.
Navigate to your font directory, select them, and click Open. Your font is added to the personal area and is immediately available (Figure 2).
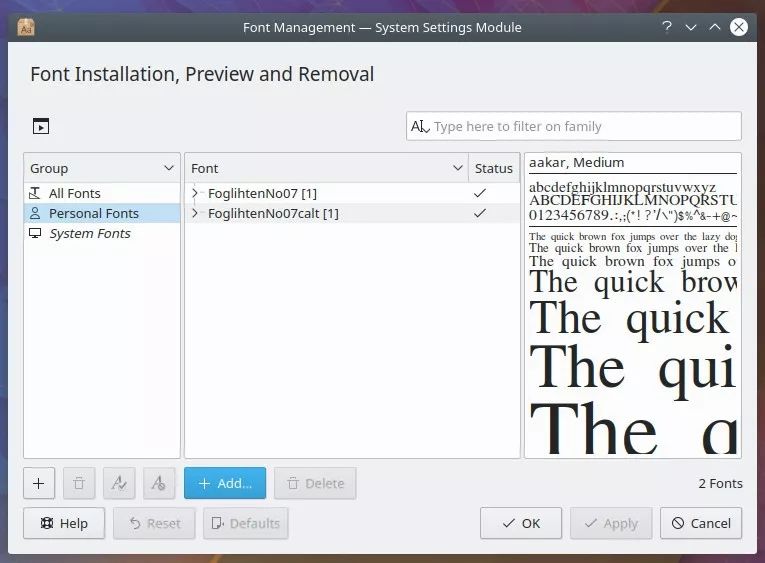
Figure 2: Adding fonts using KDE font management
Doing the same thing in GNOME requires installing an application. Open the GNOME Software Center or the Ubuntu Software Center (depending on your distribution) and search for Font Manager. Select "Font Manager" and click the Install button. Once installed, you can launch it from the desktop menu and let's install personal fonts. Here's how to install it:
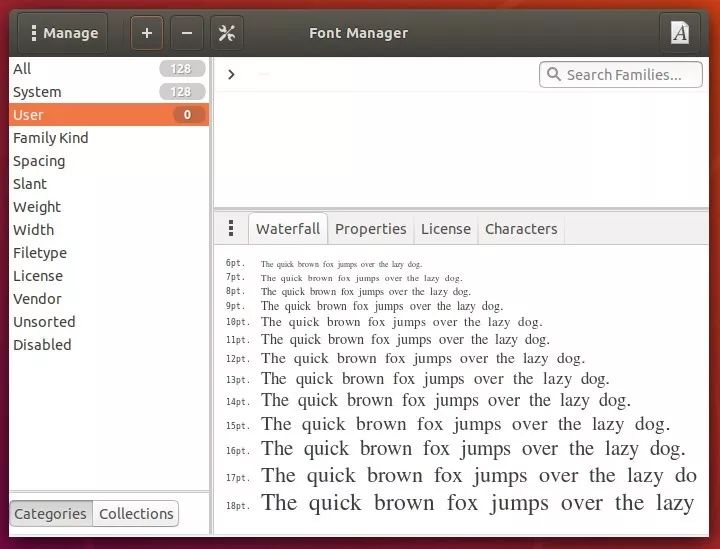
Figure 3: Adding fonts in GNOME
Adjust font
First you need to understand 3 concepts:
Assuming you have your fonts installed, but they don't look as good as you think. How will you adjust the look of the font? In both KDE and GNOME, you can make some tweaks. One thing to consider when tweaking fonts is that taste is very subjective when it comes to fonts. You may find that you have to keep tweaking until you get a font that actually looks satisfactory (depending on your needs and particular tastes). Let us first look at the situation under KDE.
Open the System Settings tool and click on Fonts. In this section, not only can you switch between different fonts, you can also enable or configure anti-aliasing or enable font scaling factors (Figure 4).
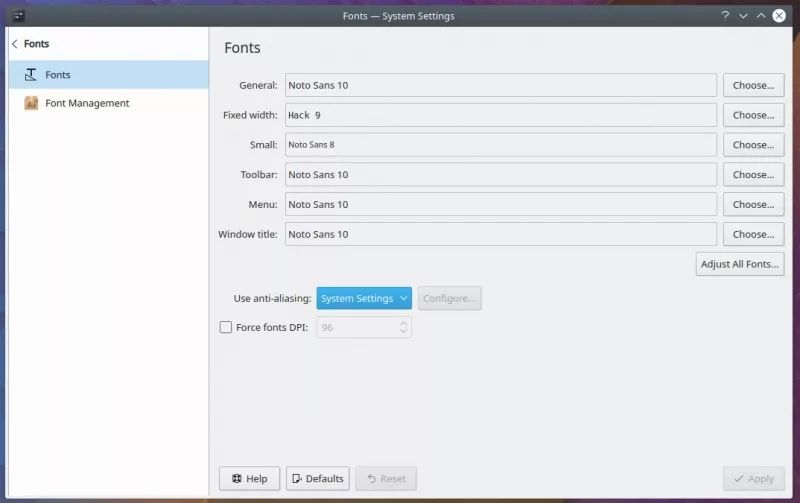
Figure 4: Configuring fonts in KDE
To configure anti-aliasing, select "Enable" from the drop-down menu and click "Configure". In the resulting window (Figure 5), you can configure the Exclusion Range, Subpixel Rendering Type, and Hinting Type.
Once you've made your changes, click Apply. Restart all running programs and the new settings will take effect.
To do this in GNOME, you need to install a "font manager" or GNOME Tweaks. Here, GNOME Tweaks is the better tool. If you open the GNOME Dash menu and don't find Tweaks, open GNOME "Software" (or Ubuntu "Software") and install GNOME Tweaks. Once installed, open and click on Fonts, here you can configure hinting, anti-aliasing, and scaling factors (Figure 6).
Figure 6: Adjusting fonts in GNOME
beautify your font
That's the gist of making your Linux fonts as beautiful as possible. You might not get fonts rendered like macOS, but you can definitely improve their appearance. In the end, the font you choose can greatly affect the visual effect, so make sure that the font you install is clean and fully adapted, otherwise you will lose this confrontation.
Learn more about Linux in the free course Introduction to Linux[1] from The Linux Foundation and the edX platform.
via: https://www.linux.com/learn/intro-to-linux/2018/5/how-manage-fonts-linux
Author: Jack Wallen[3] Topic: lujun9972 Translator: cycoe Proofreading: wxy
This article was originally compiled by LCTT and honored by Linux China
Articles are uploaded by users and are for non-commercial browsing only. Posted by: Lomu, please indicate the source: https://www.daogebangong.com/en/articles/detail/How%20to%20Manage%20Fonts%20on%20Linux%20%20Linux%20China.html
 支付宝扫一扫
评论列表(196条)
测试