
1. Create a new document
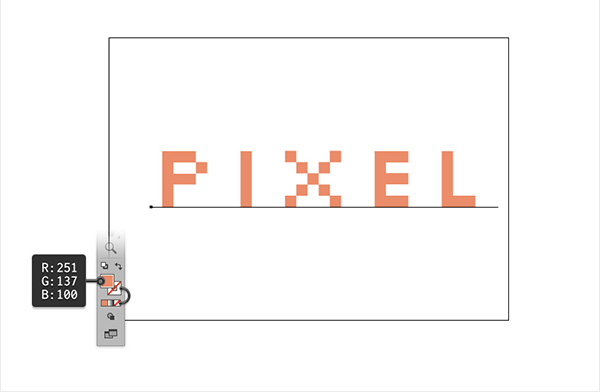
Step 1. Create a new document with a size of 850*600 and a resolution of 72. Keep the unit in pixels and enter the text FIXEL, choose Silkscreen as the font, size 200px, color value R = 251 G = 137 B = 100.
2. How to add 3D effect and expand it
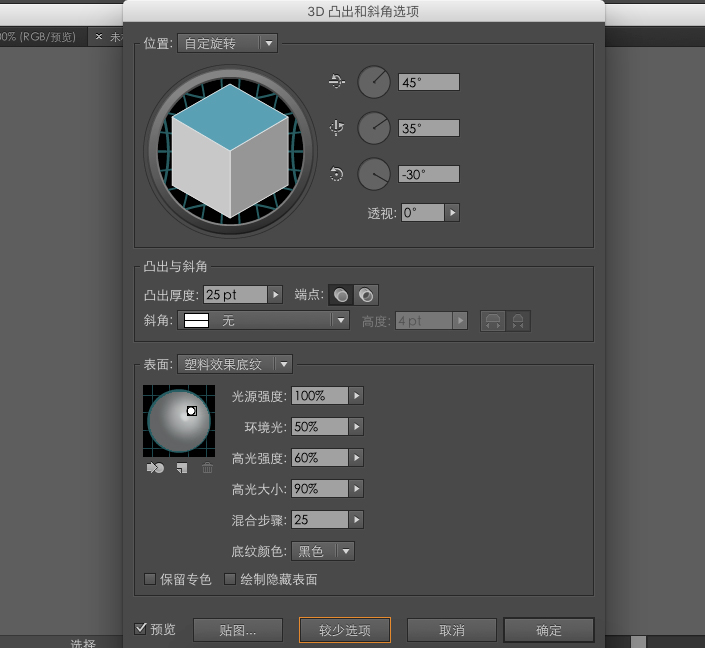
Step 1. Make sure your text is still selected and go to Effect > 3D > Extrude and Bevel. Click the More Options button, enter all the properties shown below, and click the OK button as shown in the image below.
3. Add color to the text block
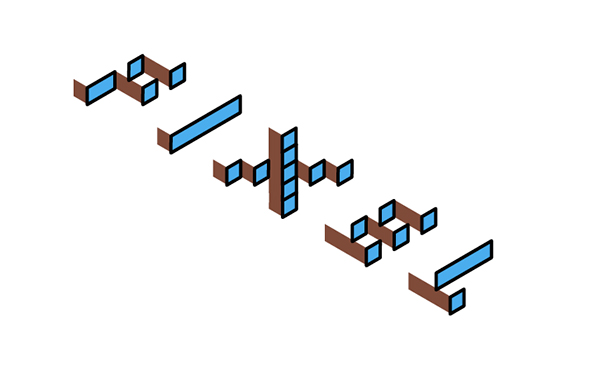
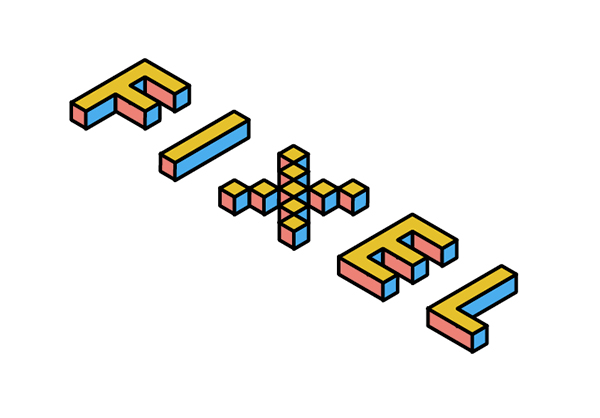
Step 1. Execute the menu Object > Expand Appearance, then right-click and choose to cancel all text groups, select some strokes in the picture, and fill the color with #fbc703, and stroke 4 pixels. Name this part of the layer "Yellow Top", and remember to select rounded corners for the stroke, otherwise all the strokes will appear wrong.

Step 2,
Focus on the Layers panel, open the existing layer, the "yellow top" layer made in the previous step should be on top, and uncheck the eye icon so it is not visible. Then select the side stroke in the picture, fill it with blue, color value #01aced, and put it behind. And name this layer as "blue", and lock this layer.
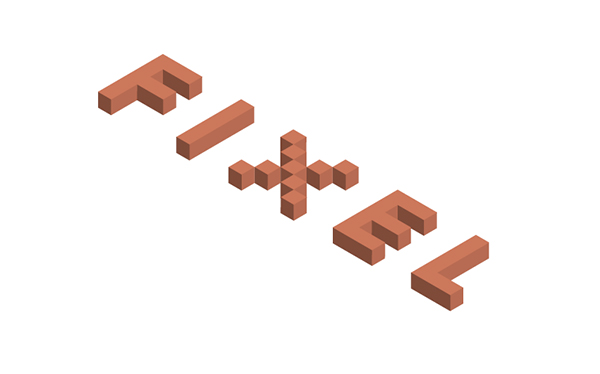
Step 3. Select all remaining browns and fill with color #fc8277
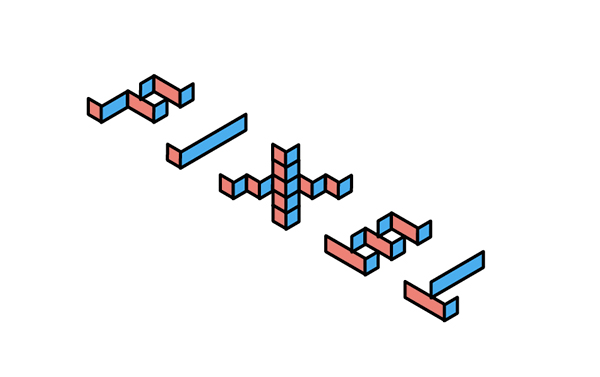
Step 4, we display the hidden yellow layer
4. Add background and projection to the finished 3D text
Step 1. Add the same size as the file background layer, fill with color #00aeed
Step 2. Go to the "Blue Layer", select it and move it to the "Appearance" panel. Change the Blending Mode to Soft Light and go to Effect > Path > Offset Path. Enter a 2 px Offset, and set Join to Circle. Click the OK button and go to Effect > Distort & Transform > Transform. Drag the "Horizontal" slider to 0.2 pixels, enter 100 in the "Copy" box, click the "OK" button, and you're done.

Articles are uploaded by users and are for non-commercial browsing only. Posted by: Lomu, please indicate the source: https://www.daogebangong.com/en/articles/detail/How%20to%20Create%20a%203D%20Blocks%20Font%20Effect%20in%20Adobe%20Illustrator.html
 支付宝扫一扫
评论列表(196条)
测试