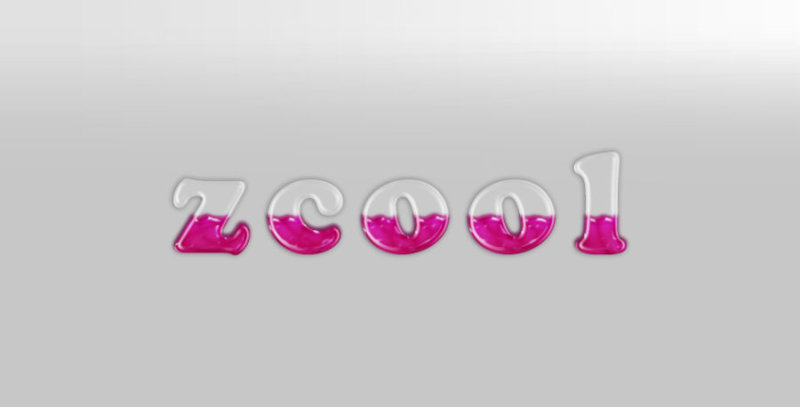
The font effect of this tutorial is divided into two parts to make. One is the glass text, and the other is the liquid part. The production of the two parts is basically the same, and they are all done with layer styles. It’s just that the liquid part needs to use a pen to outline the flowing shape before rendering the texture.
final effect:

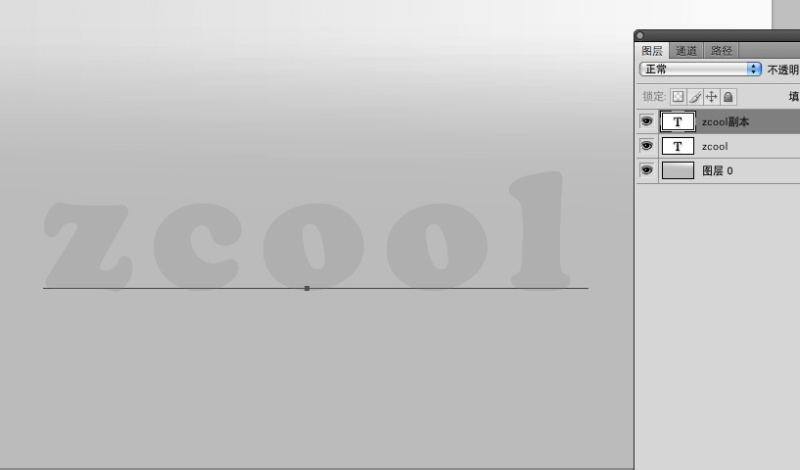
1. Create a new document (any size is fine), enter the text color as # dbdbdb, size 300px, and font type as "Cooper Std". You can use other fonts according to your preference. Duplicate the text layer, the two layers are as shown in the figure.
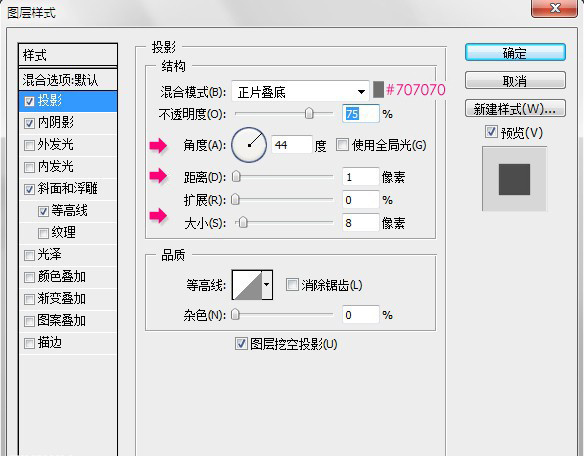
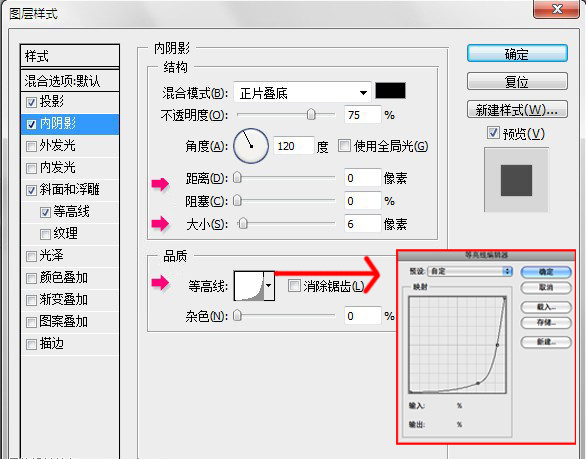
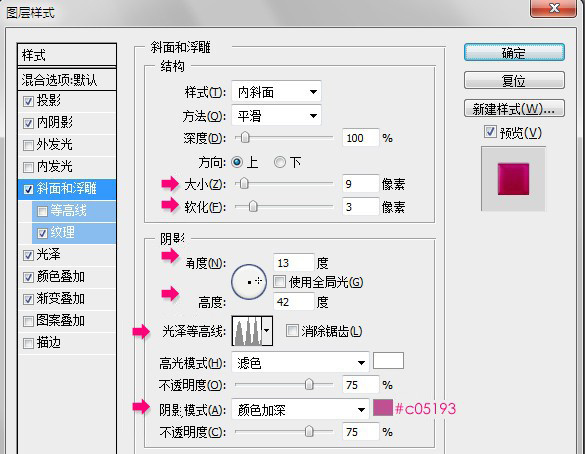
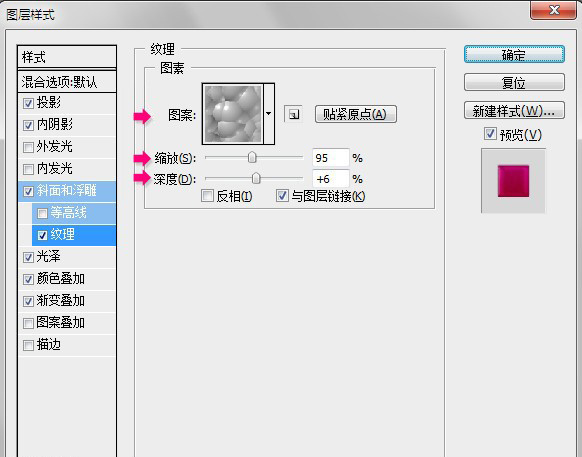
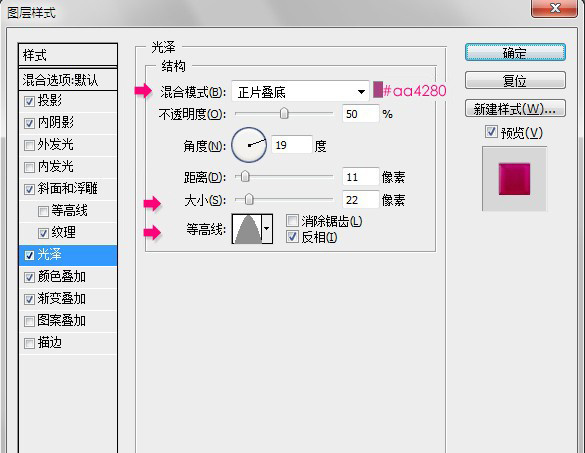
3. Double-click the topmost layer (the copy) and apply the following layer blending modes:
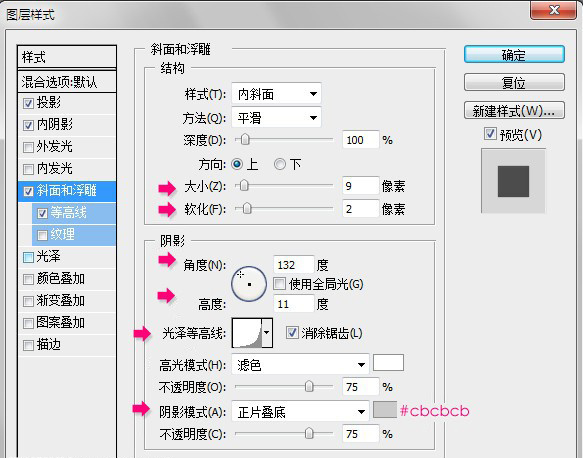
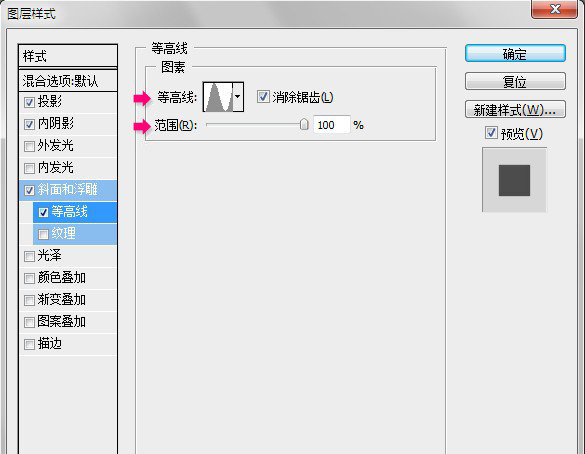
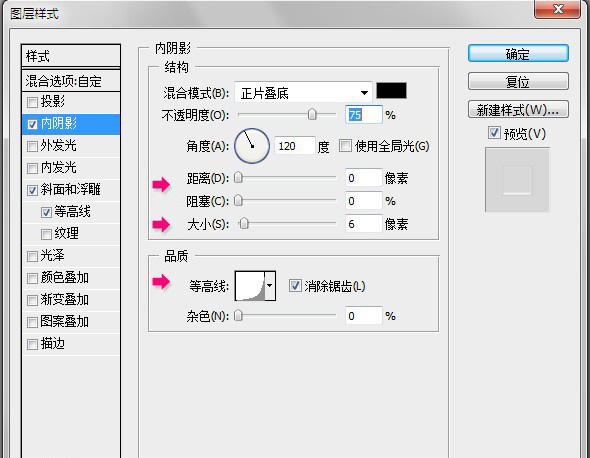
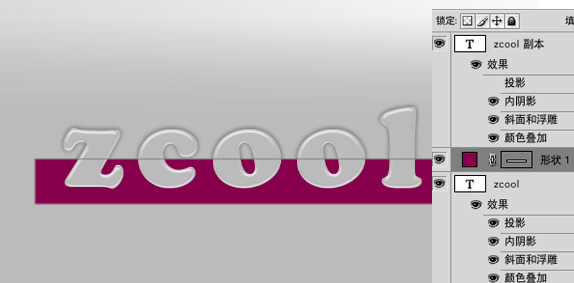
4. Using the Rectangle Tool, draw a rectangle shape, cover the lower half of the text, and use the color #aa4280. Make sure that the rectangle layer is in the middle of the two layers, as shown in the figure:
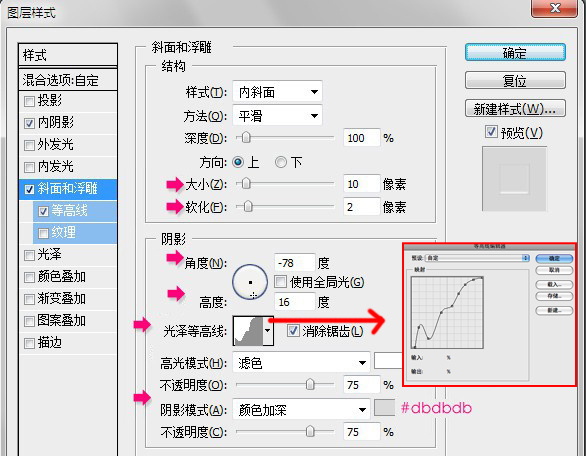
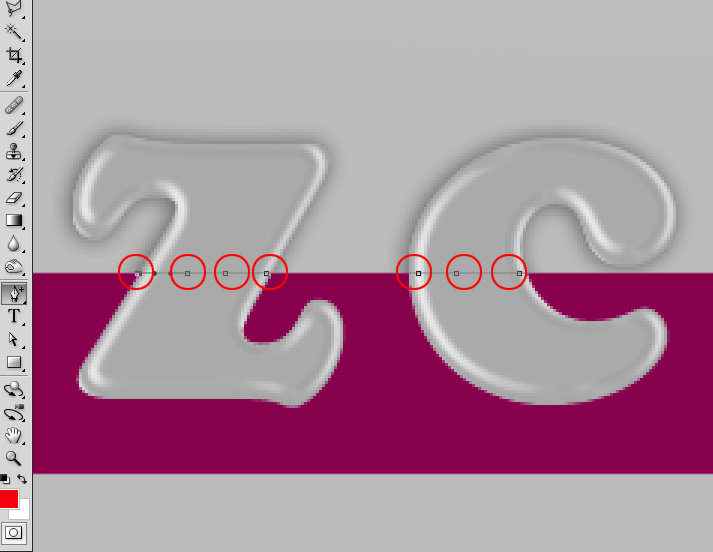
5. Select the "Add Anchor Point Tool" and start adding the upper edge of the rectangle shape.
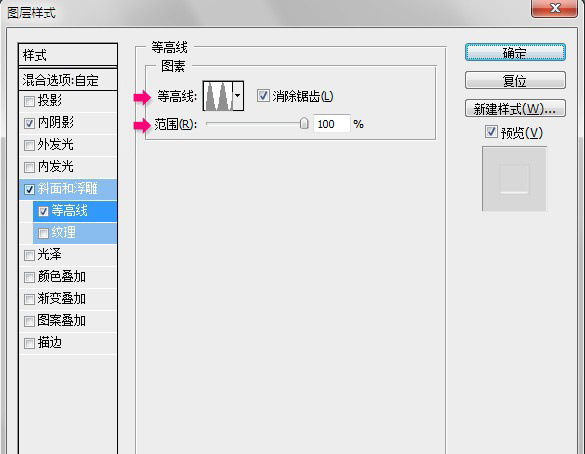
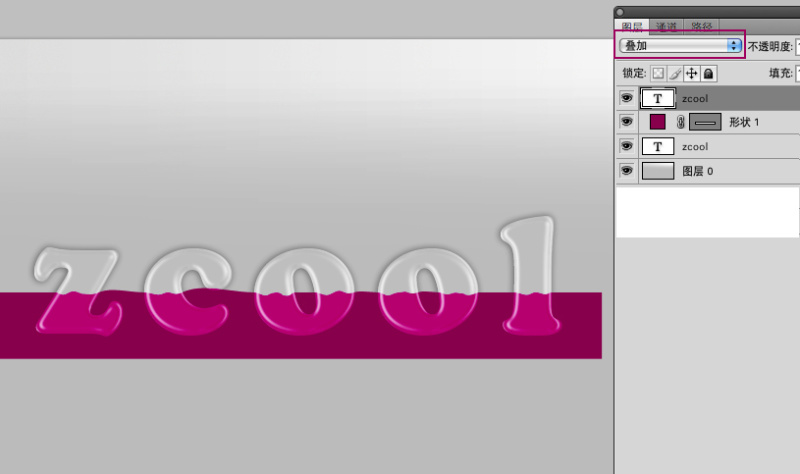
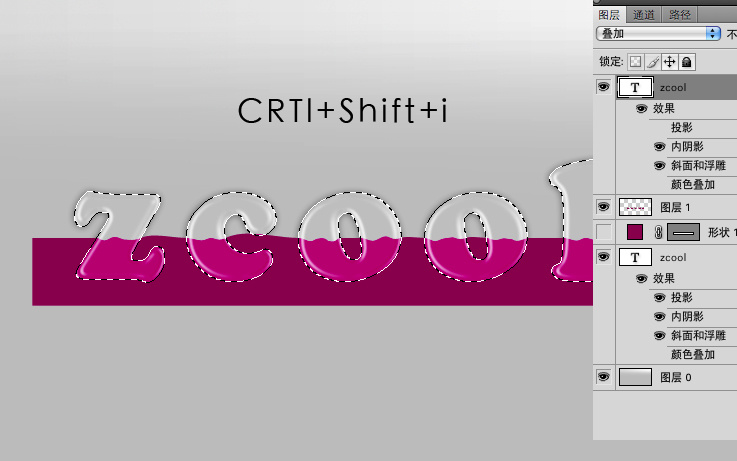
7. Select the first layer, select Overlay as the blending mode (picture 1 below), then make the completed rectangular shape, copy a layer of rasterized layer, then right-click the icon at the bottom of the text to create a text outline selection area, and delete the shape the excess part of . (Picture 2 below)
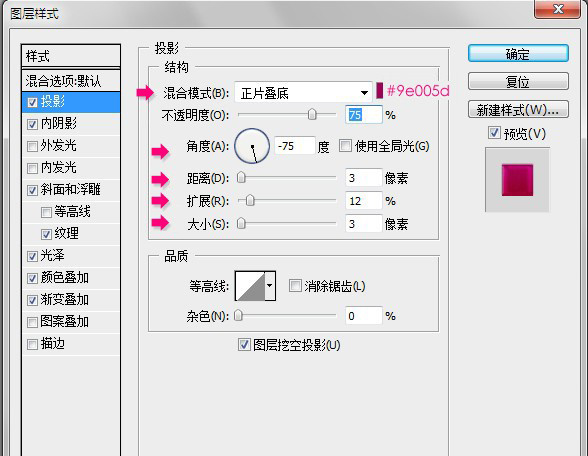
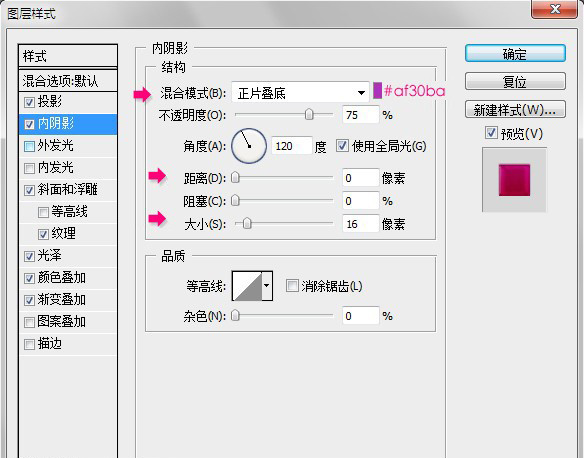
8. Next, create a blending mode for the text to make it have the effect of flowing liquid, as shown in the figure.
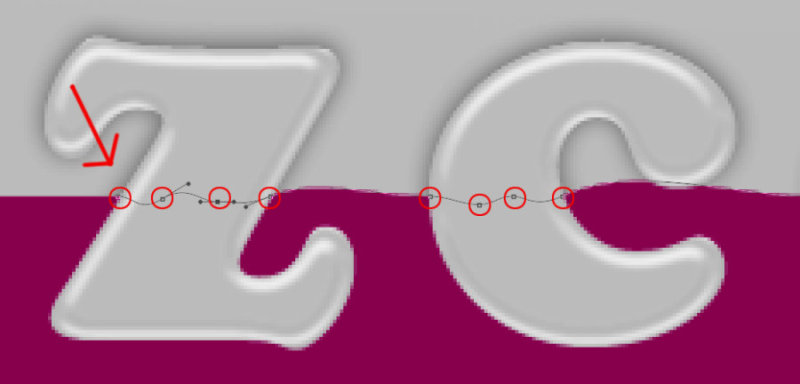
9. If you like, you can also change the hue and use hue and saturation to adjust.
Another: You are new to design, do you have design language and thinking? Welcome to add! Just scan the QR code~ There are no advertisements, only progress!
Articles are uploaded by users and are for non-commercial browsing only. Posted by: Lomu, please indicate the source: https://www.daogebangong.com/en/articles/detail/Font%20Tutorial%20Quickly%20create%20container%20text%20filled%20with%20liquid%20in%20a%20few%20steps.html

 支付宝扫一扫
评论列表(196条)
测试