The following articles are from Photoshop

P big point S, PS original tutorial gathering place, creativity, inspiration, magical PS world!
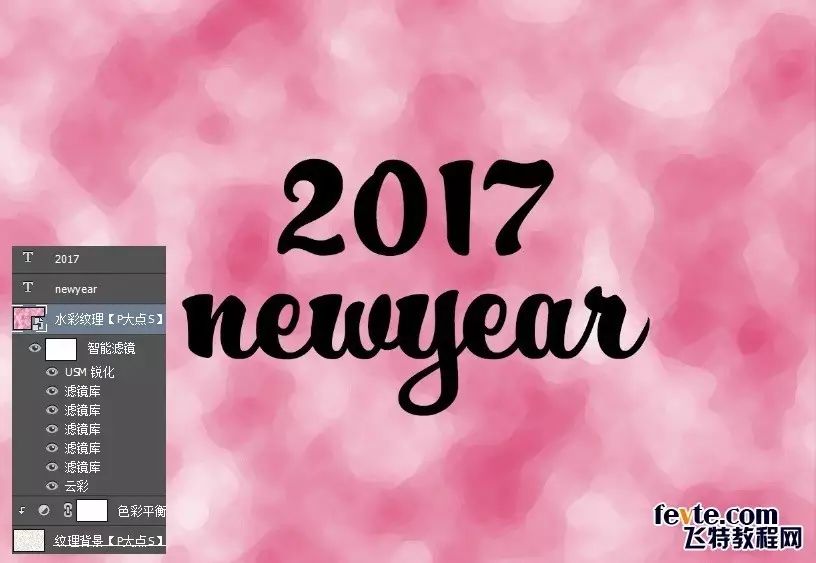
Watercolor text effect has been used by many designers in packaging design, poster design and other fields because of its relatively fresh and natural feeling. At the same time, it is also relatively common in the current popular e-commerce design. This tutorial can be regarded as an introduction. Through the production of watercolor text effects, the design learners of Fitenet can understand and master the application of watercolor effects in actual design. Well, without further ado, let’s take a look at the effect first:
Look at the renderings first
 The specific production steps are as follows:
First, I created a new document, and I used a size of 1250X850 pixels.

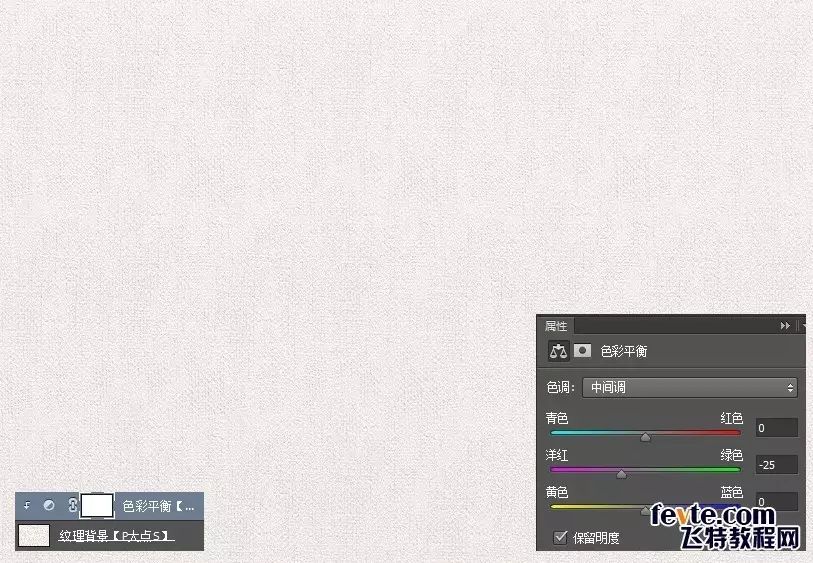
In the material package we provide, find this texture material, put it in our document, and you can adjust the size and position in time. I created a "Color Balance" adjustment layer, created a clipping mask, and slightly changed the color of the lower footage.
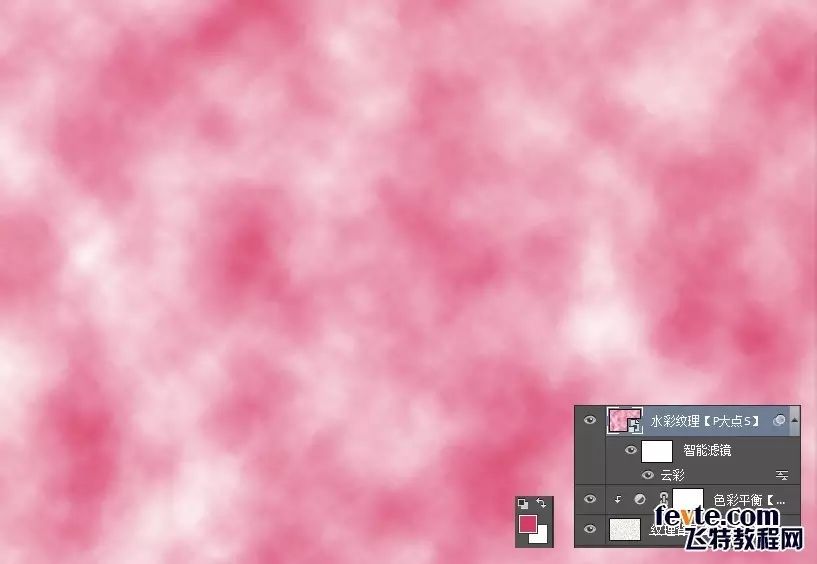
Create a new layer and fill it with #d63c65. This layer will be used as our watercolor texture layer. Since the next operations are filters, it is recommended to convert it into a smart object to facilitate modification when mistakes are made.
Execute a cloud filter, here it should be noted that the foreground color should be the color we just filled #d63c65, and the background color should be white.
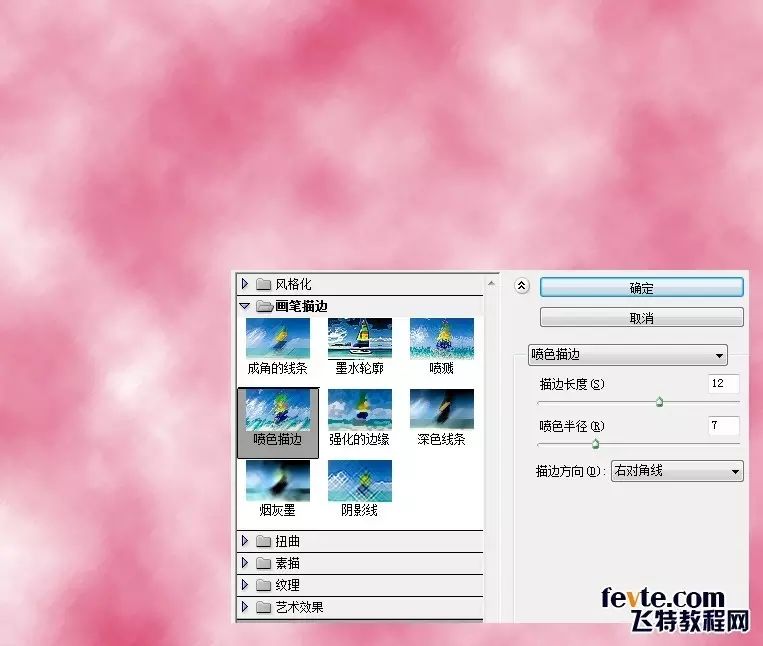
Execute a spray stroke filter, set the stroke length to 12, the spray radius to 7, and the stroke direction to the right diagonal.
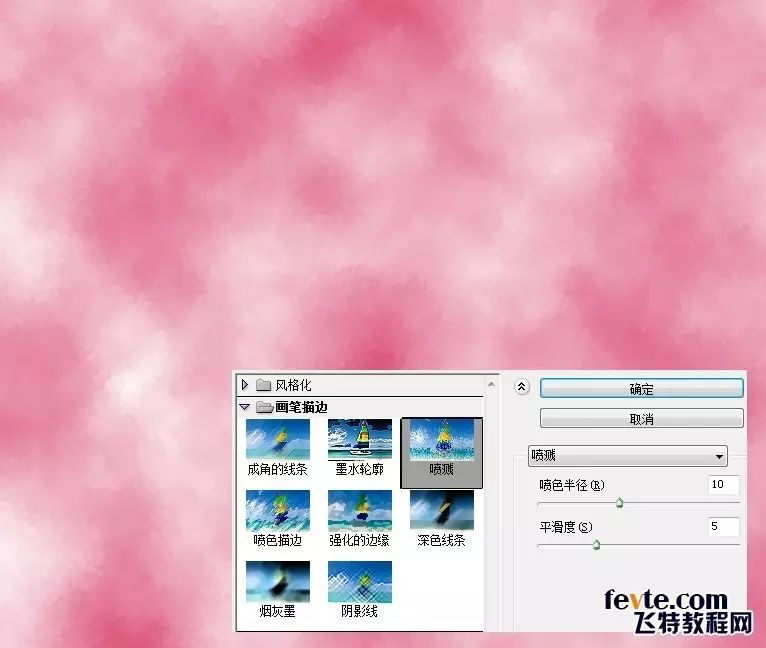
Execute a splash filter, set the spray radius to 10 and the smoothness to 5.
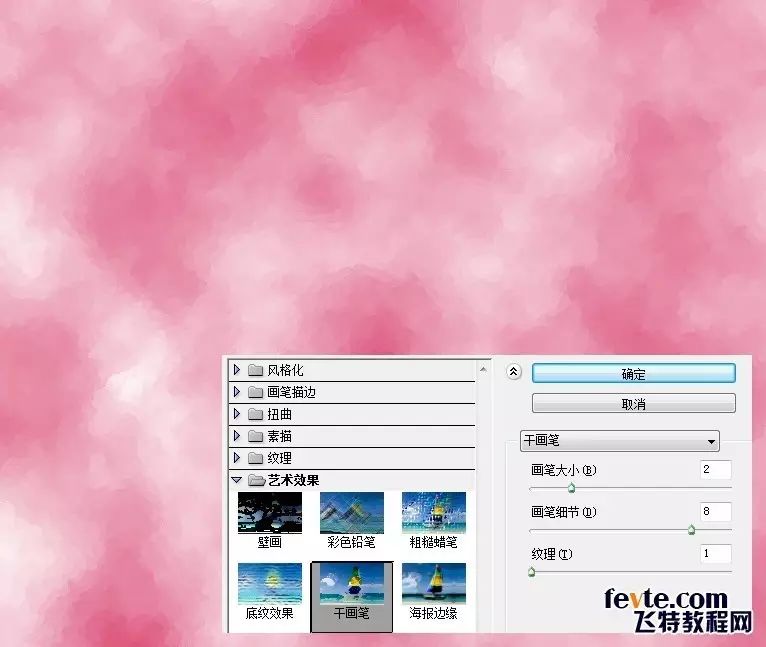
Perform a dry brush filter, set the brush size to 2, brush detail to 8, and texture to 1.
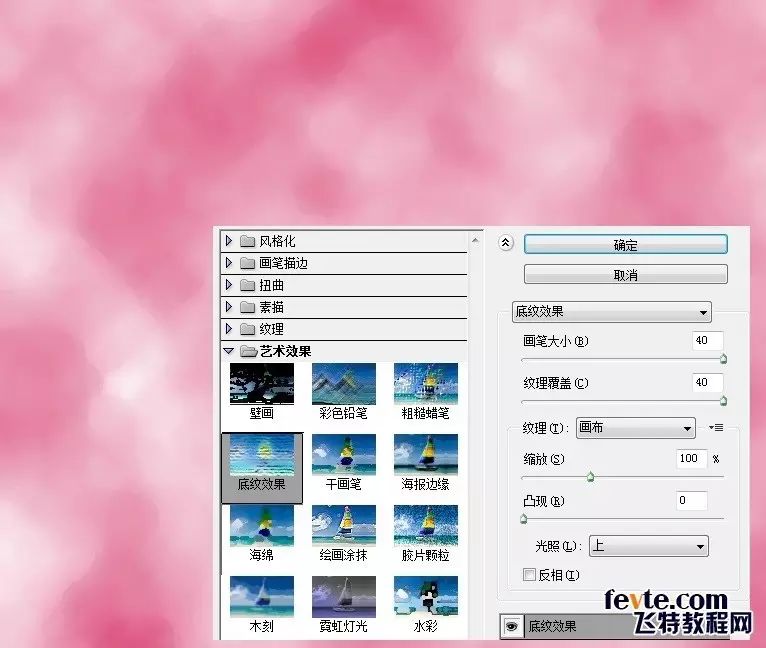
Execute a texture effect filter, set the brush size to 40, the texture coverage to 40, and the light to up.
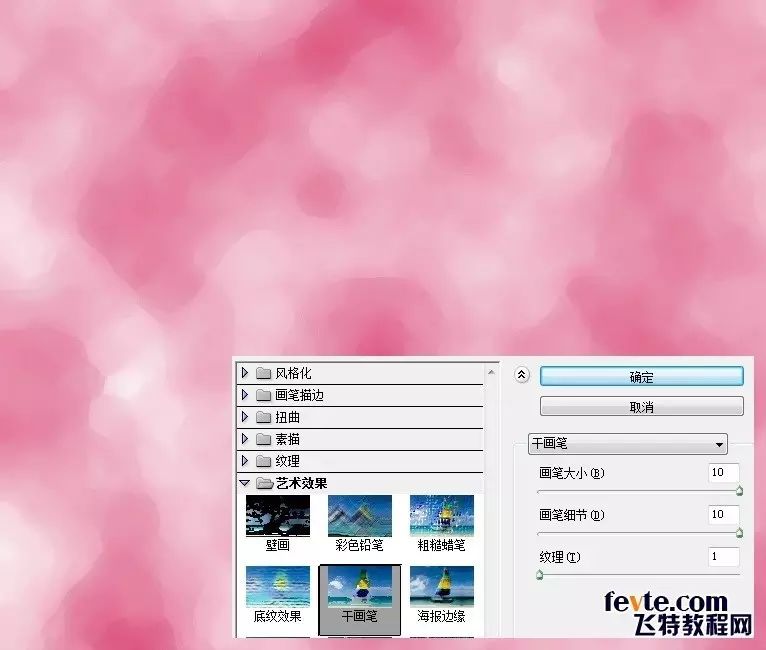
Perform a Dry Brush filter again, setting the Brush Size to 10, Brush Detail to 10, and Texture to 1.
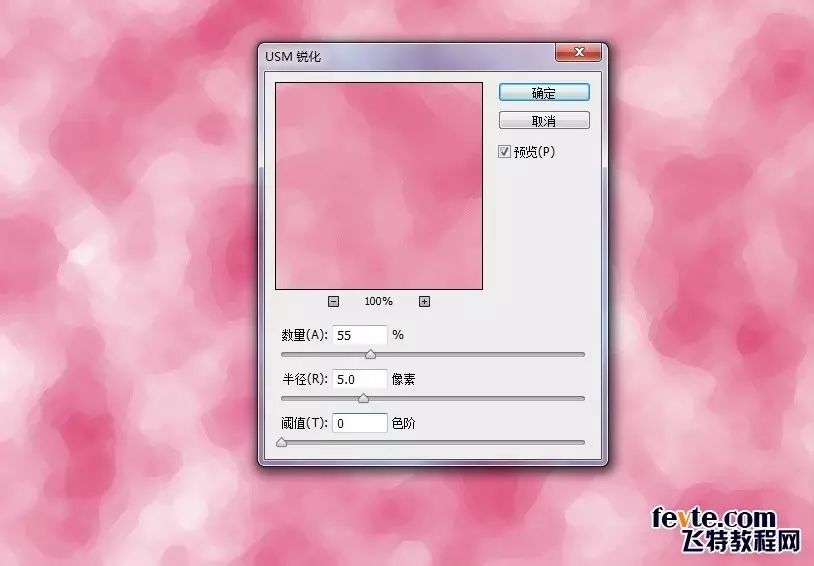
Performs a USM sharpening with 55% Amount, 5px Radius, and 0 Levels Threshold.

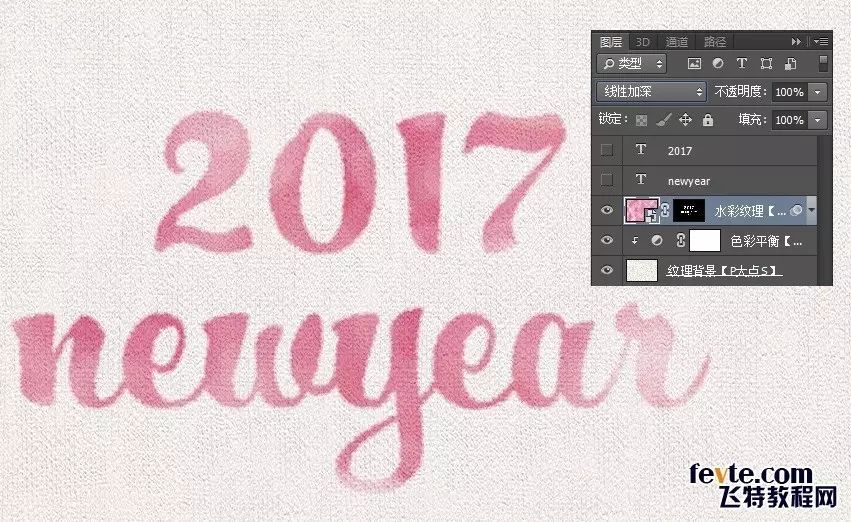
Add our text, I used 2017NEWYEAR here, in fact, I should use HELLO2017, I only remembered it halfway through, so forget it. The font used here is HucklebuckJF, with a size of 200 points. Its shape is a bit like writing. I think it is more suitable for watercolor characters.

Right click on the text layer, select "Create Work Path", and save the path in the path panel. Because I use two text layers here, I saved two.
Because after the text is converted to a path, the paths between some texts are intersected, we need to eliminate these points, select this path, and merge the shape components.
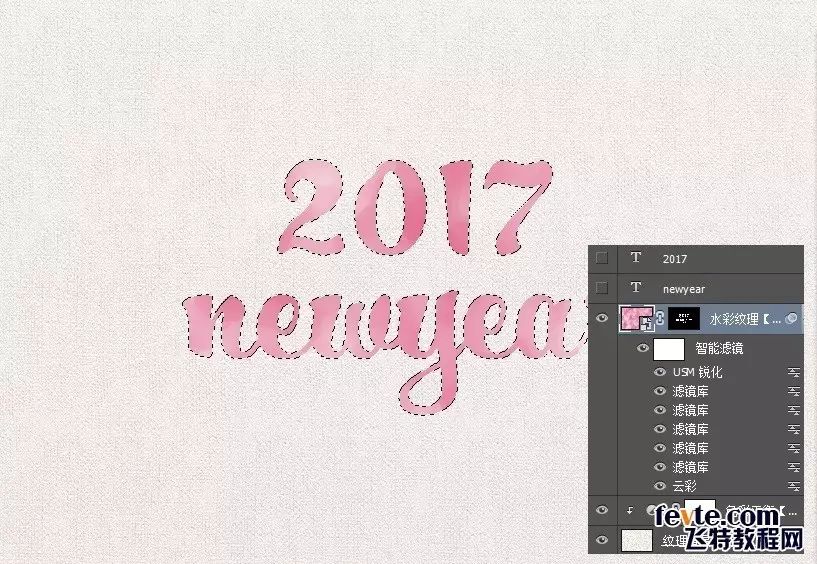
Load the text selection, create a mask for the watercolor texture layer, and hide our text layer. Now you can see that our text has a preliminary watercolor effect, but it is not perfect, and we need to further optimize it.
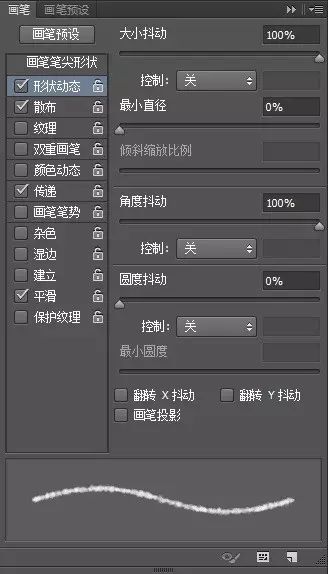
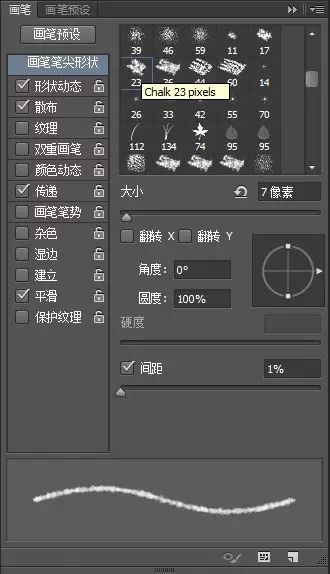
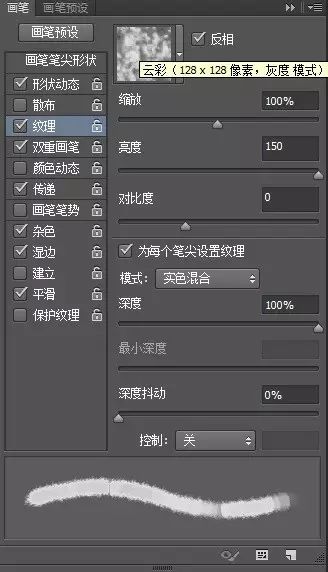
Next, we optimize. First, we set up the brush, set the shape of the brush tip, shape dynamics, spread and transfer, remember to check smooth.
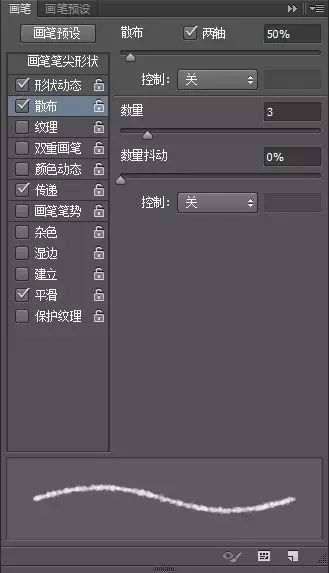
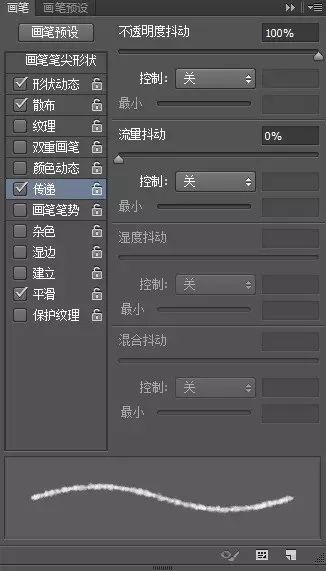


After setting up the brush, set the foreground color to black, and then select the mask of the watercolor texture layer. Please be sure to select this mask, perform stroke path operation in the path panel, and set the simulated pressure. Performing a stroke on the mask is equivalent to using the stroked area to paint on the mask, which will make the edge more realistic.
OK, now we get the following effect.
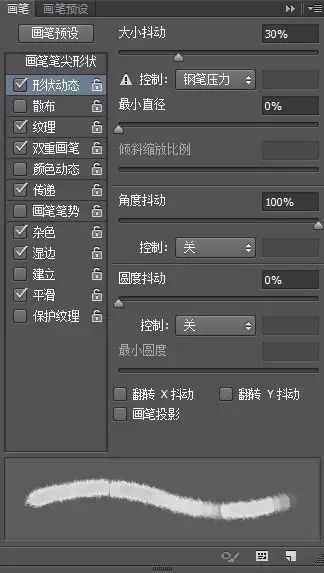
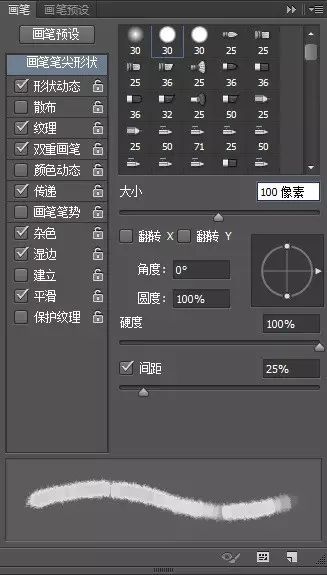
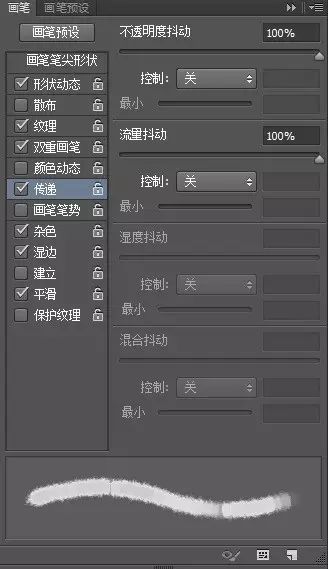
Next, let’s continue to set the brush. I set the brush tip shape, shape dynamics, texture, double brush and transfer. Remember to check noise, wet edge and smooth.
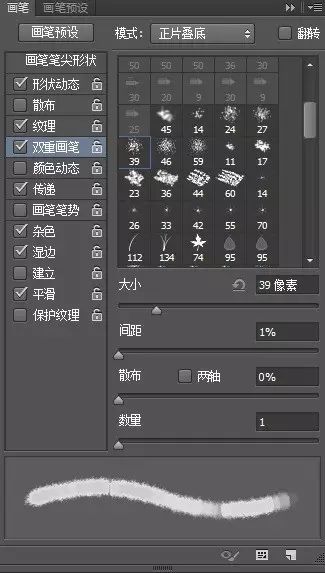

After setting up the brush, set the foreground color to black, paint on the mask of the watercolor texture layer according to your own ideas, and wipe it appropriately where you think it should be blurred and hazy Wipe, the effect is as follows:
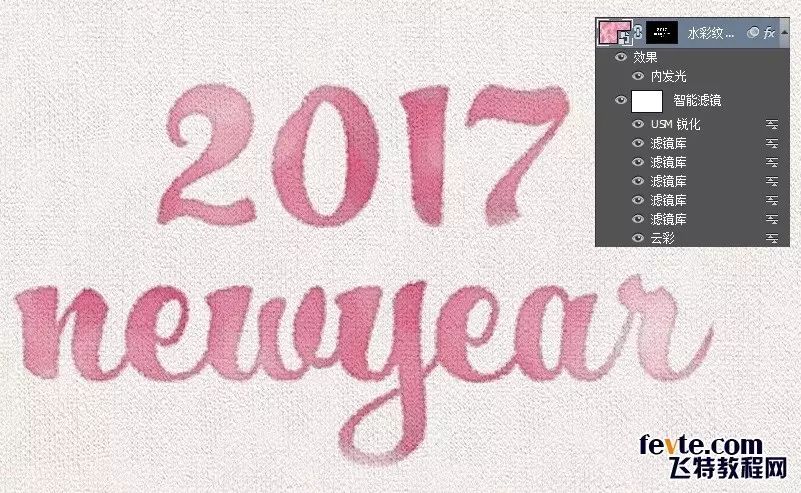
Watercolor will permeate on the canvas, and the texture of the paper will also be visible, so we change the layer blending mode of the watercolor texture layer to "Linear Burn", the effect is as follows:
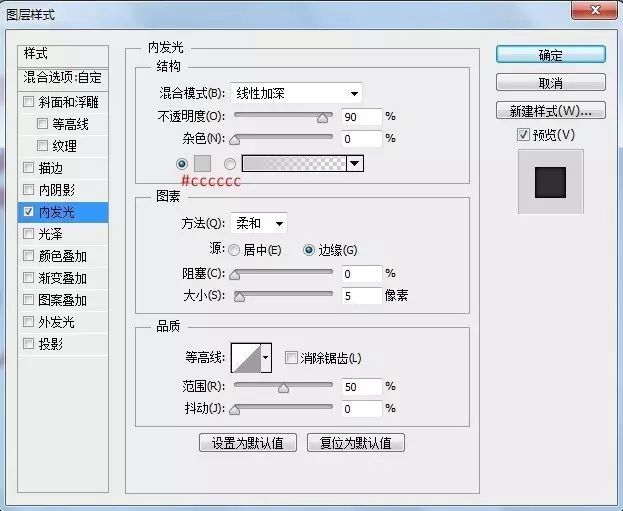
Next, we add an inner glow effect to the watercolor texture layer to make the edges of the text darker, pay attention to the layer blending mode of our inner glow.
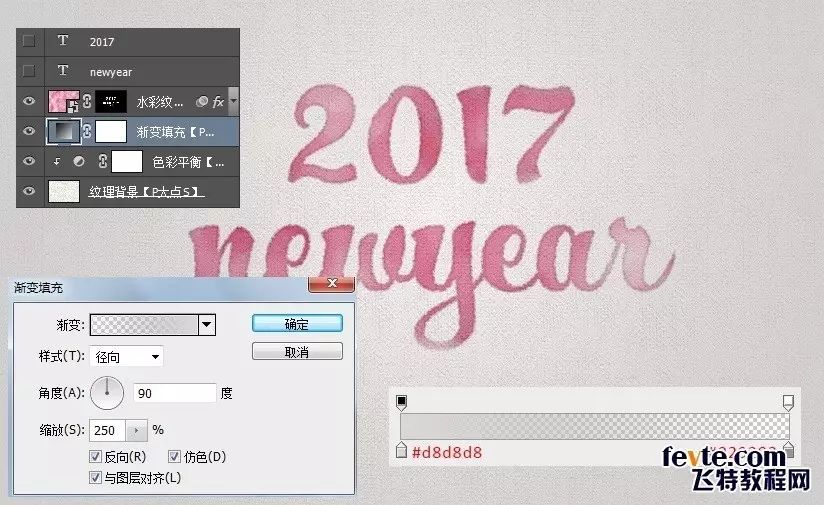
Next, we add a Gradient Fill adjustment layer under the watercolor texture layer with the parameters as shown below.
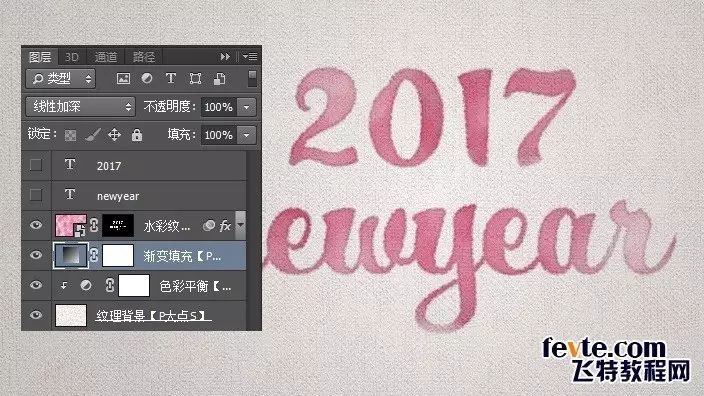
Change the layer blending mode of the gradient fill adjustment layer to "Linear Burn", the effect is as follows:
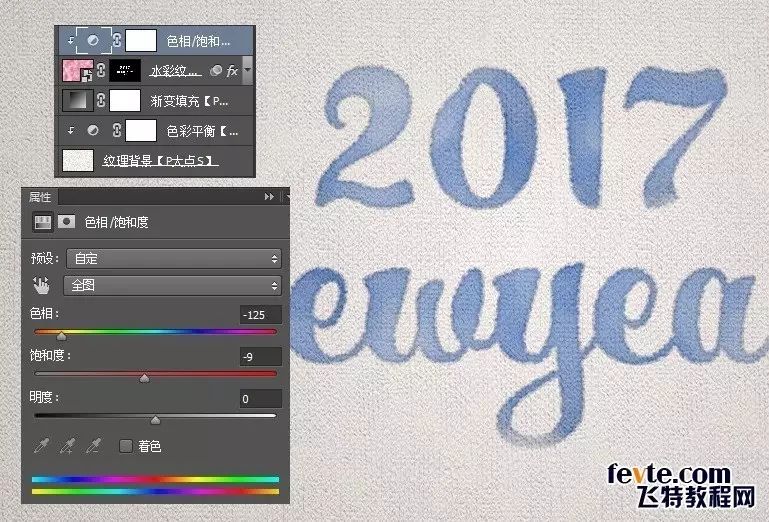
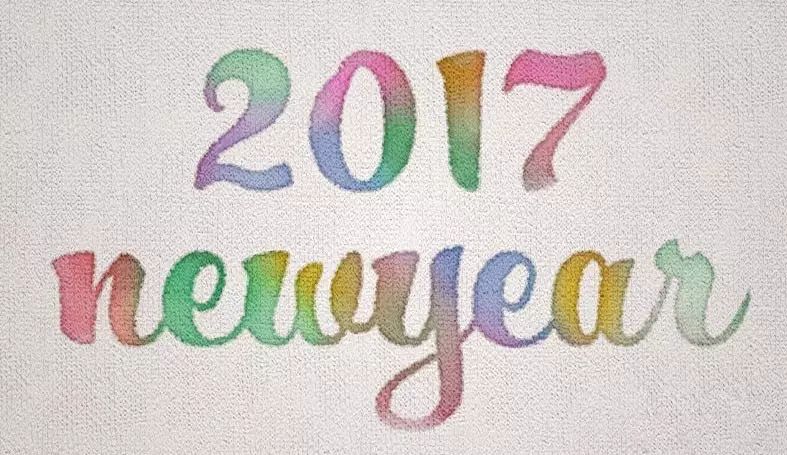
If we want to modify the color of the watercolor text, add a Hue/Saturation adjustment layer (remember the clipping mask), and it becomes very easy to modify the color.
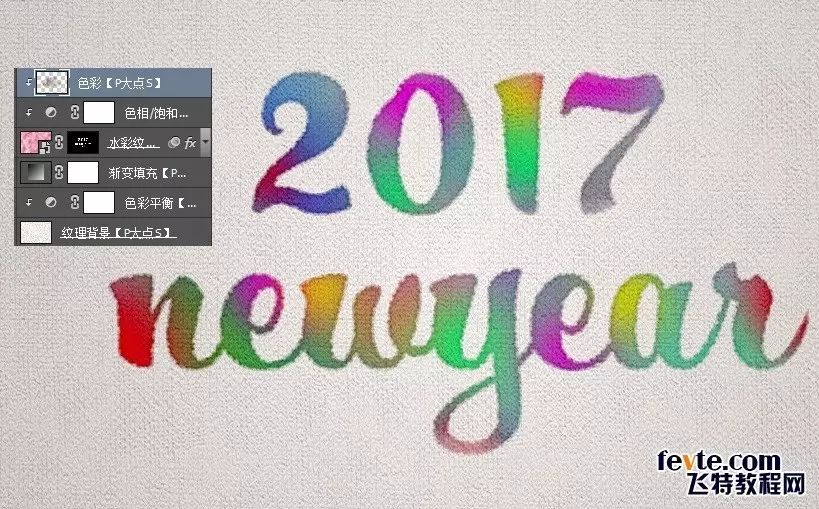
If you want a watercolor word with gradient color, it is also very simple. Create a new layer and paint some color yourself. You can use appropriate Gaussian blur, or you can change the layer blending mode to color.
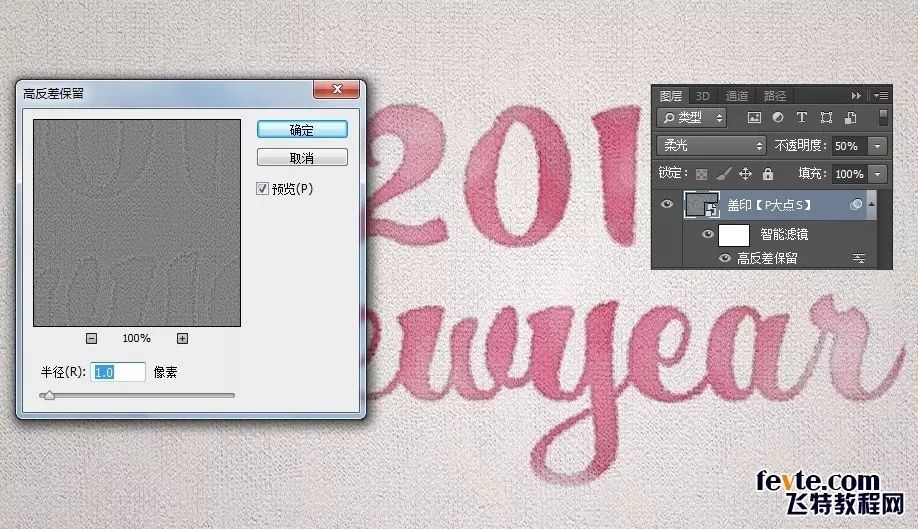
OK, let's move on, Ctrl+Shift+Alt+E stamp the visible layer, apply a high pass filter, set the radius to 1 pixel, set the layer blending mode to soft light, layer opacity 50%, the effect is as follows:
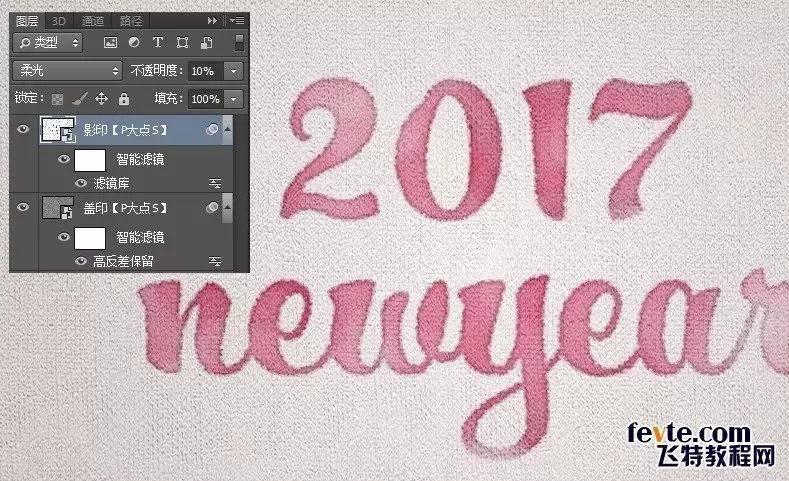
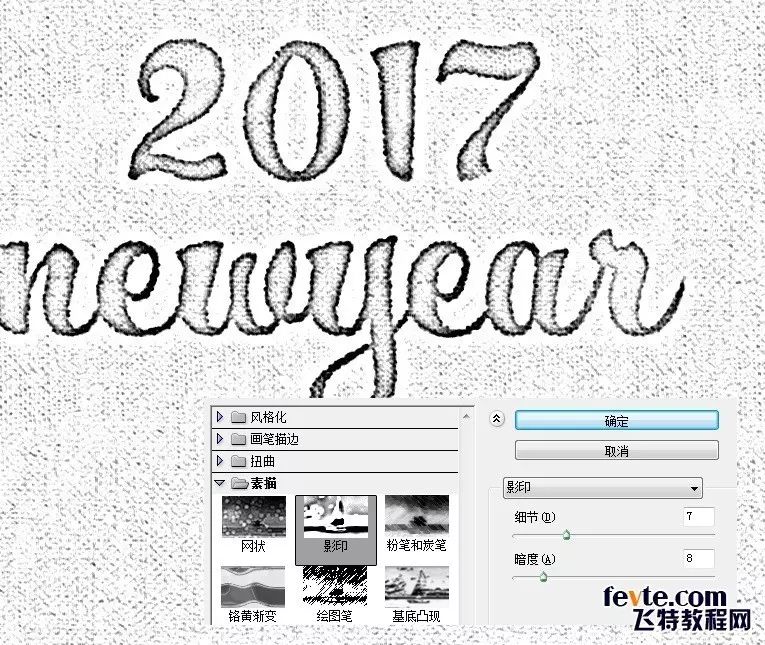
Press Ctrl+Shift+Alt+E again to imprint the visible layer and execute a photocopy filter (you need to pay attention to the color of the foreground color here, as for why, you can test it yourself), the parameters are as follows:
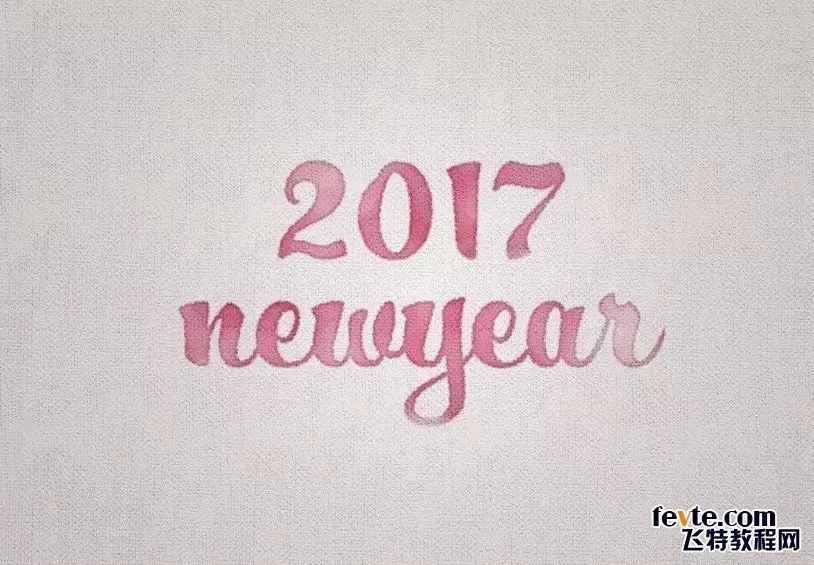
Change the layer blending mode of the layer that executes the photocopy filter to soft light, and the layer opacity is 10%, the effect is as follows:
It's over here, our final effect is as follows:

I think today's tutorial should not be difficult for everyone, it mainly involves a few knowledge points.
1. Use filters to create a pseudo-watercolor texture.
2. Use brushes to enhance the sense of reality.
3. Path strokes can also be applied to masks.
About the list of winners and two consolation prizes of "Fun with Graphics" on March 14
Please click Graphic Design in the menu - Send Book AwardView (as shown in the picture)

Graphic Design Book Collection
logo|packaging|visual|font
Read
Extended reading
①Learn poster design from McDonald's!
②[Dry goods] You should know these 20 text layout guidelines.
③Designer, you really need to study hard this time!
④30 cases teach you how to design posters
⑤ Take it, these god-like ideas!
Public account ID
lgkugd
if you like my article
Please long press to identify the QR code and follow me^^
Articles are uploaded by users and are for non-commercial browsing only. Posted by: Lomu, please indicate the source: https://www.daogebangong.com/en/articles/detail/Font%20PS%20Tutorial%20Make%20Watercolor%20Text%20Effect.html
 支付宝扫一扫
评论列表(196条)
测试