Hello, everyone, I am Xue Hai.
When it comes to【Slide Background Fill】, many people should be familiar with it.
When we create a new PPT, its default background is white.

Right-click-【Set background format】, you can fill the picture into the background.

When we fill the picture into the background, we can turn the shape into the background, which is The little trick I want to share today------slide background filling .
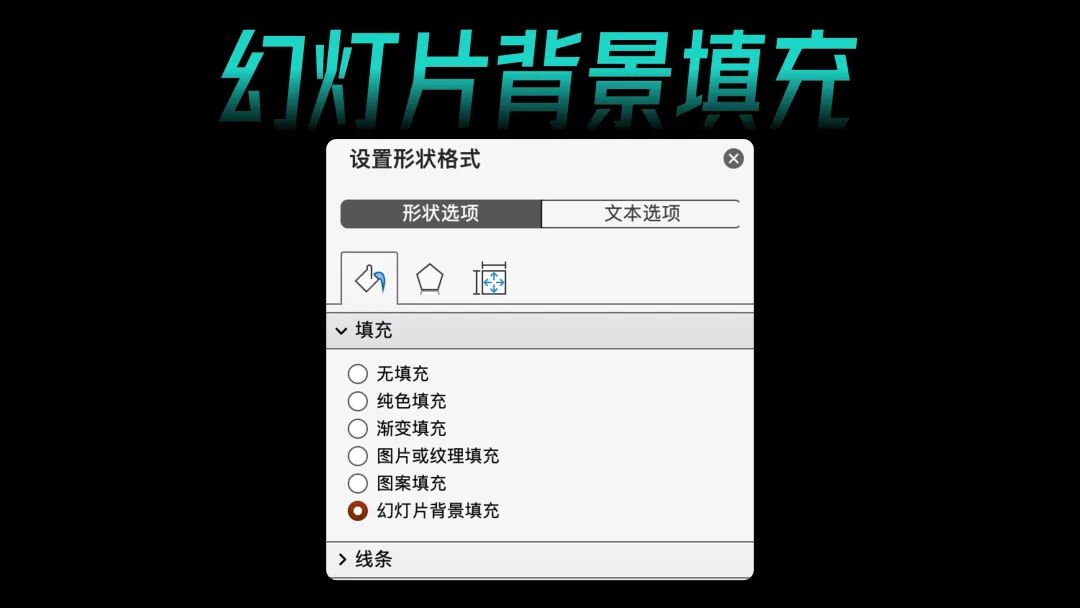
To put it simply, before making, first fill the image you want to display as the background, and then insert the shape to fill the background image , no matter how the color block moves, it can be integrated with the background.
Next, I will share with you 5 tips for background filling to make a good-looking PPT easily!
01 Virtual and real combination

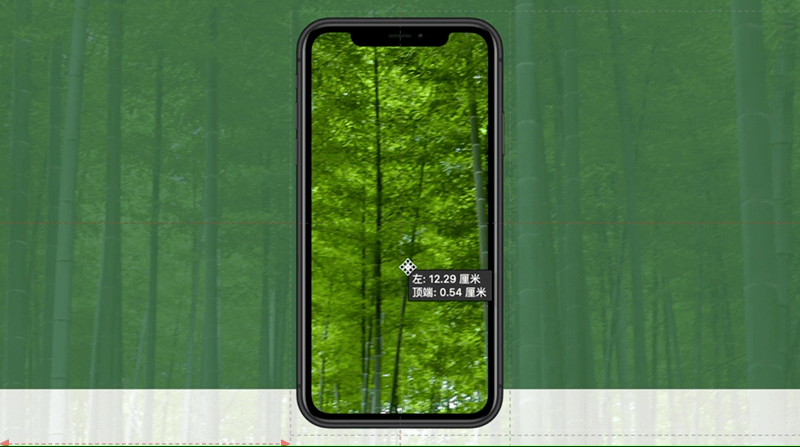
In this PPT page, except for the picture on the mobile phone screen, other pictures are blurred.
How did this effect come about?
Step 1: Insert first A picture, and then filled into the PPT background.

Second step: Insert again An identical picture is overlaid on the background, and a blurring effect is set.
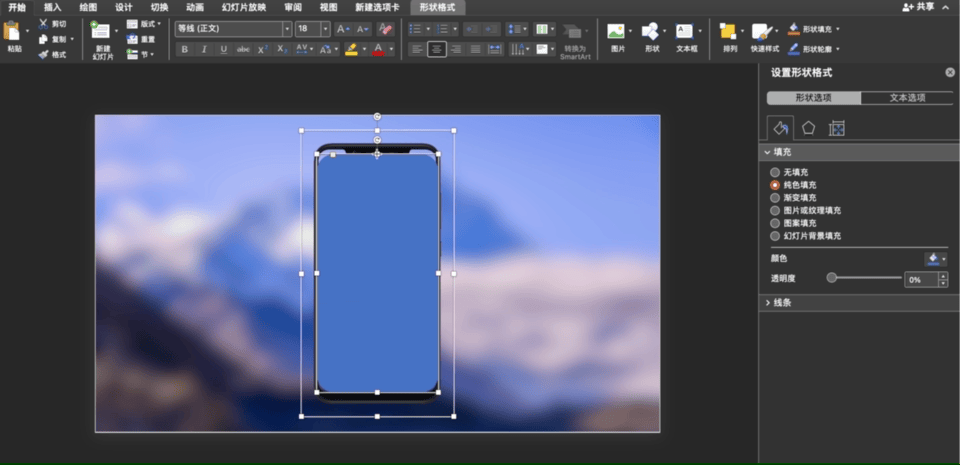
Step 3: Insert a Mobile phone mockup and a rounded rectangle.
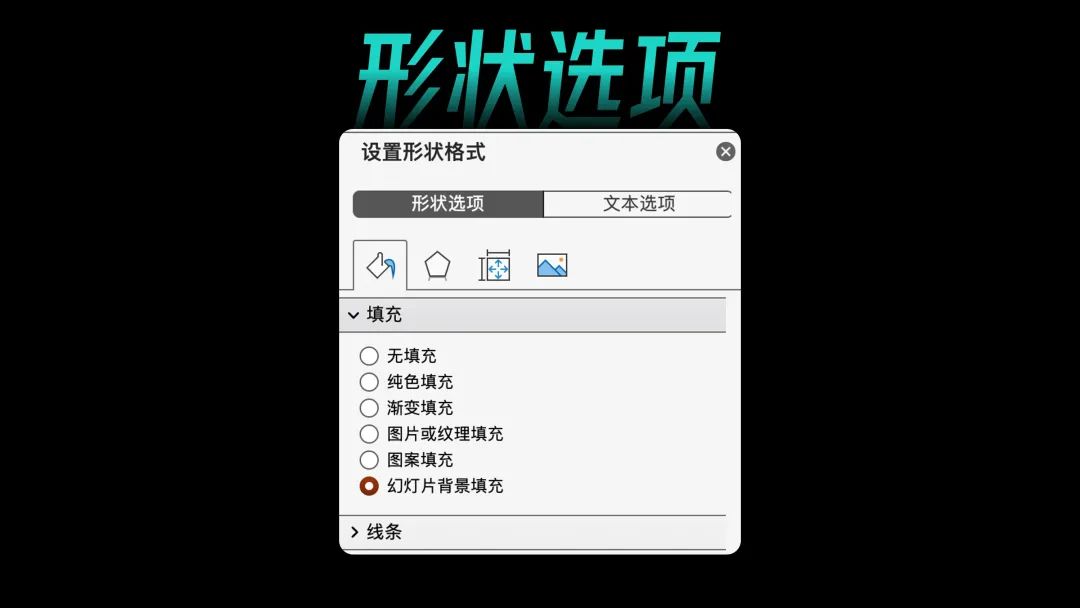
Adjust the rounded rectangle to be the same size as the phone screen, set it to no outline, and set the fill method to【Slide background fill ] can be.
Step 4: Zoom in and place on the left, add text and you're done.

Using background fill and mockup, you can create a lot of advanced and design slides.

The method of making the PPT on the above page is the same, that is, after filling the picture into the background, add another layer of mask.

After adding the prototype, insert a picture in PNG format and crop it.
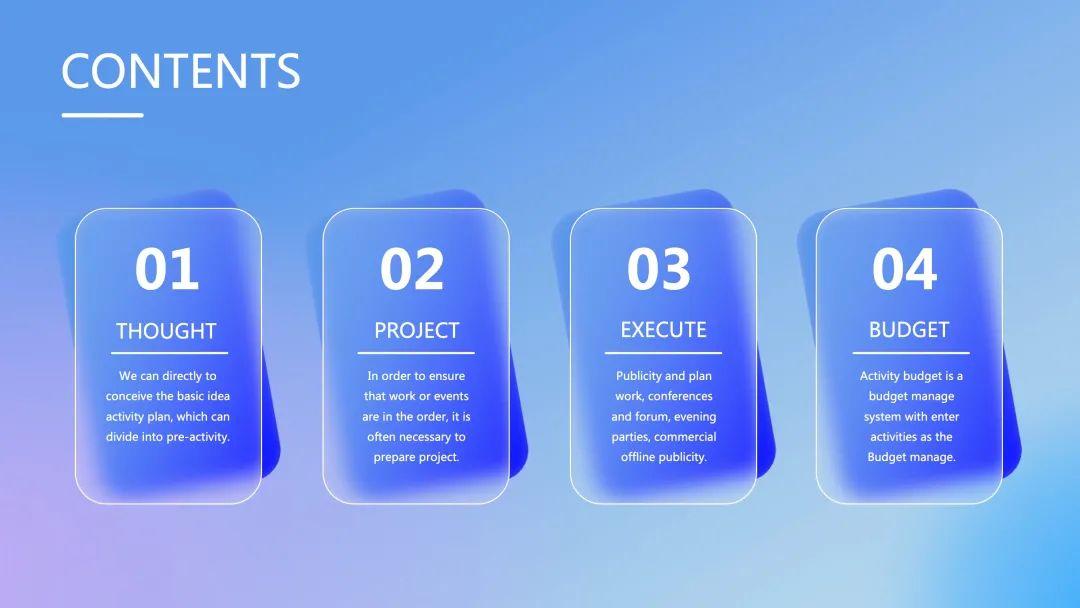
02 Frosted glass effect

The frosted glass effect that was popular on the Internet before was created by filling the slide background.
From this PPT page, we can see that the frosted glass effect has an obvious blurring, and some whitening Effect.

So how did this effect come about?
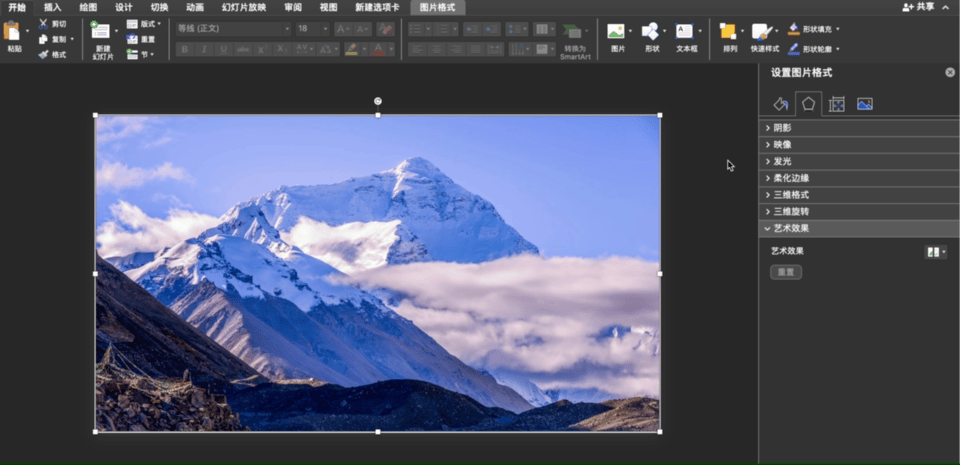
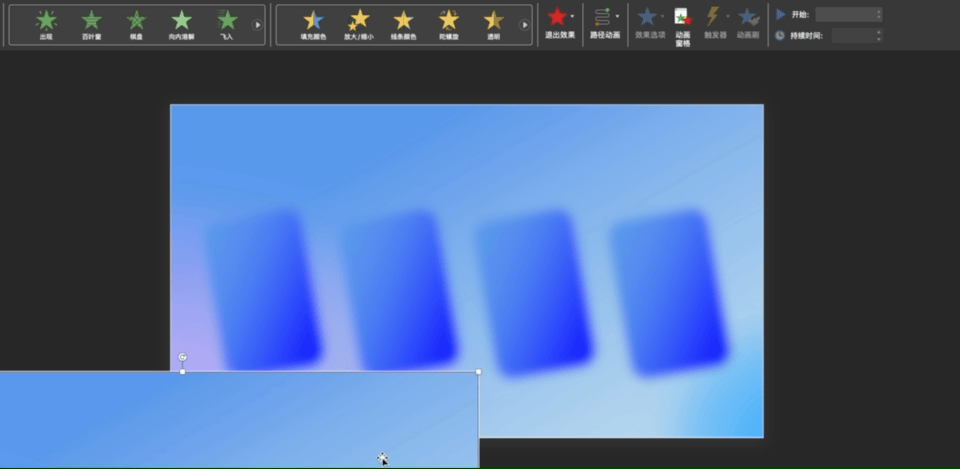
Step 1: Insert some gradient rounded rectangles on the page, then export them as pictures, and then insert them into PPT:

Second step: on the right Find [Artistic Effect] in the side setting picture format, and add [Blur] effect to the picture.

Step 3: The processed image is filled into the background.
Then insert the previous picture again as the foreground of the page.
Step 5:We are in Insert a rounded rectangle on the page and set it to [Slide Background Fill]:

To make it more realistic, let's copy another shape and overlay it on the original shape, set it to white fill, and adjust the transparency to 90%

Such a beautiful frosted glass effect is completed.
03 Side typesetting

In the above case, the slide background fill is set for the text box.
Step 1: Insert a An image fills the background.

Second step:Insert body English.

Step 3: Insert subtitle , set the text box shape fill to 【Slide Background Fill】
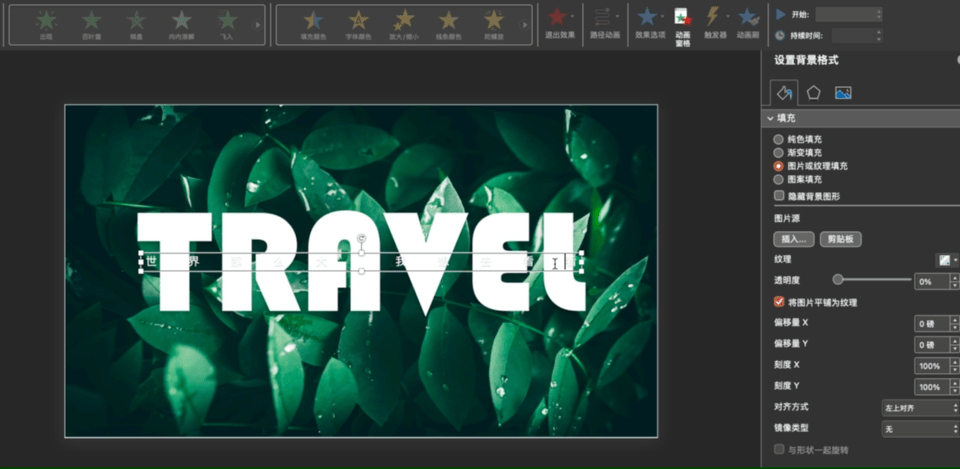
Note that the text box shape option is set here~
04 Wireframe Split

A discontinuous line or border like this can also be easily made with background filling.
First prepare the background image and a wireframe.

Then use two rectangles to cover the part of the wireframe that needs to be disconnected, set it to [Slide Background Fill] and you are done .
In this way, we can also intersperse the characters in the wireframe to make a good-looking character introduction page.

Use the arbitrary shape in the shape to draw the unoccluded part, and fill it as the slide background.

05 Text occlusion

This object occlusion effect is easy to create an advanced and mysterious texture, which increases the layering of the picture.
The steps are also very simple:
Step 1: Insert a picture , filled as the slide background.
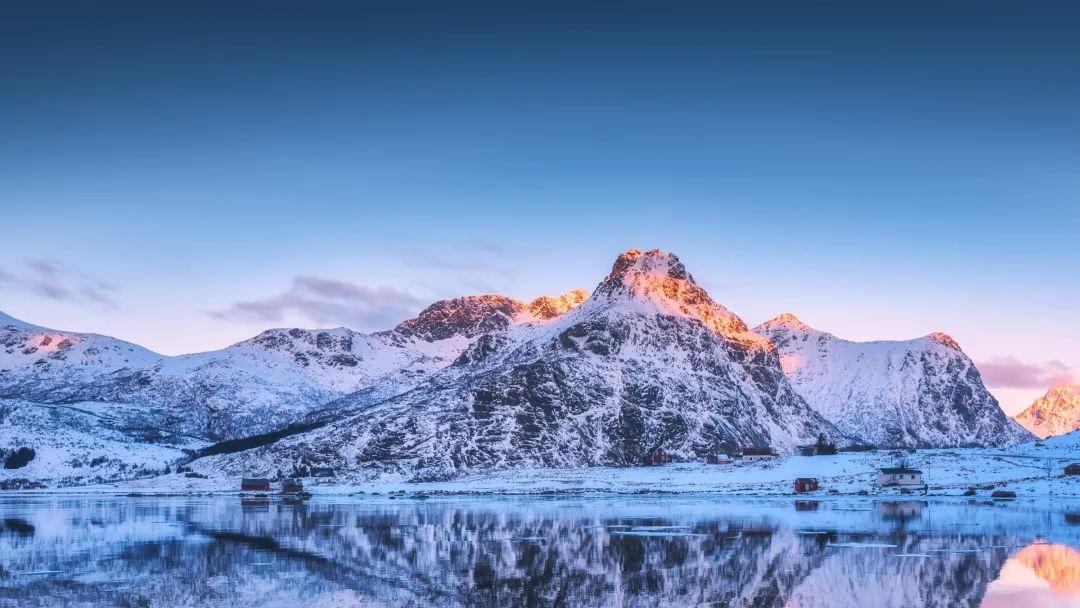
Step 2: Use any The polygon is stroked along the outline of the mountain.

Step 3: Line closure After creating a shape, set it to No Outline, and fill it to【Slide Background Fill】
Step 4:Add text , and place it on the bottom layer, and you're done.

The background of the city is also very good.

The above are 5 tips for background filling, have you learned it yet?
End of this article.
Articles are uploaded by users and are for non-commercial browsing only. Posted by: Lomu, please indicate the source: https://www.daogebangong.com/en/articles/detail/Crazy%20PPT%20background%20filling%20is%20so%20powerful.html
 支付宝扫一扫
评论列表(196条)
测试