At present, there are many online tutorials about Microsoft Office related content, but the introduction of domestic WPS is relatively rare. Starting from this article, the editor will officially enter the specific content of "WPS text". The previous editor gave a detailed description of the working interface, cloud documents, and rice husks of "WPS Text". This article breaks down the text setting part of "WPS Text" in detail on the basis of everyone's familiarity with the software interface!
Document Properties
release date | February 25, 2018 | Updated | March 1, 2018 |
Software version | WPS Text 10.1.0.7106 | operating system | Windows 10 |
Explanation table of contents

This article explains the table of contents
The part explained in this article, use the red box to select the following:

The part of explaining the text format
Legend and description:

In the WPS text, the functions represented by each icon
About "Font"
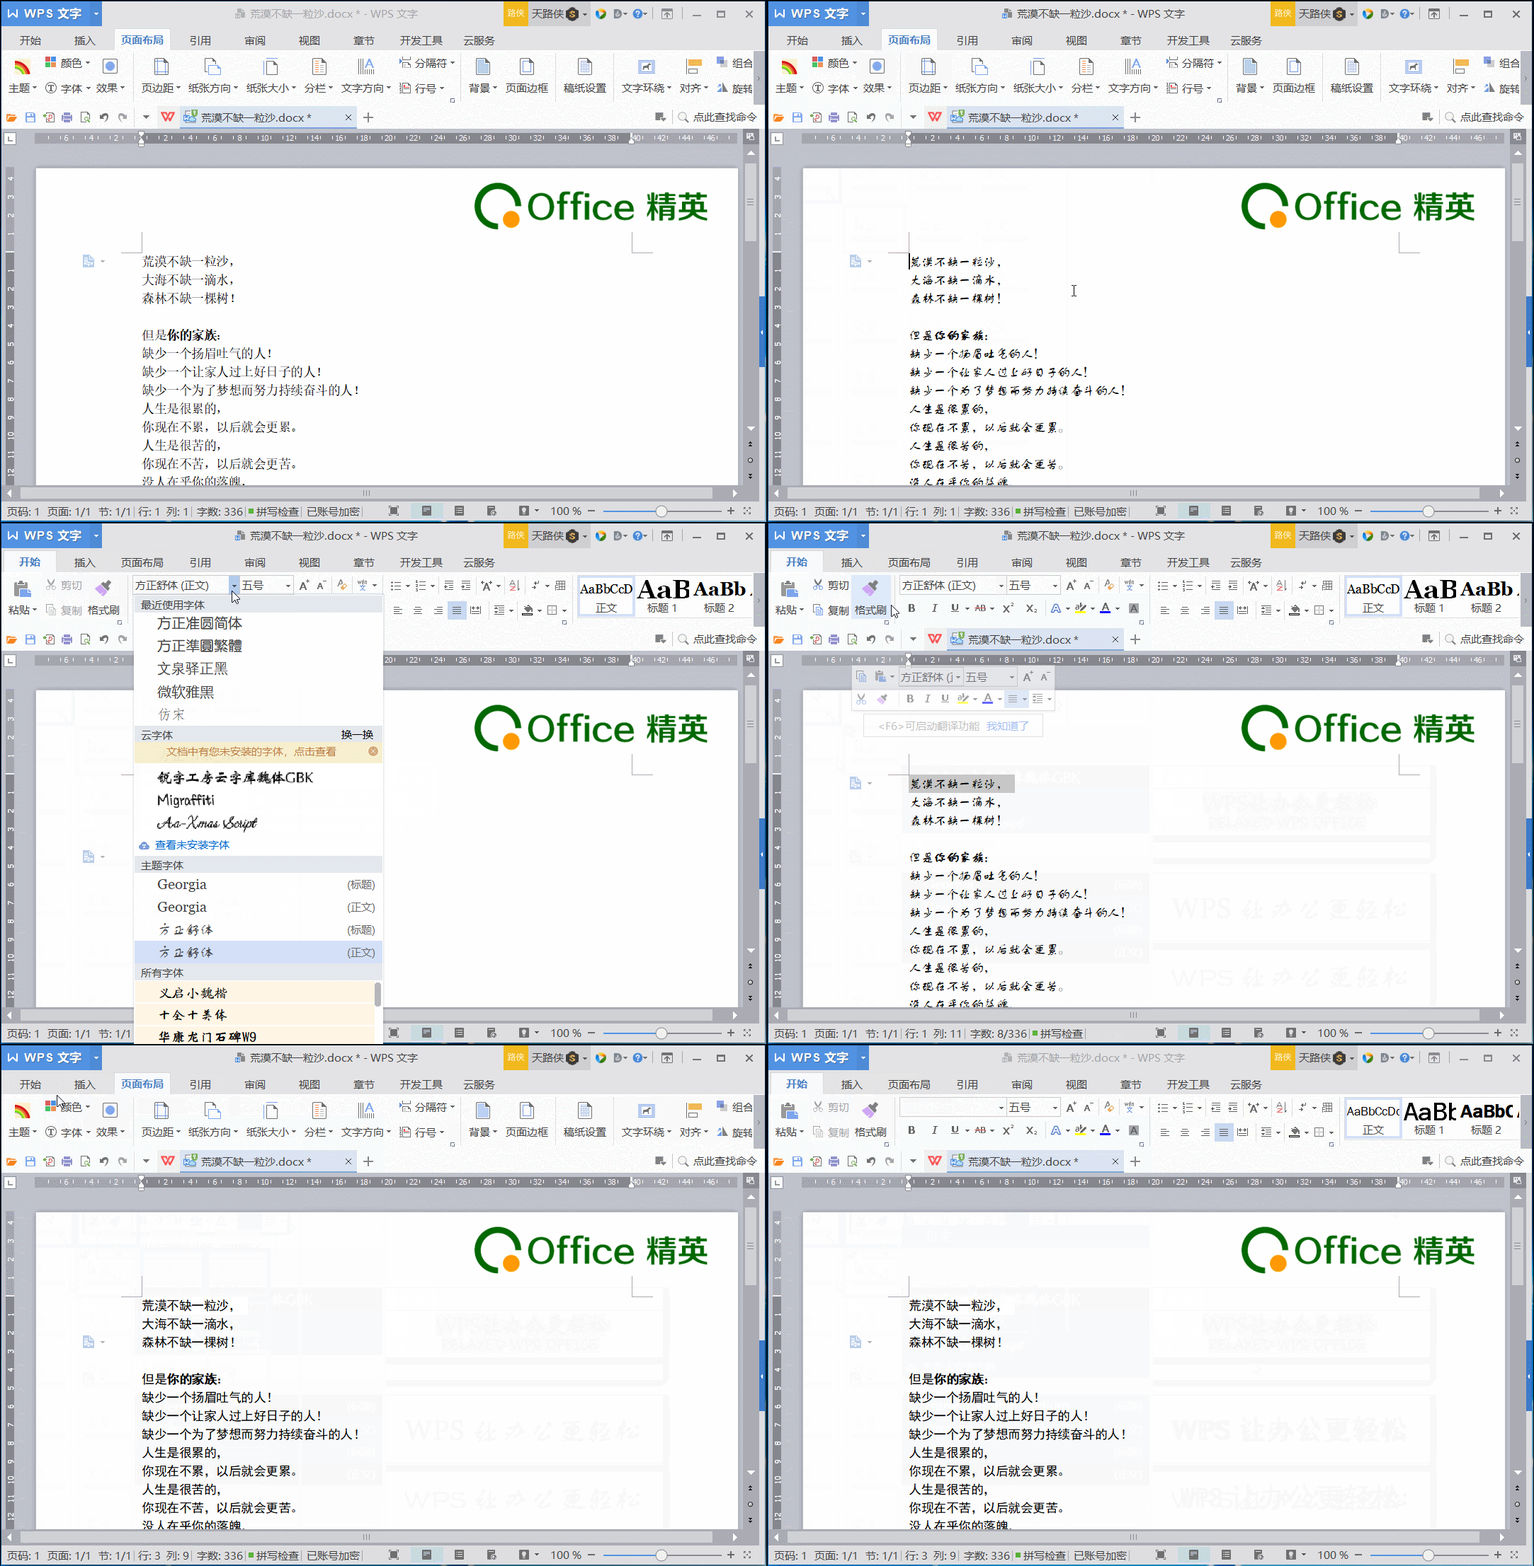
The "Font" selection (drop-down menu) of WPS text can be divided into three parts: cloud font, theme font and all fonts. Additionally, there is a "Recently Used Fonts". As shown in the picture:

Font selection drop-down menu
Cloud font:
This drop-down menu is somewhat similar to Microsoft Office. The difference is that there is an extra "cloud font". It is an online font. As long as you log in to your WPS account, if you have purchased or used cloud fonts before, they will appear in the drop-down list of cloud fonts. This greatly facilitates the problem of limited fonts on this machine (the computer currently in use) when we edit documents.

WPS cloud font
Theme font:
The theme font is automatically adapted according to the "theme" selected by the current WPS text document. When we select a different theme in "Page Layout" → "Theme", the theme font will change together according to the prefabricated font, color, etc. in the selected "Theme". The specific demonstration is as follows:

Theme modification and theme font changes
All fonts:
Refers to all fonts in the font library in the Windows system. The location of this folder: "Fonts" under the "Windows" folder under the C disk (system disk).

Windows font library
Recently used fonts:
It is the editor of the current document, the font record that has just been used. Record user habits, convenient for editors to quickly set up.
Set the font of the text
This function is very common, so it is also very simple. We only need to select the target text with the mouse, and select the desired font in the "Font" drop-down box of the "Toolbar", and the setting is completed. As shown below:

We can also quickly set the font in the pop-up box that pops up above the selected text after the text is selected. As shown in the following figure:

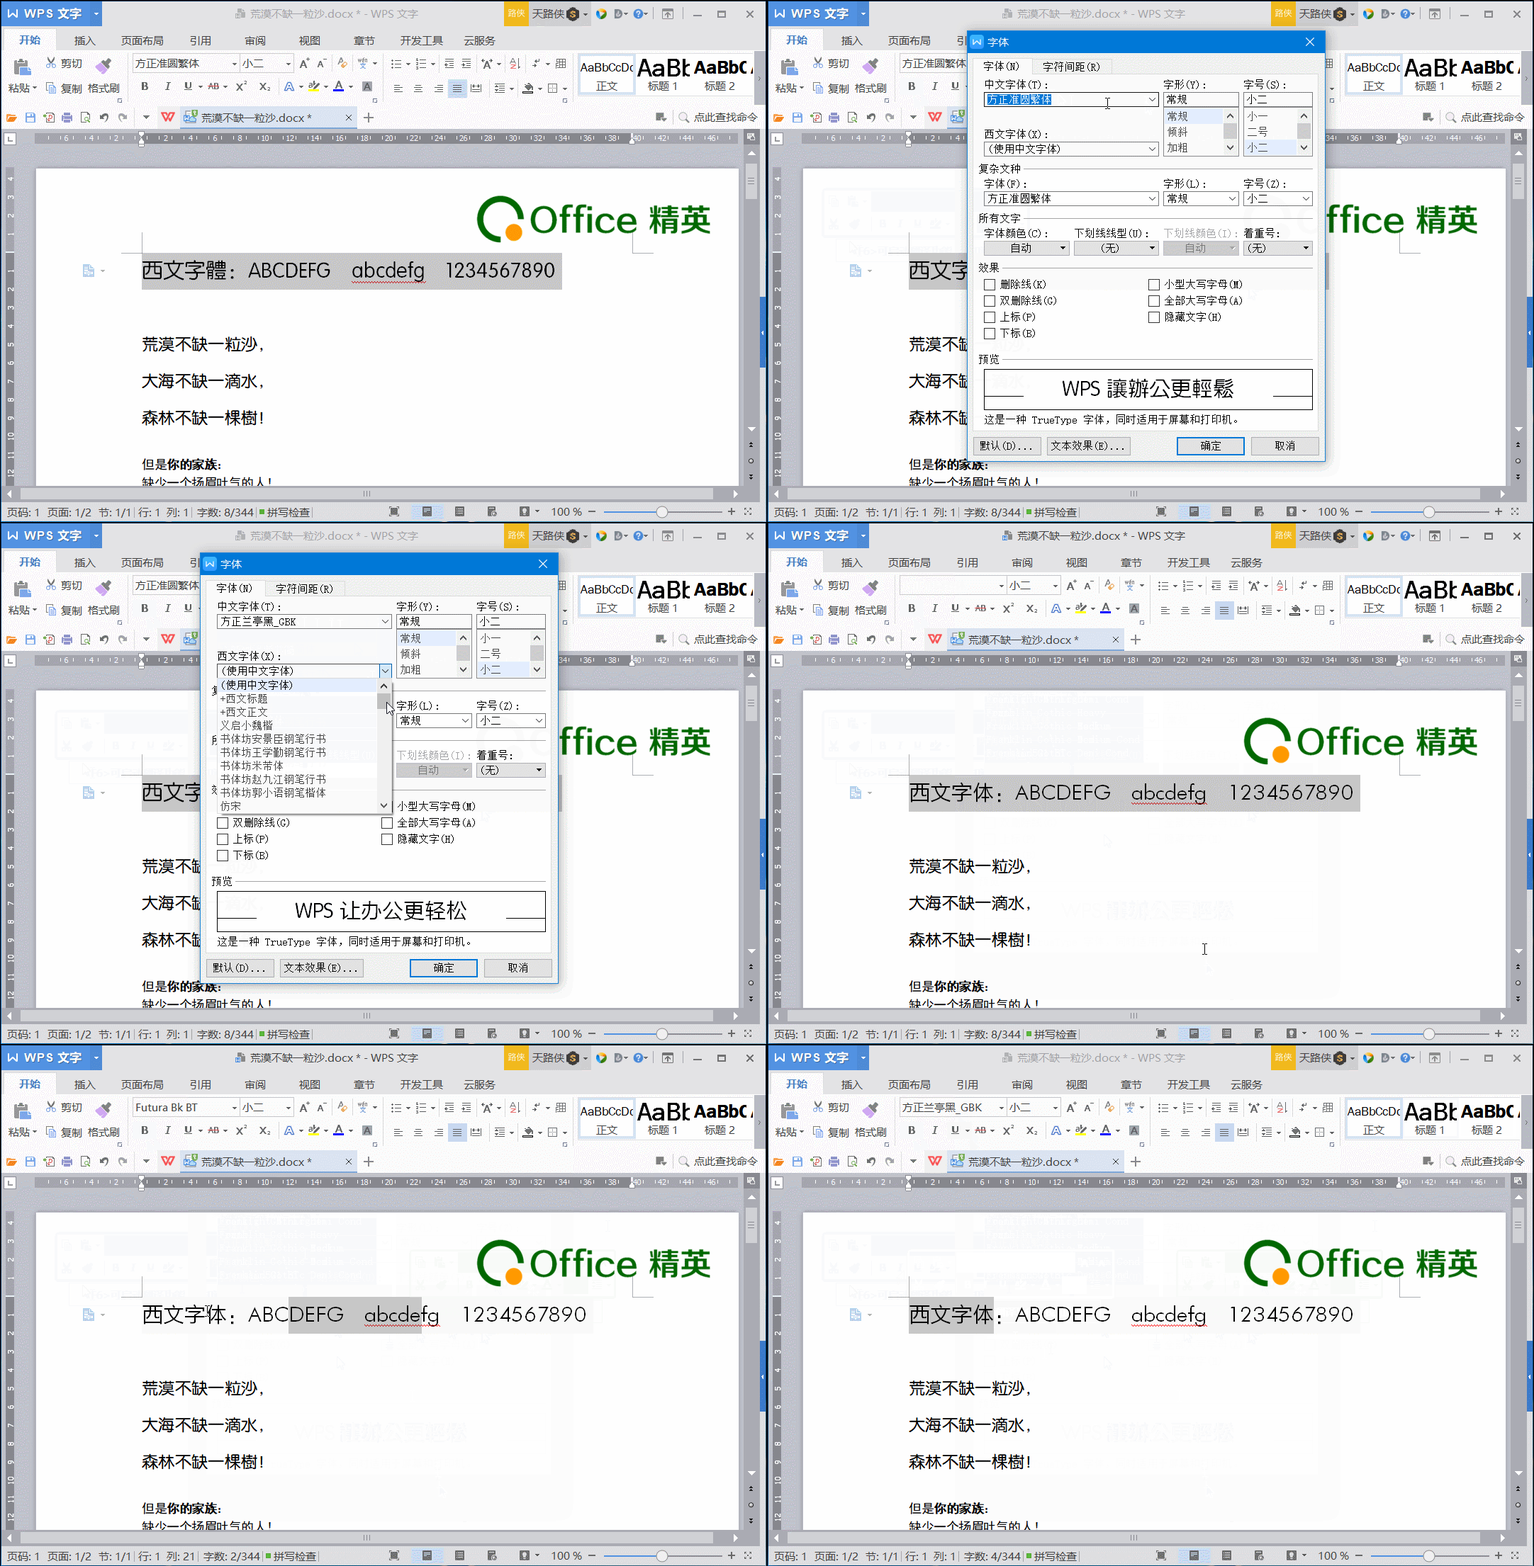
Not only that, when we set the font, sometimes we need to set "Chinese font" and "Western font" respectively (including English letters, Arabic numerals, etc.), at this time, We need to set them separately in the font pop-up box, The specific demonstration is as follows:

Effects of setting Chinese font and Western font separately
Through the demonstration, we found that after the Chinese font and the Western font are set separately, their fonts also change according to the settings. This is also often used when editing documents! Please practice a lot.
This article focuses on some common sense about the font setting of "text" when using WPS text. If you find any problems during use, please leave a message to communicate!
We will share the follow-up courses about the "text" setting of WPS text later, thank you for your support!
This article is the original work of "Office Elite", please indicate the source for reprinting! Thank you for reading and look forward to your attention! Please see the next issue for more sharing!
"Office Elite" belongs to the office software dedicated semicolon of the "Office Elite" headline, please support it!
Articles are uploaded by users and are for non-commercial browsing only. Posted by: Lomu, please indicate the source: https://www.daogebangong.com/en/articles/detail/CourseDetailed%20text%20setting%20of%20WPS%20text%201%20Font%20setting%20skills.html

 支付宝扫一扫
评论列表(196条)
测试