
Hello~ everyone. I am Zi'er Yaoji! This time I bring you: , I hope you can learn the method of various layouts of fonts. Then we'll go straight to making
First sort out the general content:
1: Selection and description of hand-painted fonts
2: Application of AI hybrid mode
3: Combination of conventional fonts and artistic fonts
4: detail processing
PART1: AI drawing fonts
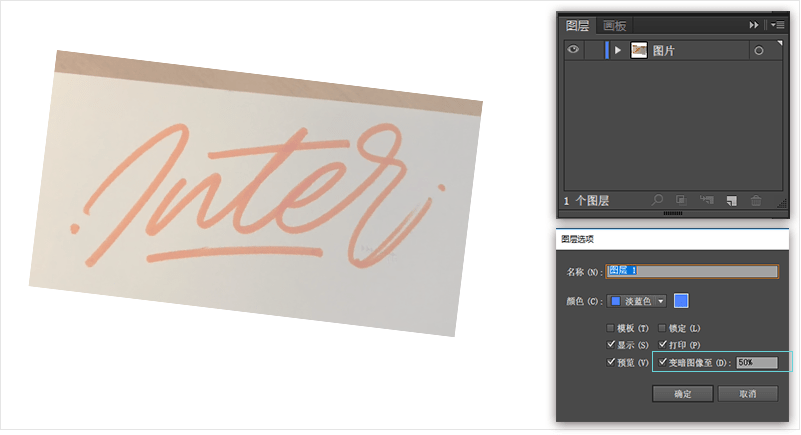
Step1. First create a new canvas 800*800px in AI, and drag a font map prepared in advance into the canvas. Rotate the picture to a certain angle, as shown in the picture, double-click the picture layer to pop up (Layer Options), adjust the darkened layer to 50%, and finally lock the picture layer.
Step2. Now we need to create a new layer on the layer and name it the font layer, which is used to distinguish the fonts of the pictures and facilitate subsequent operations. Then we select the pen tool (shortcut key P) to draw the shape of the font on the picture.
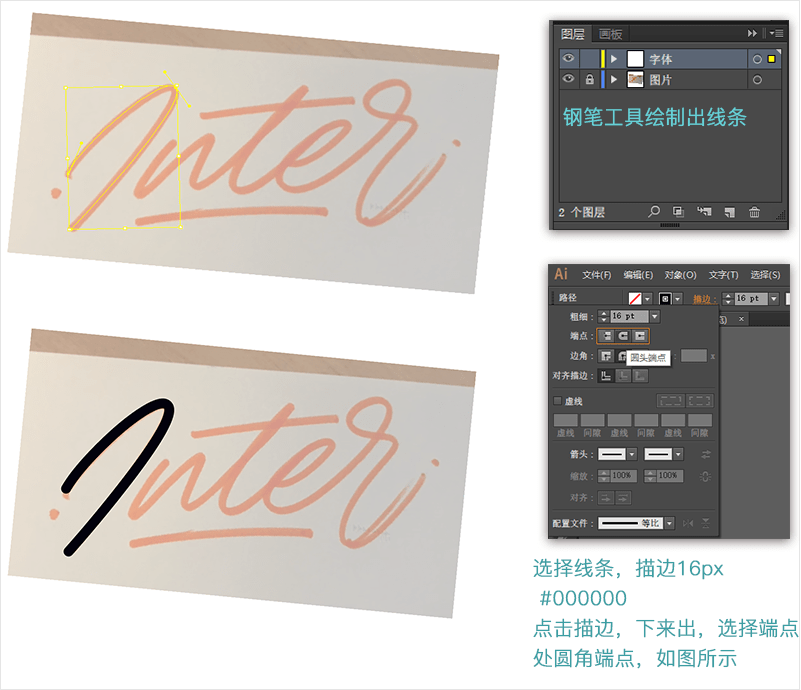
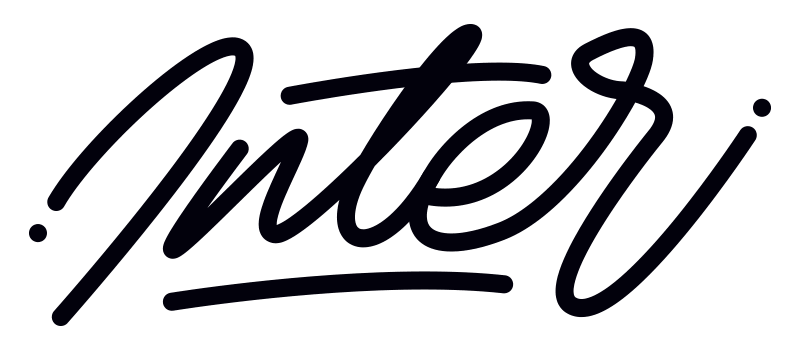
According to the above method, draw all the shapes with the pen tool, as shown in the figure below
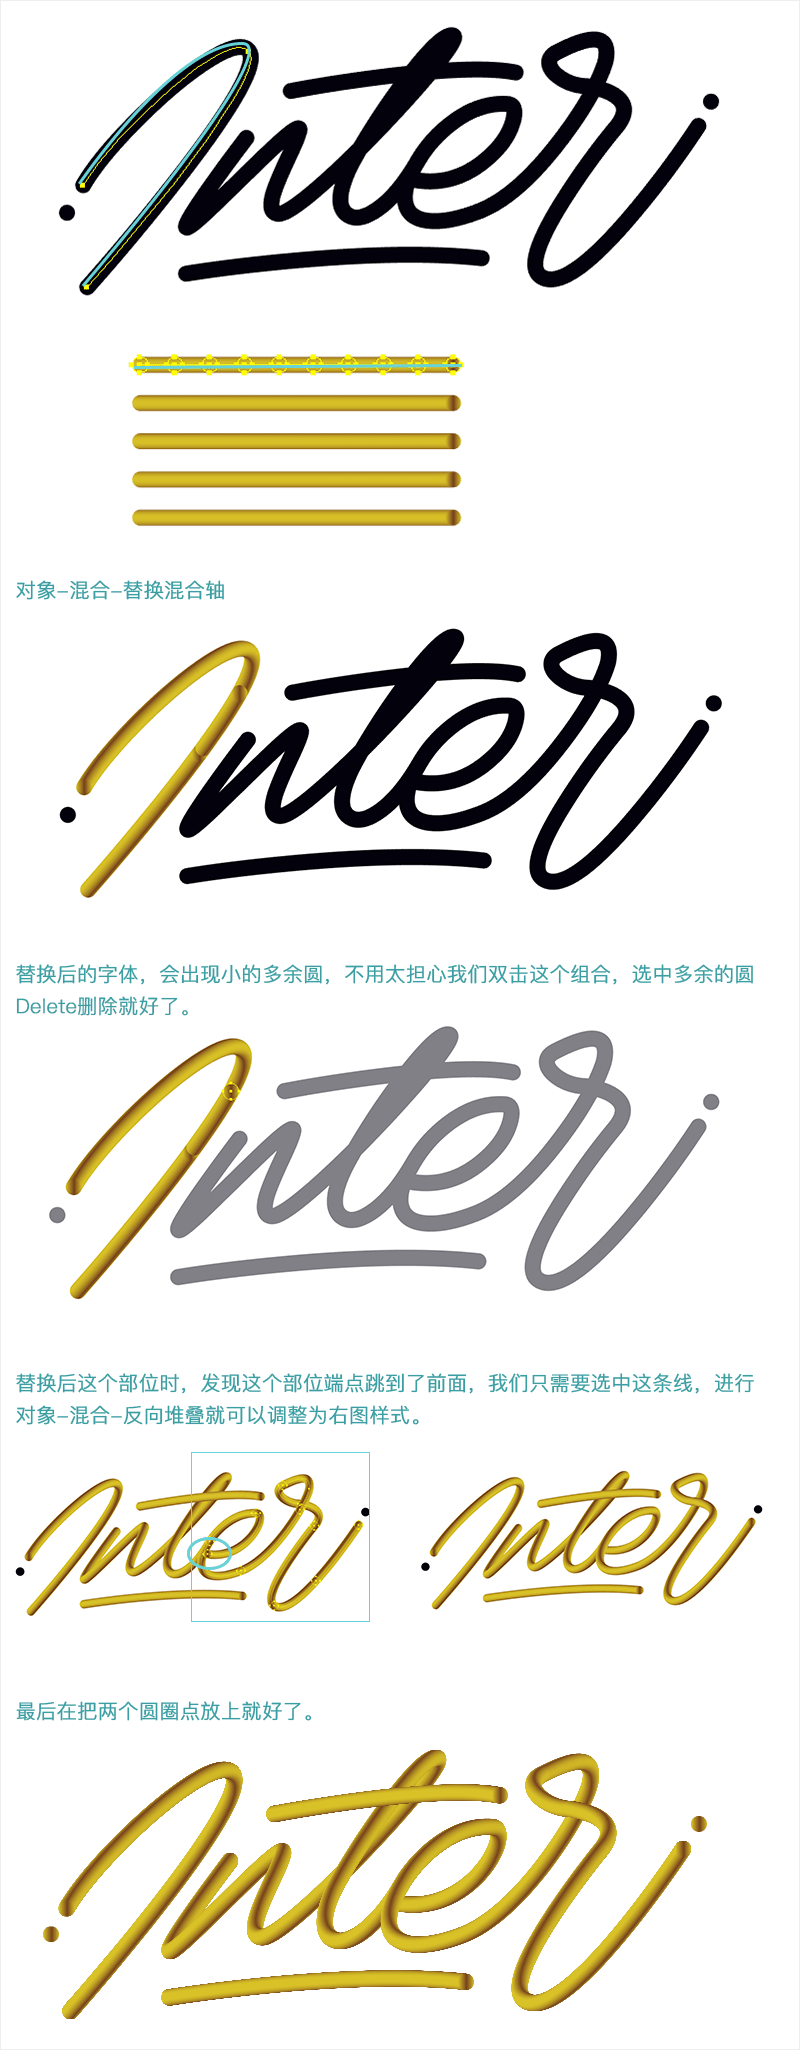
Step3. Then we need to deal with the three-dimensional font, first draw a 16x16px circle below, fill the gradient color
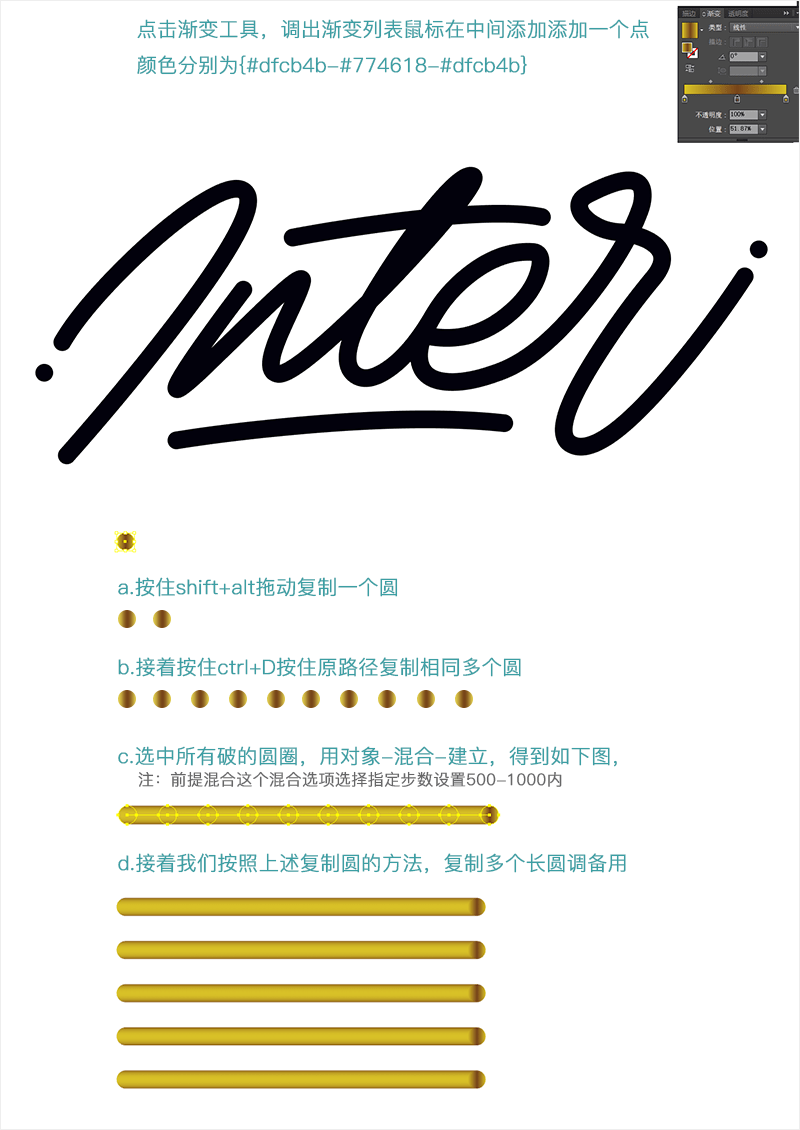
Step4. Then we need to replace the long circle effect made by the font with the artistic font we described. First, select a long circle and a font path.
PART2: PS processing font combination
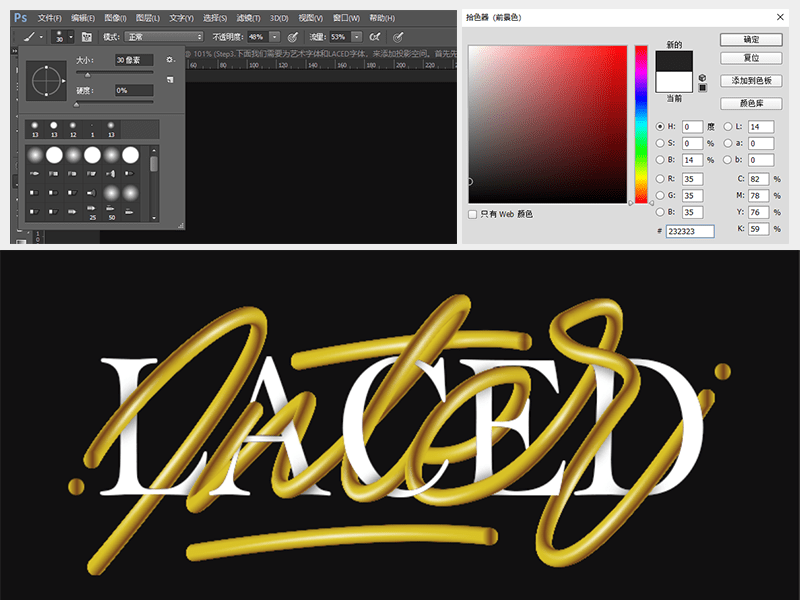
Step1. First, create a new canvas 800*600px in PS, fill it with background color #000000, copy the word art done in AI, ctrl+c to copy to PS, ctrl+v to paste, select the vector smart object and paste it into the screen.

Then add the font LACED with a size of 212px and place it under the word art layer
Step2.Next, I need to intersect the two fonts, first add a mask layer on the layer of the artistic word, and then press and hold ctrl+ Click the font LACED with the mouse, select its selection area, and finally select the mask layer of the word art, and use the eraser to erase their shapes.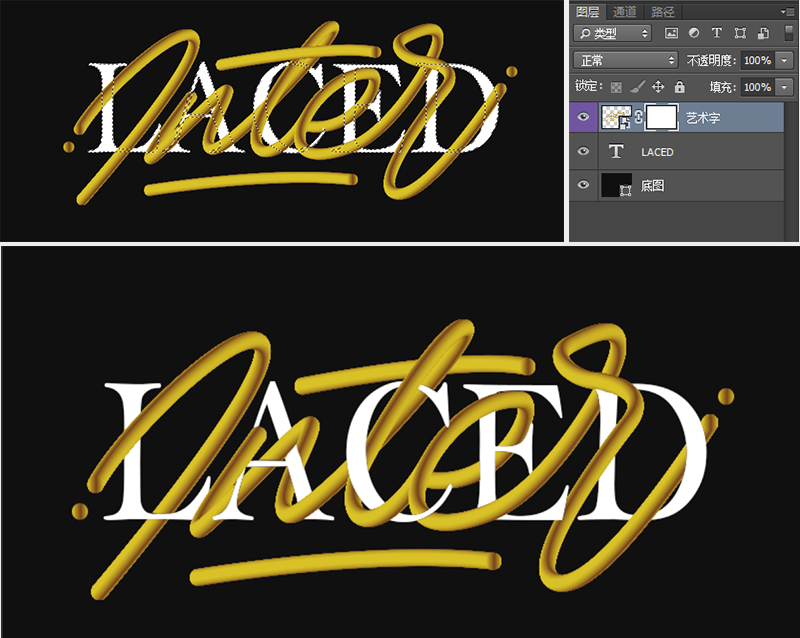
Step3. Now we need to deal with the highlight of the artistic font, first, we create a new layer called highlight, first set the size of the brush tool to 4px, size hardness 0, and then Where we need to add highlights on the word art, use the pen tool (path) to draw the path, and then right-click to select the stroke path to enrich other windows and doors on the page in turn.

Here, the selected tool is the brush tool, check the simulate pressure, and confirm. Then right click to delete the path

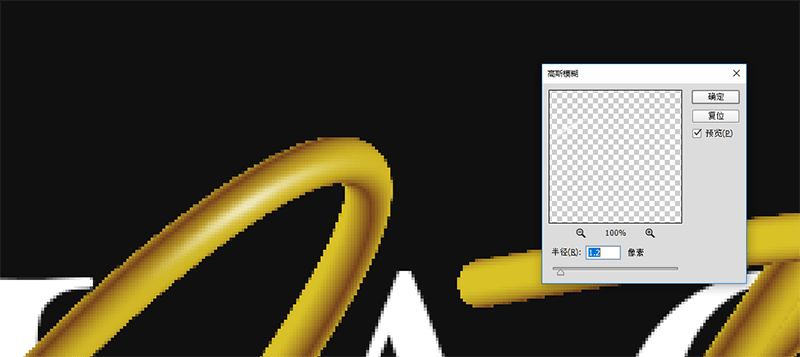
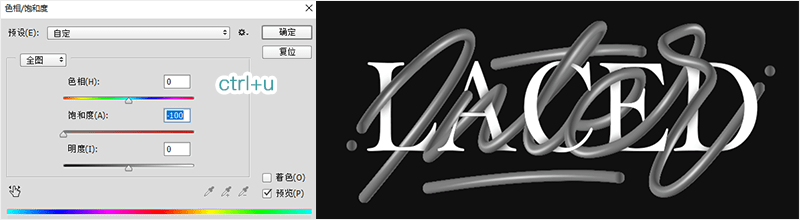
In order to make the highlights softer, we need to use filter-blur-Gaussian blur at one time
Step4. Next, we need to add projection space for artistic fonts and LACED fonts. First create a projection layer, ctrl + mouse click on the LACED font, then return to the projection layer, we add projection under the artistic word layer.
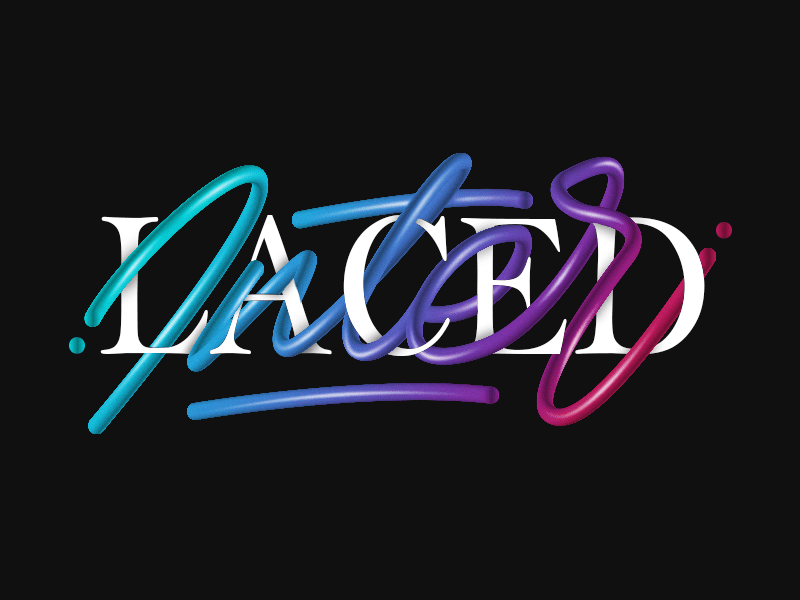
tep5.Finally, we need to add gradient color to our art fonts to enrich the picture, we ctrl+j copy a word art layer and then select the previous layer WordArt
Then add a Gradient Overlay effect to this layer

Step6.Finally, we need to add clothing points to our artistic fonts in noise, filter - noise - add noise

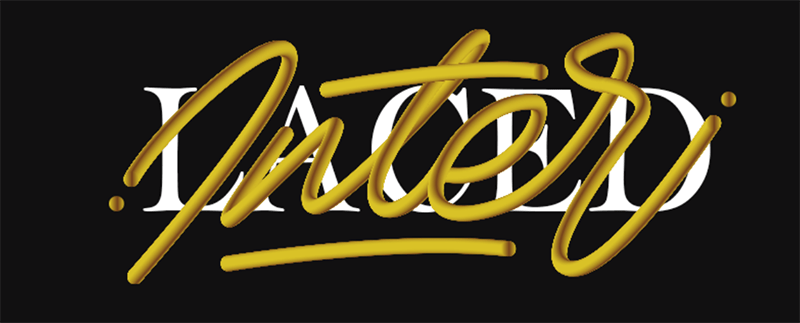
The final effect is as shown in the figure
Author: Ste Bradbury Design
Work link: https://www.youtube.com/watch?v=zXPyhbrVdSw
Articles are uploaded by users and are for non-commercial browsing only. Posted by: Lomu, please indicate the source: https://www.daogebangong.com/en/articles/detail/Colorful%20Artistic%20Monogram%20Font%20Tutorial.html
 支付宝扫一扫
评论列表(196条)
测试