Dad has been in a relatively stable mood recently, and the background has already received such messages:

So I think it's time to come back with another article.
At the same time, the 4th group of Wild Deer's Hundred Million Series (Wild Deer Zhixian Rongta Hundred Million Co., Ltd.) has opened. Children's shoes who want to join the group, please tease me!

During this period of time, many children's shoes have been asked this question:

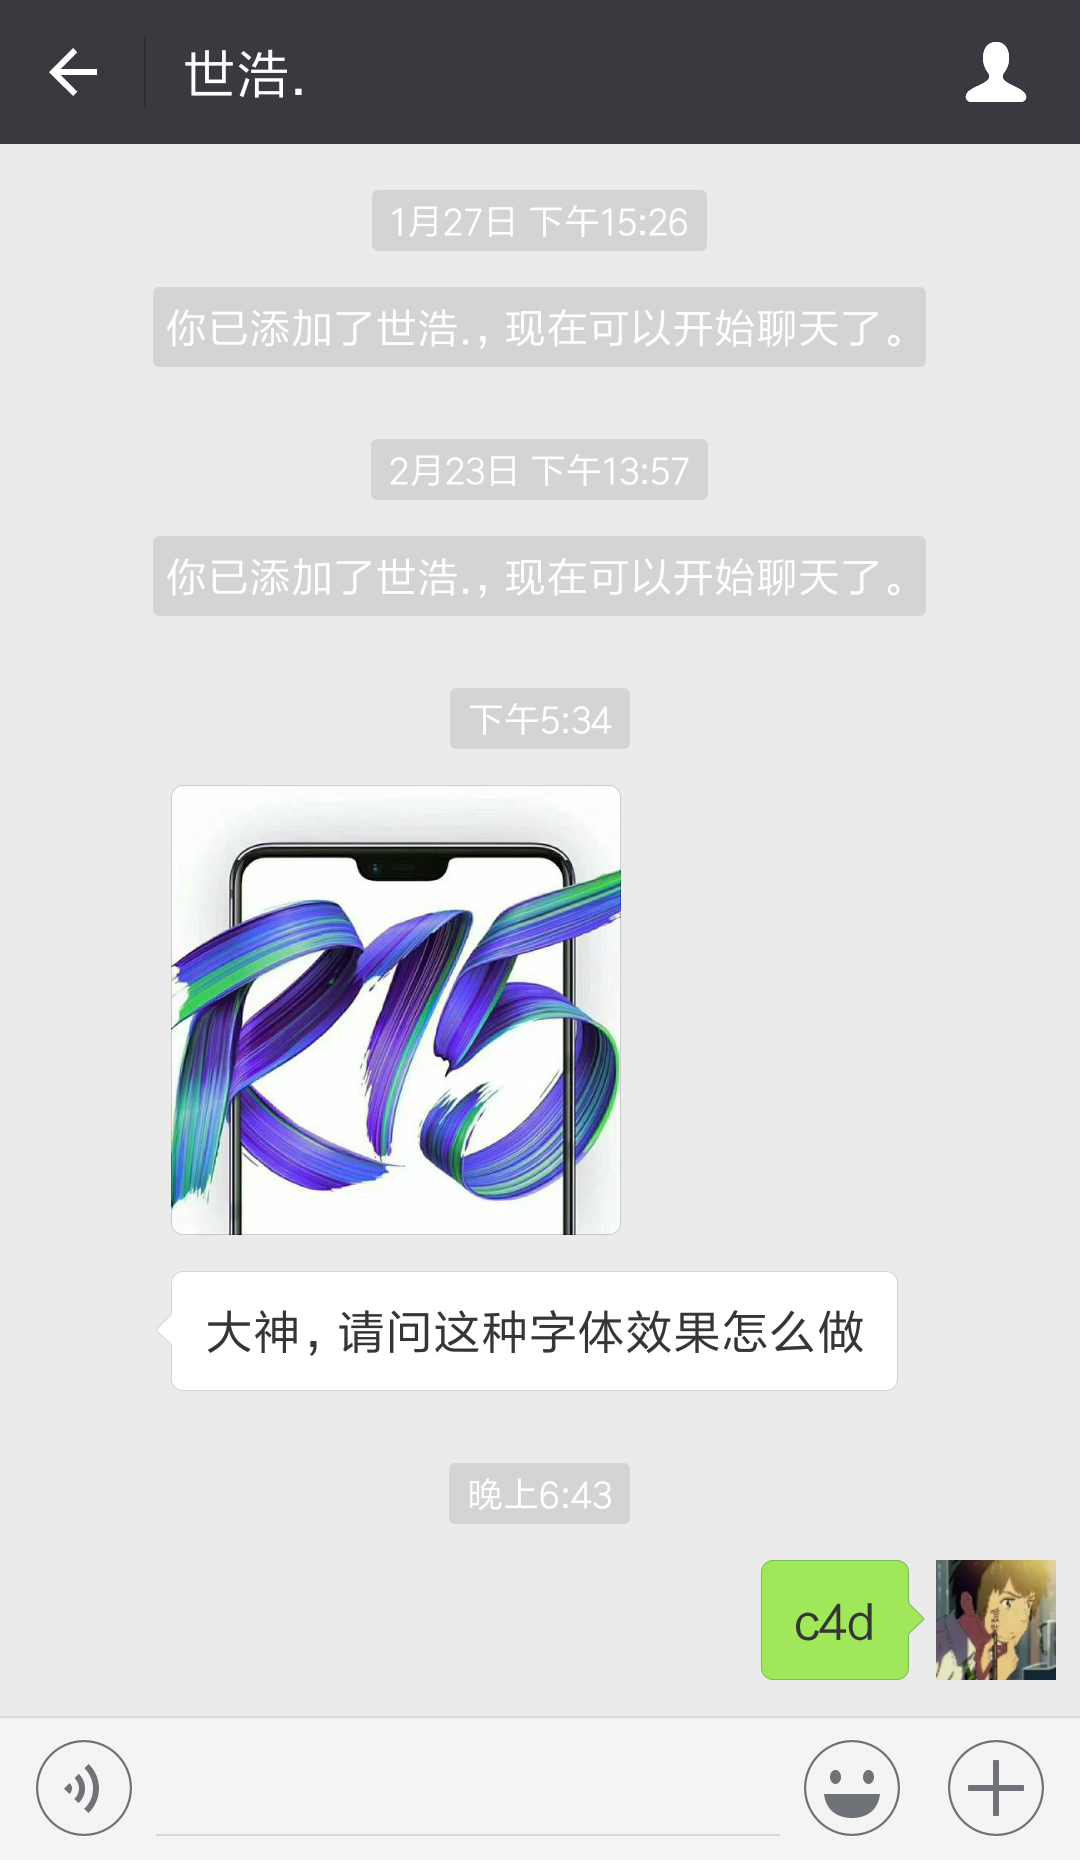
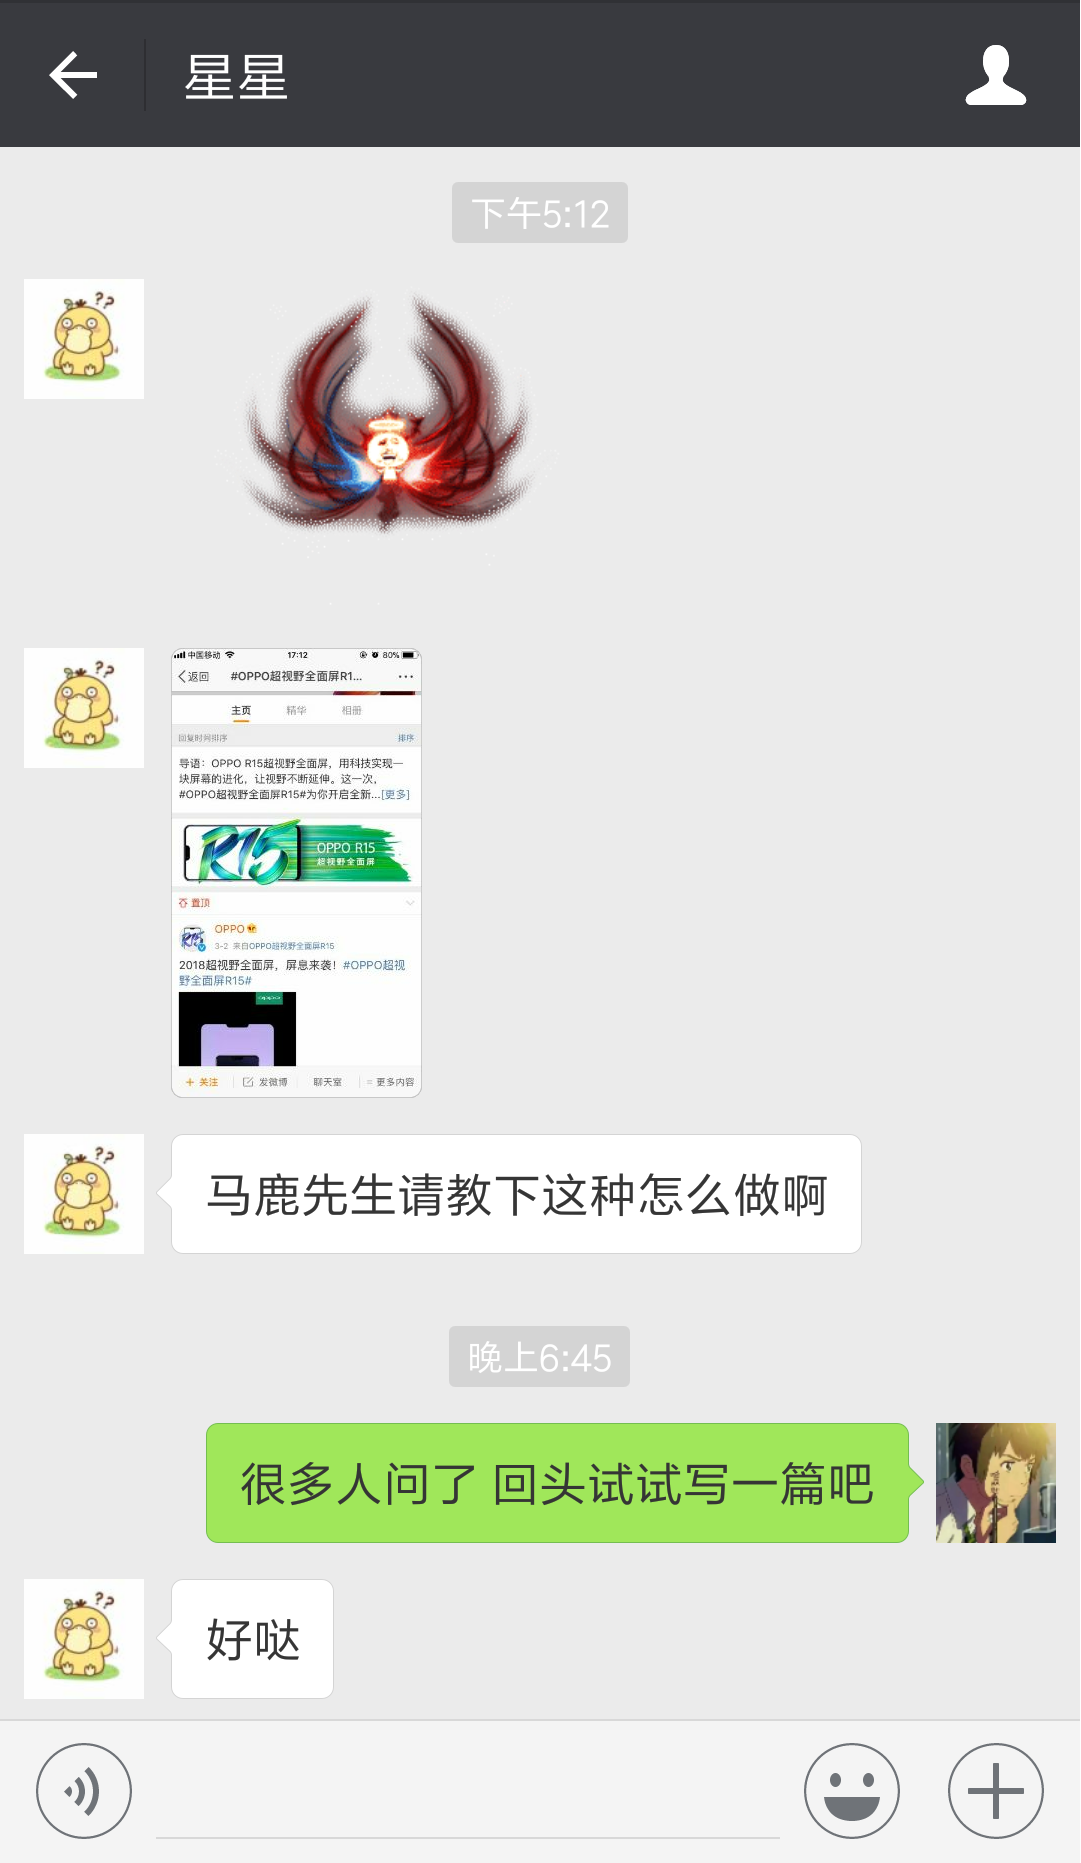
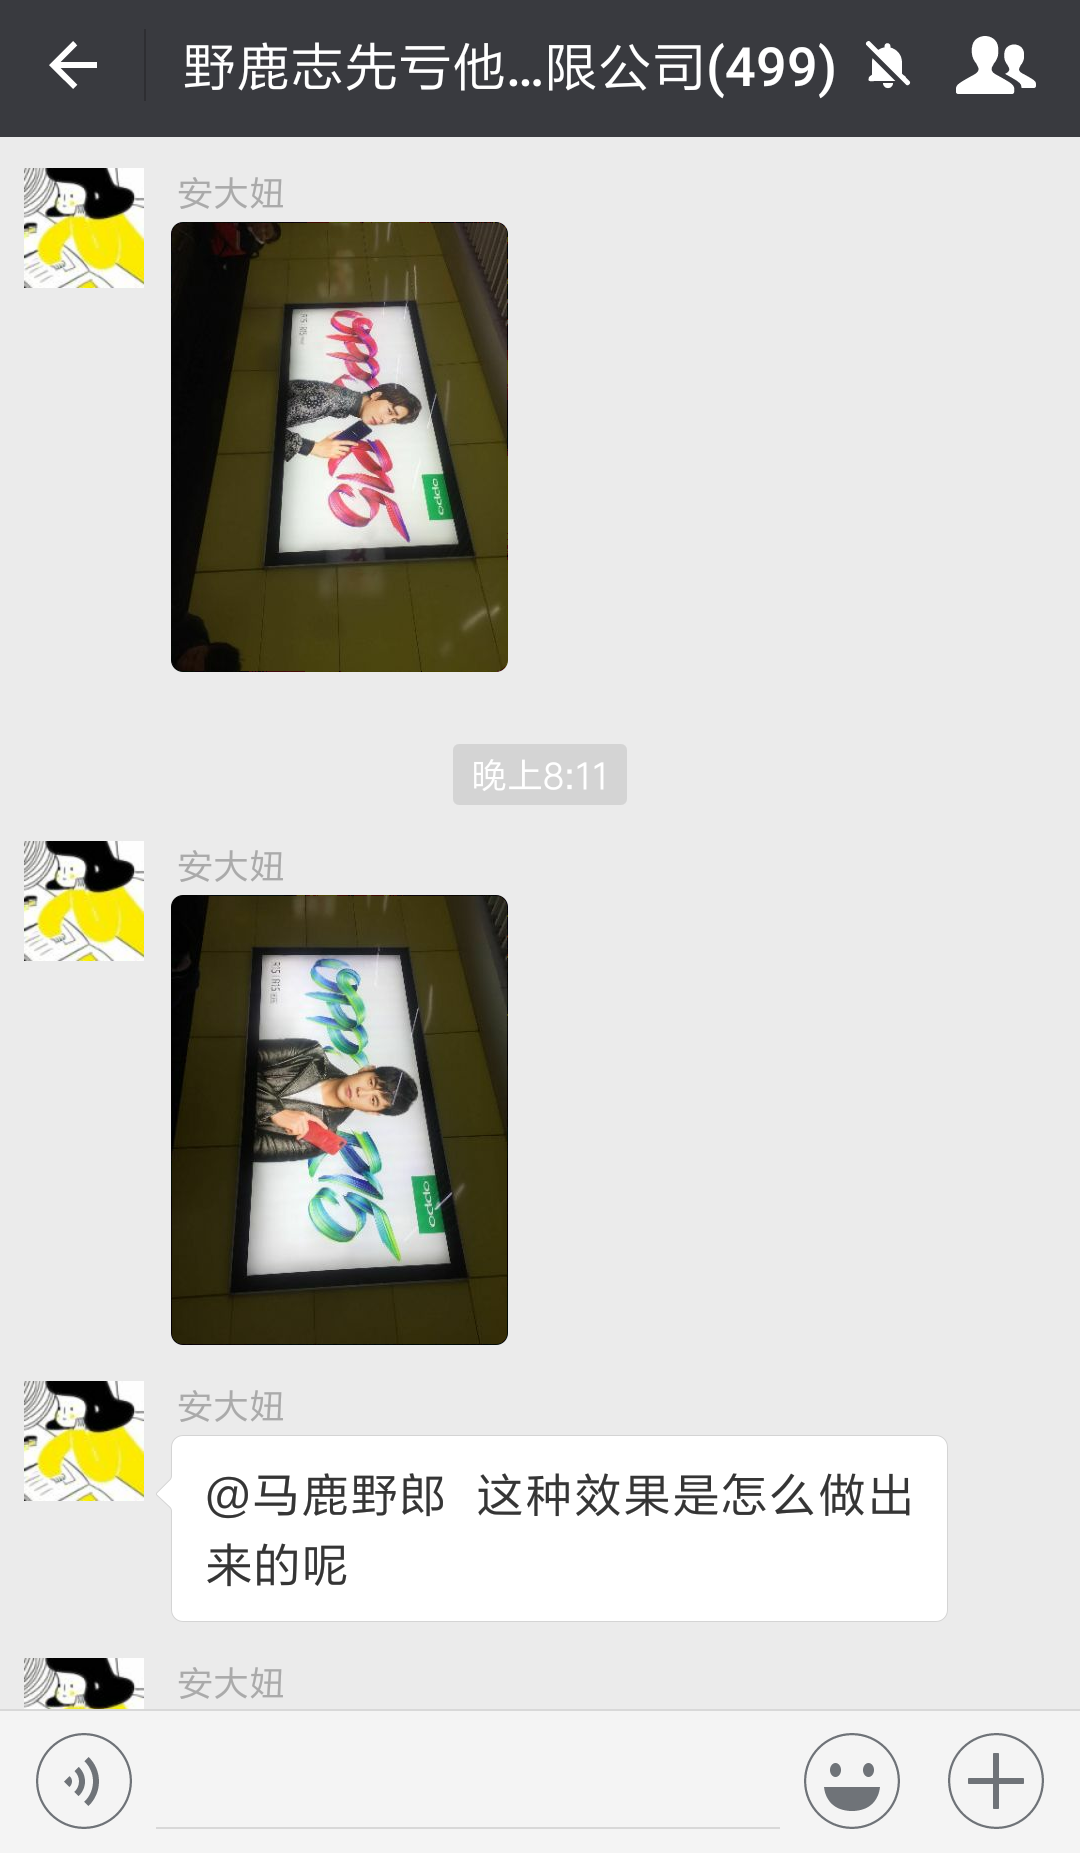
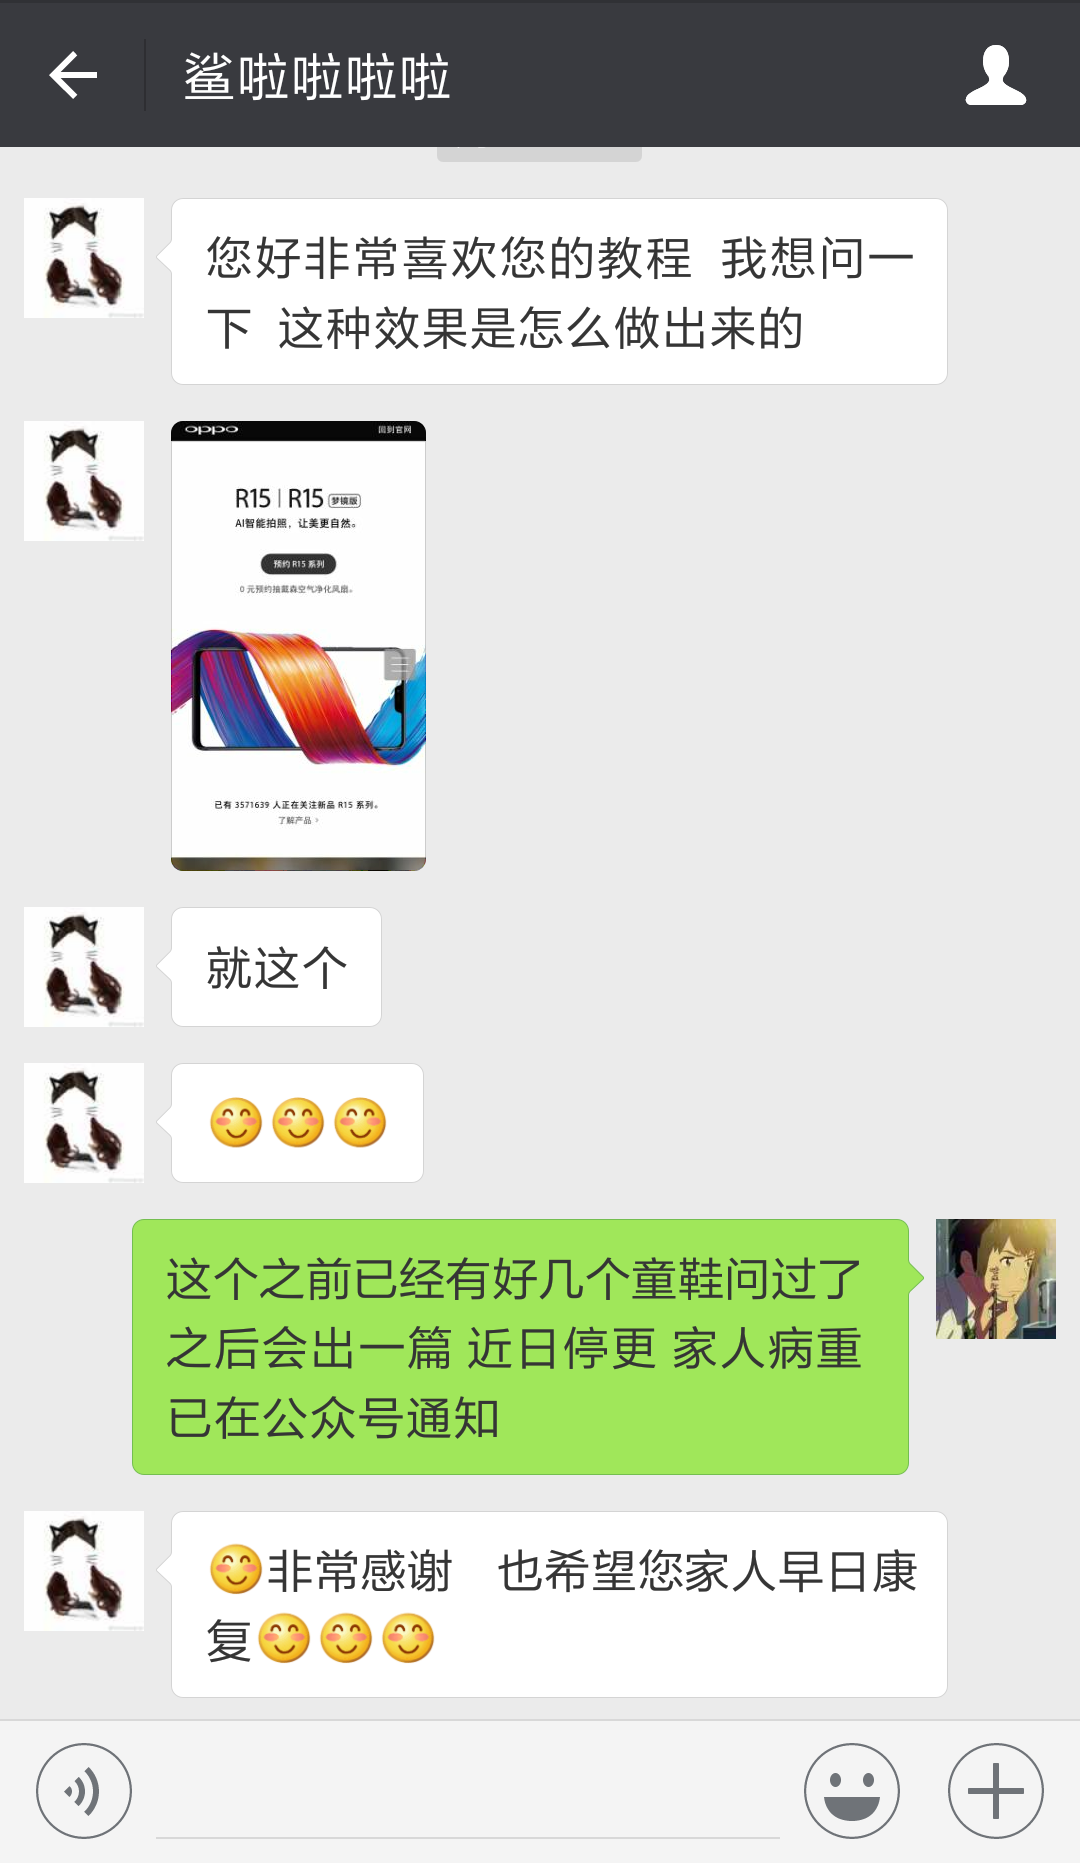
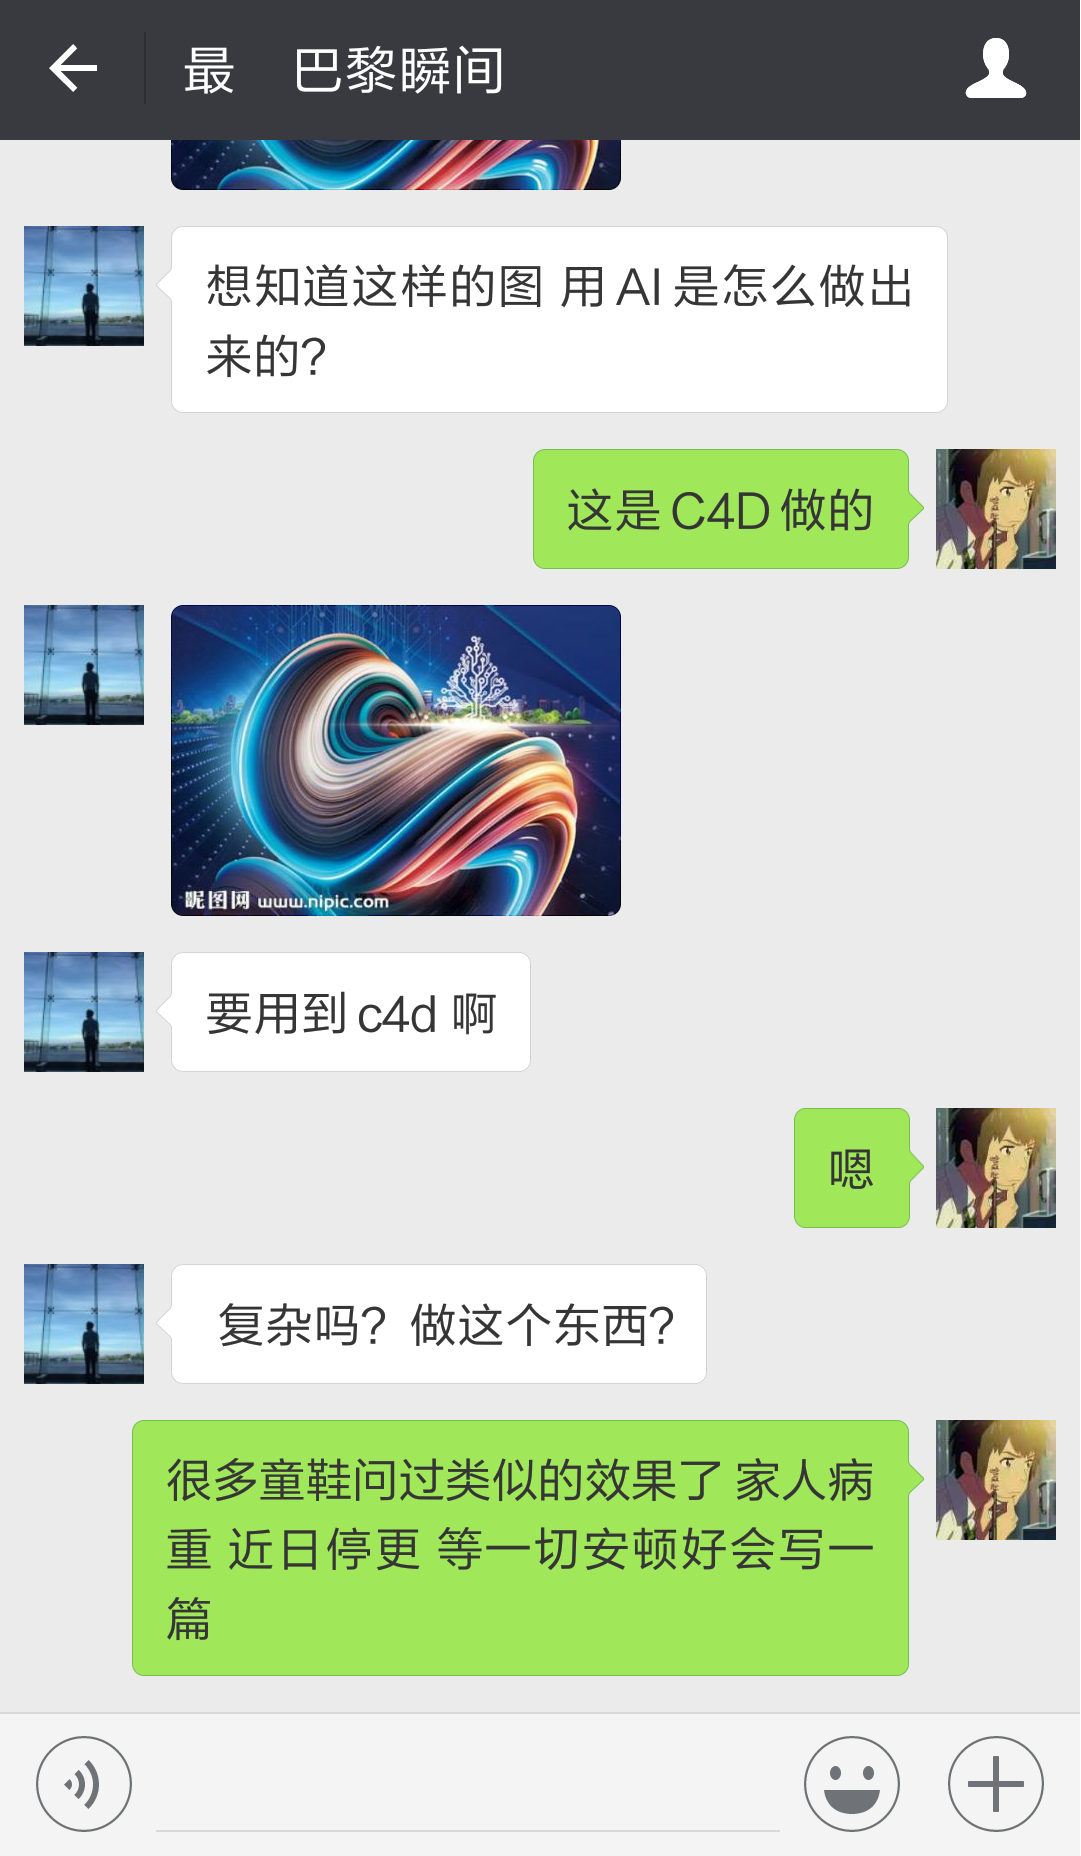
The paint text effect of oppo R15 and the texture effect of the last children's shoes are actually made with C4D spline constraints, but they will be polished with PS later.
Today we will share how to make oppo R15 paint text!

Before starting, let’s use the texture effect of the last child’s shoe question to make a small case, and give a brief introduction to the fun tool of spline constraint.
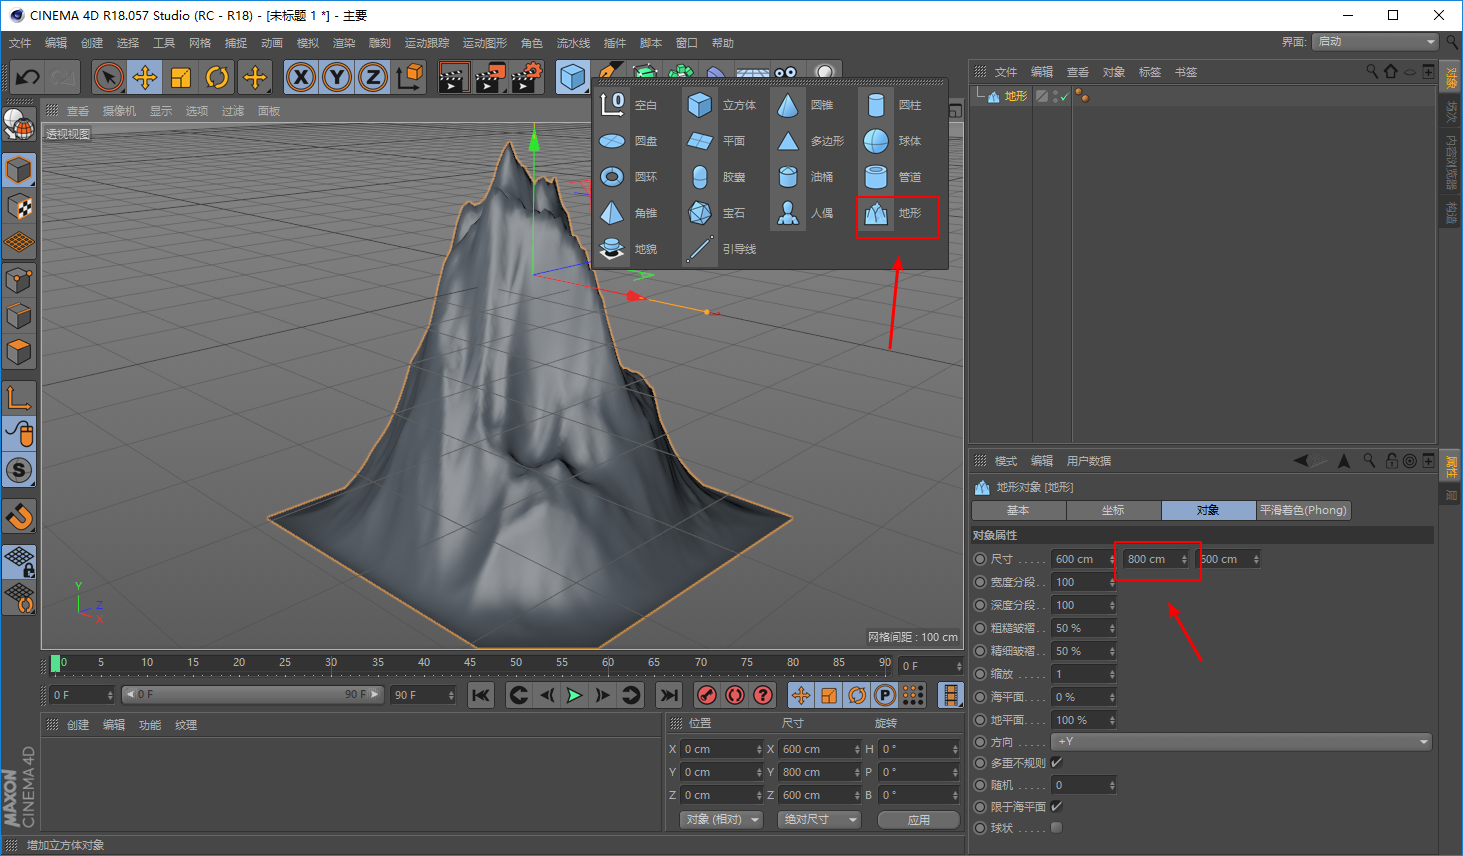
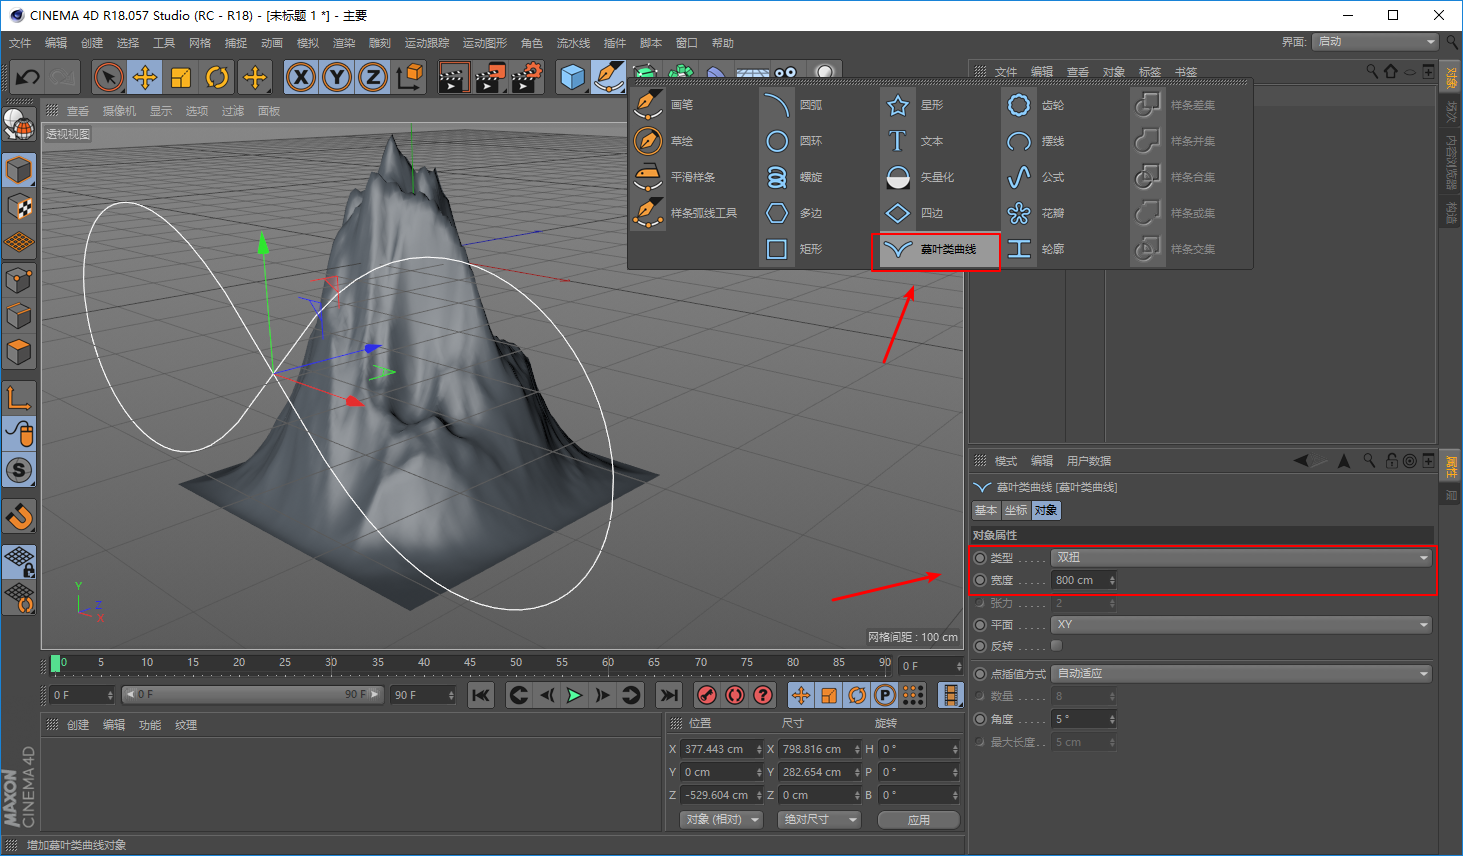
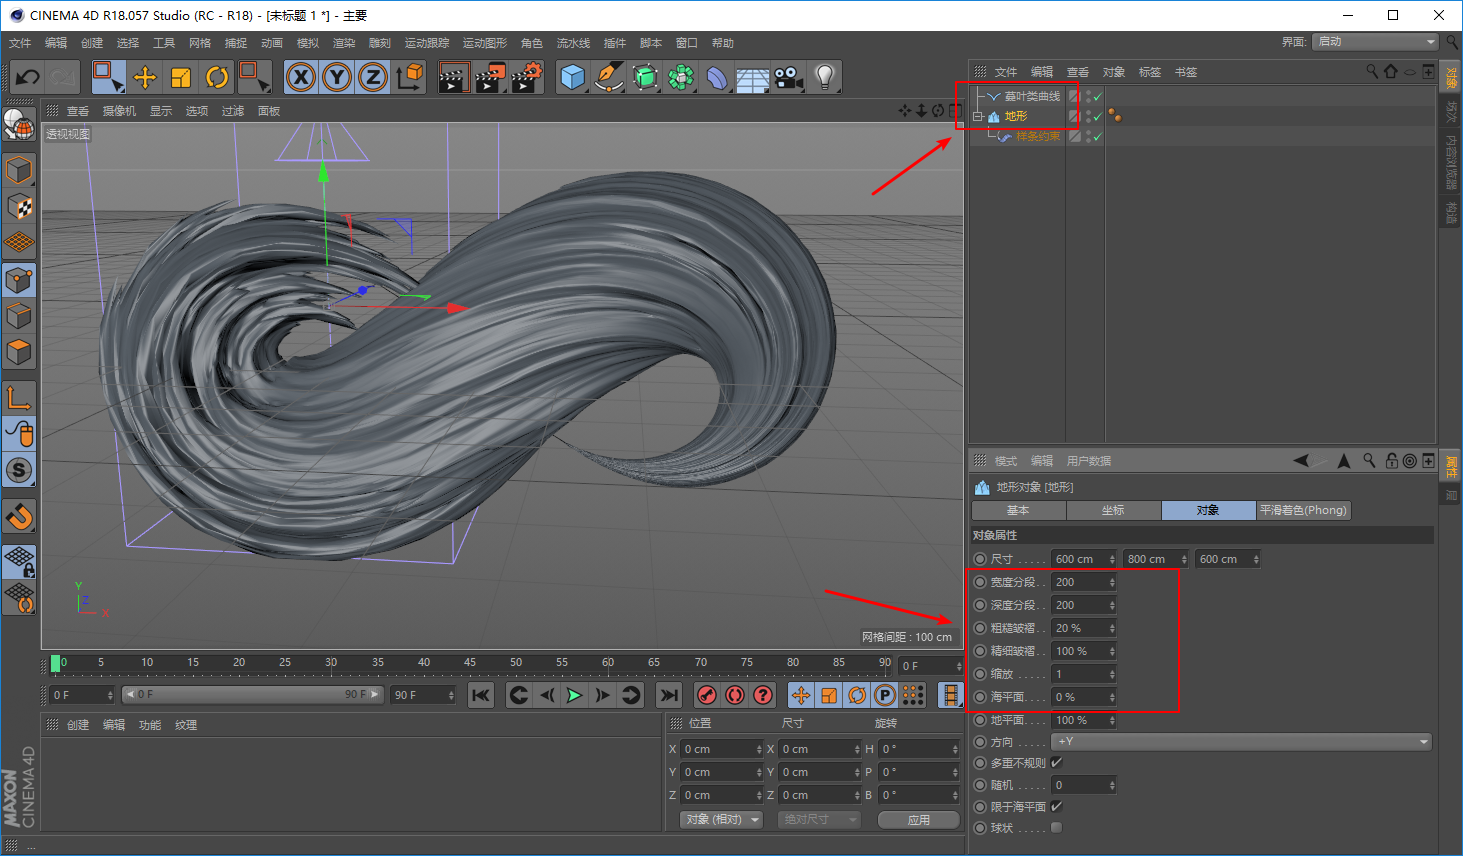
Open C4D and create a new terrain in the geometry tool group, and change the value of the Y axis at the same time:
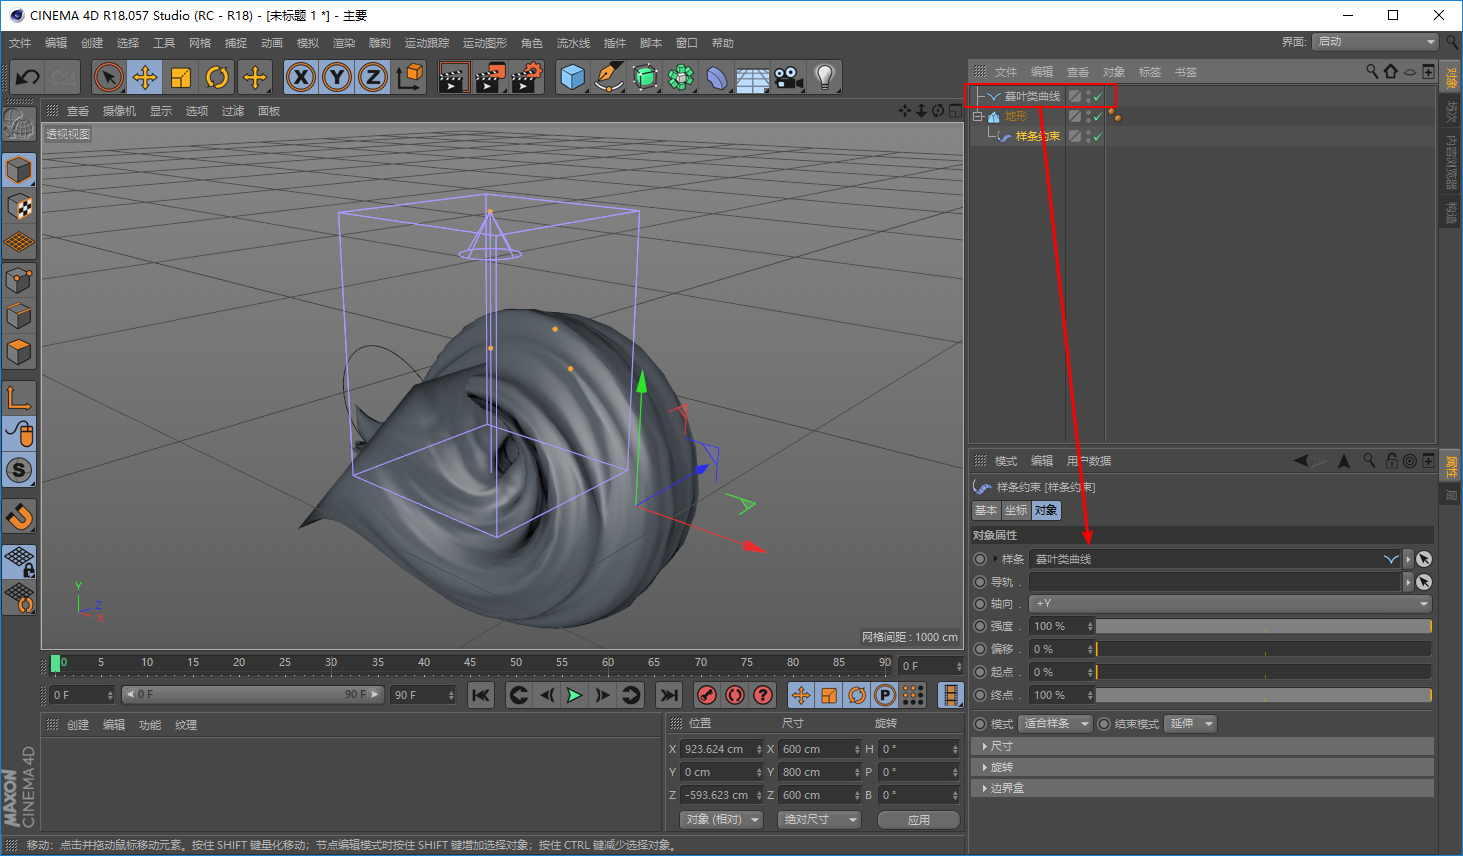
Create a new spline in the spline tool group. Here I choose the vine leaf curve, and change its type and width at the same time:
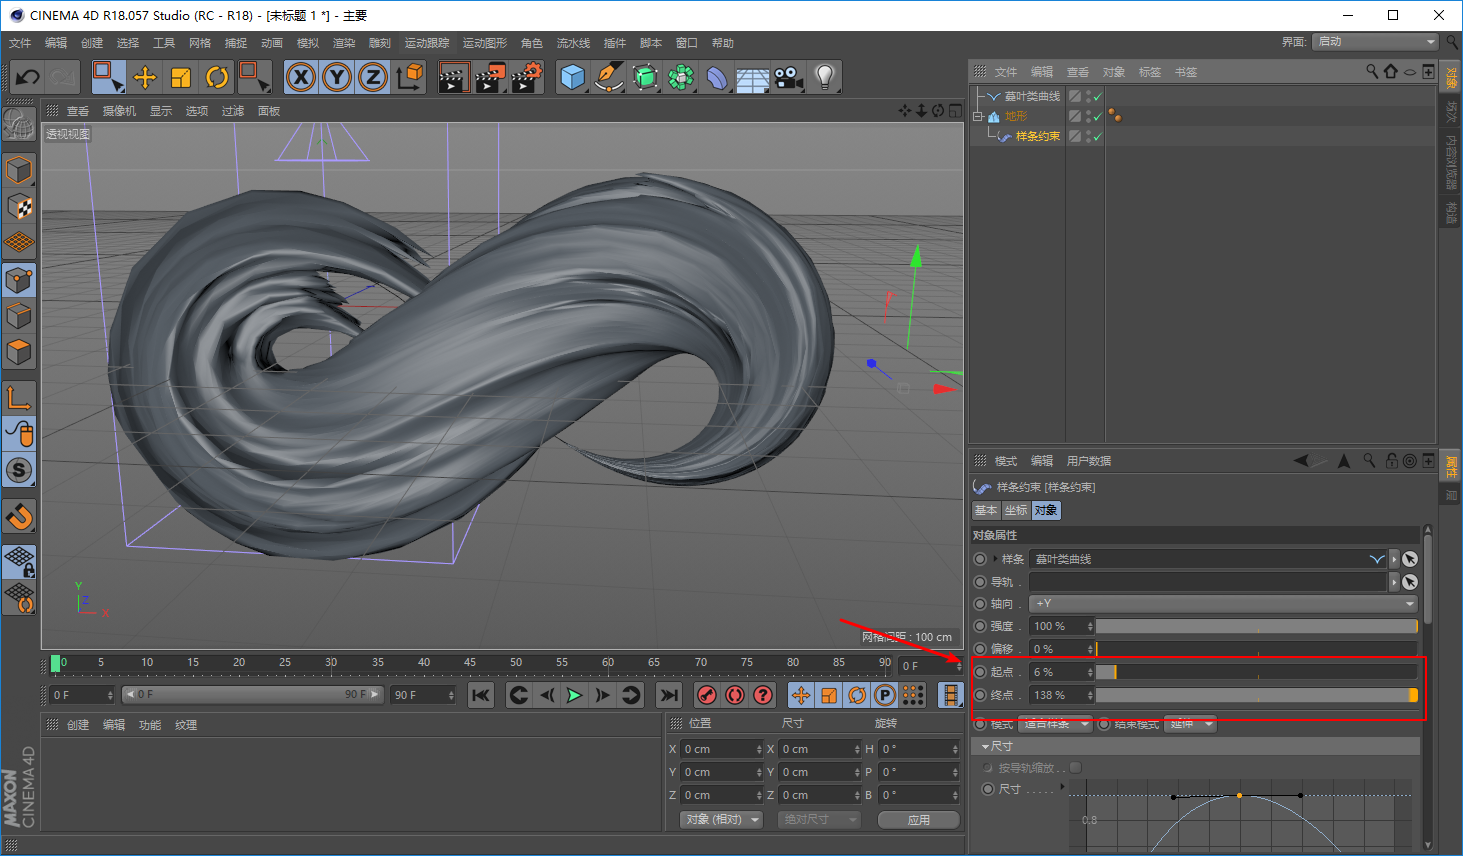
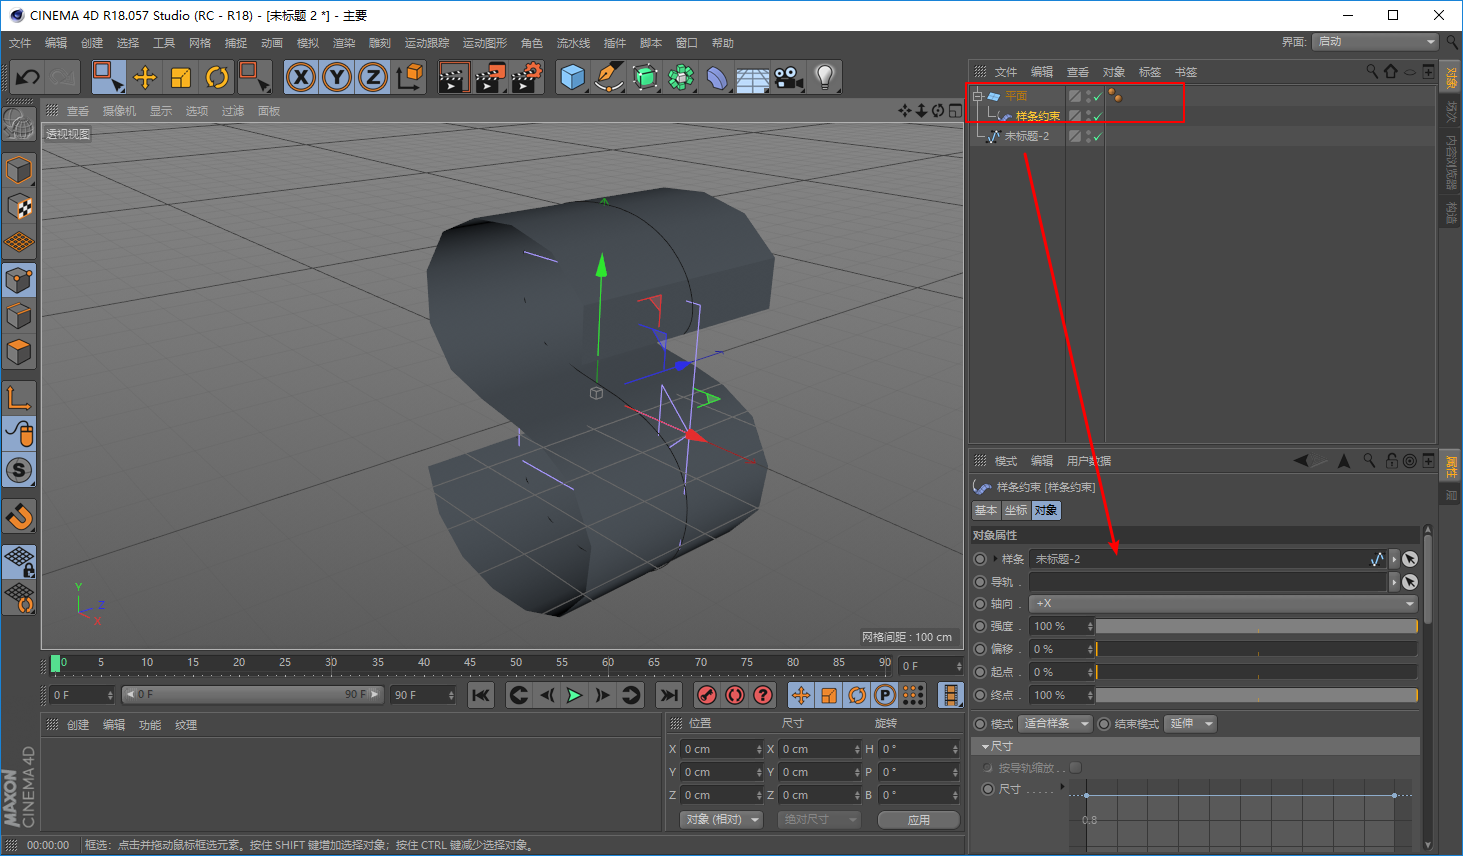
Then create a new spline constraint in the deformer tool group:
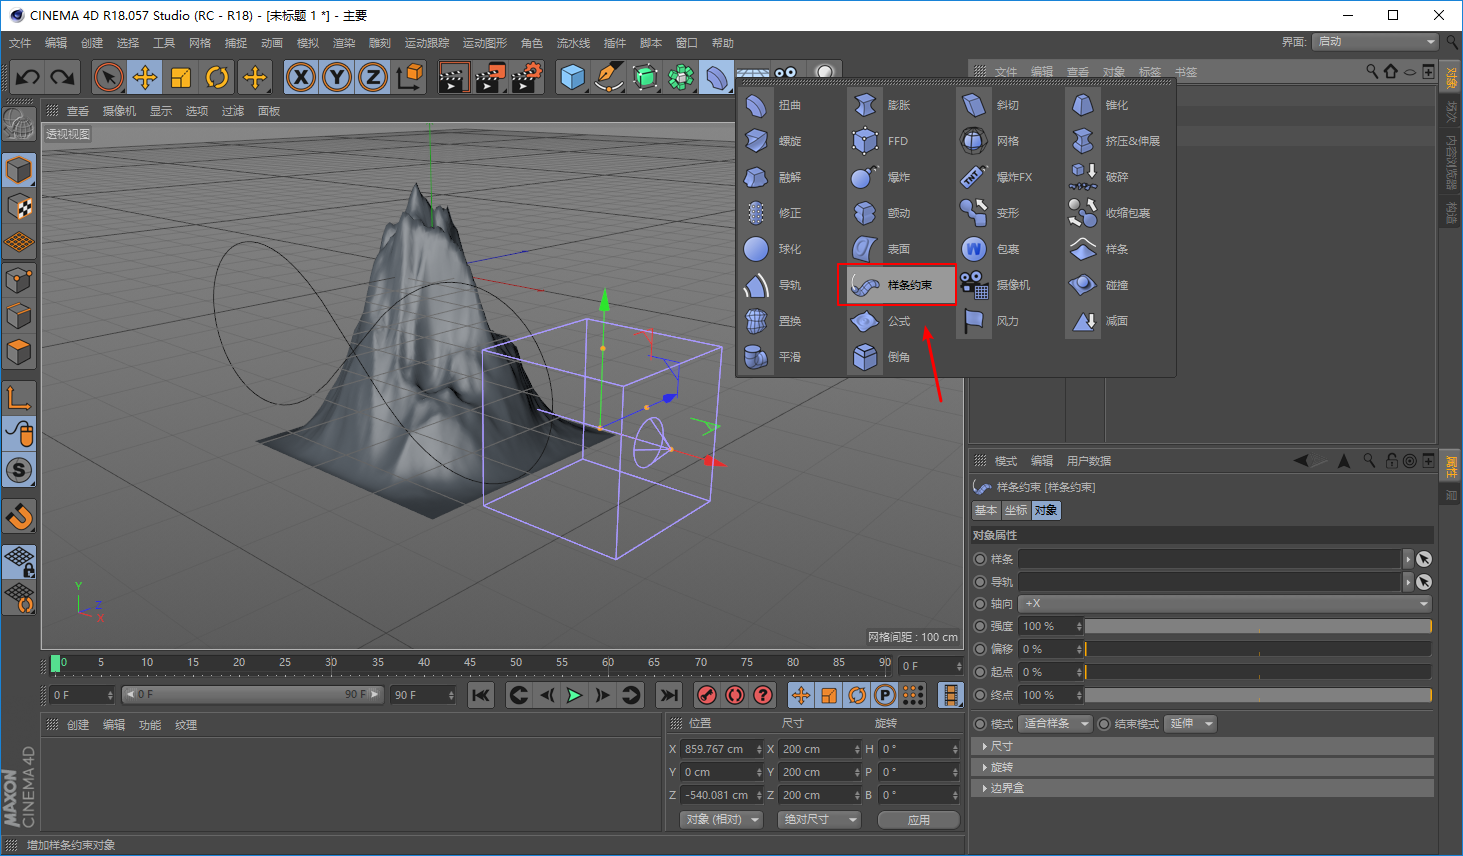
One thing to note here is that because the mountain changes in the Y-axis direction, remember to change the axis of the spline constraint to the Y-axis:
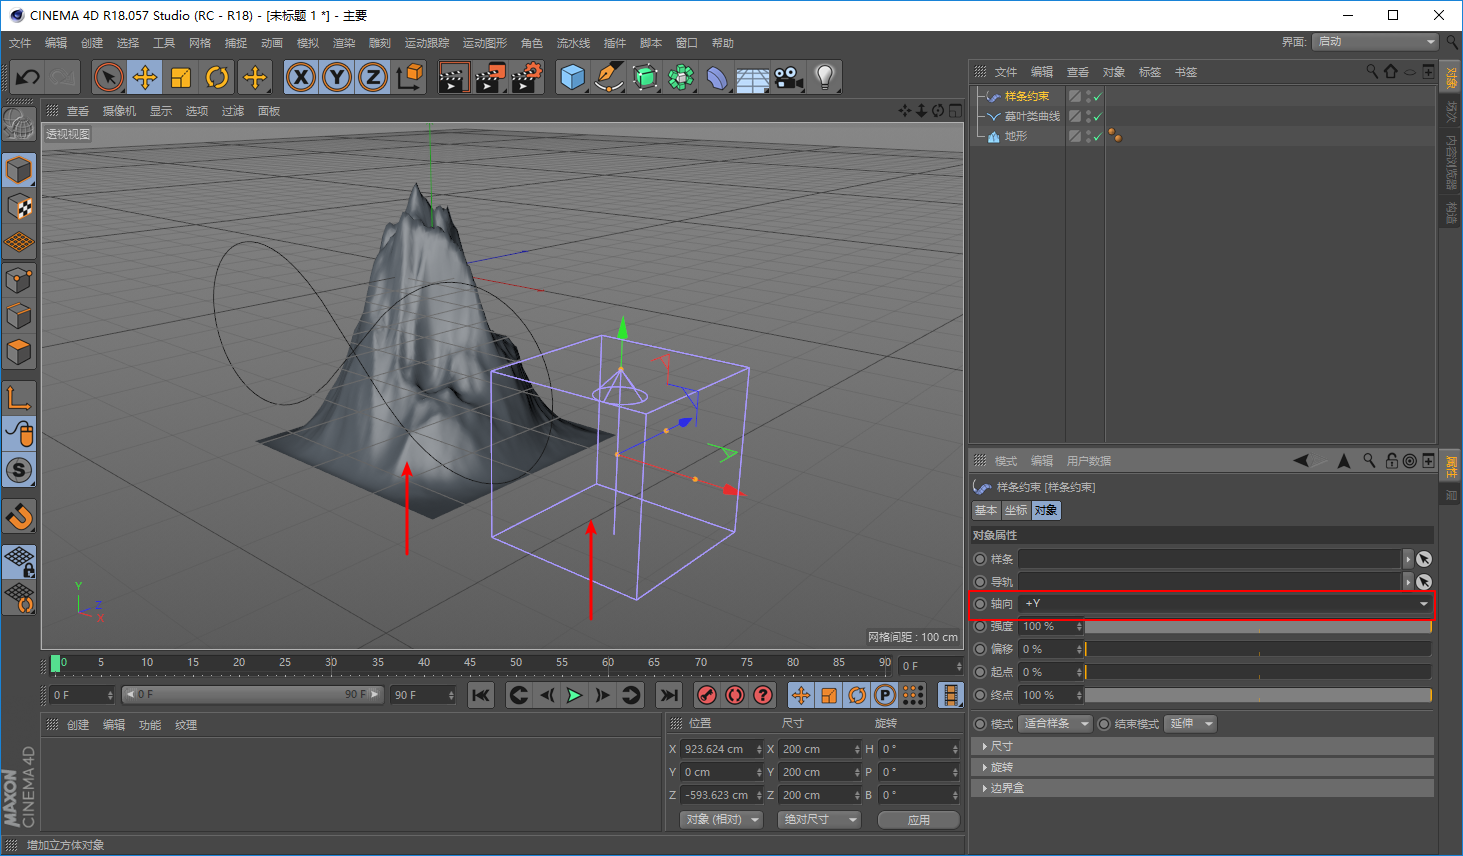
Since the spline constraint is purple, according to our previous sharing, we need to make it a subset of the terrain:
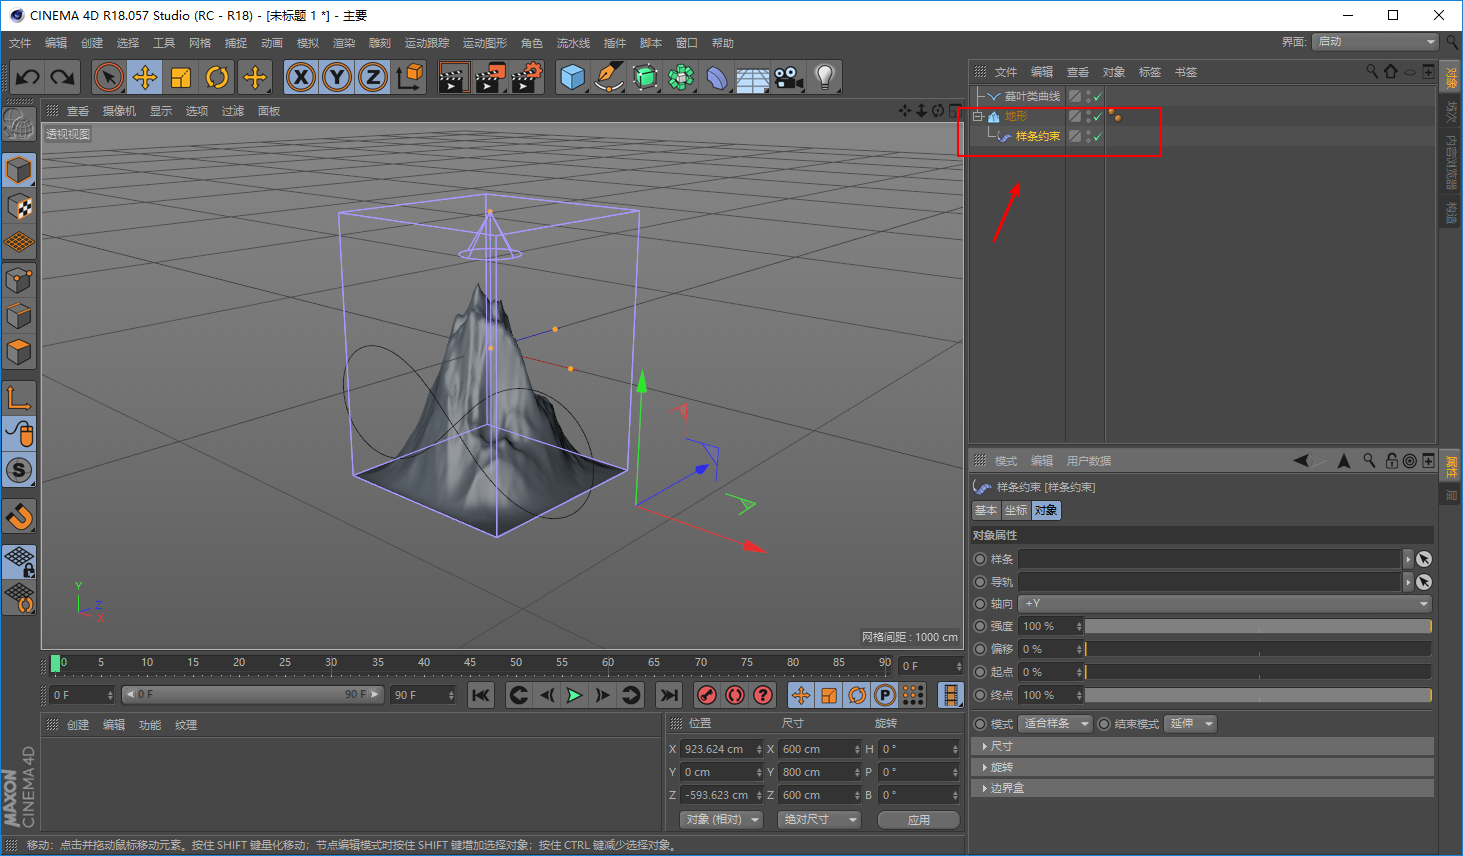
Then drag the spline to the position indicated by the arrow in the property bar of the spline constraint object, and we can see that the object has changed significantly:
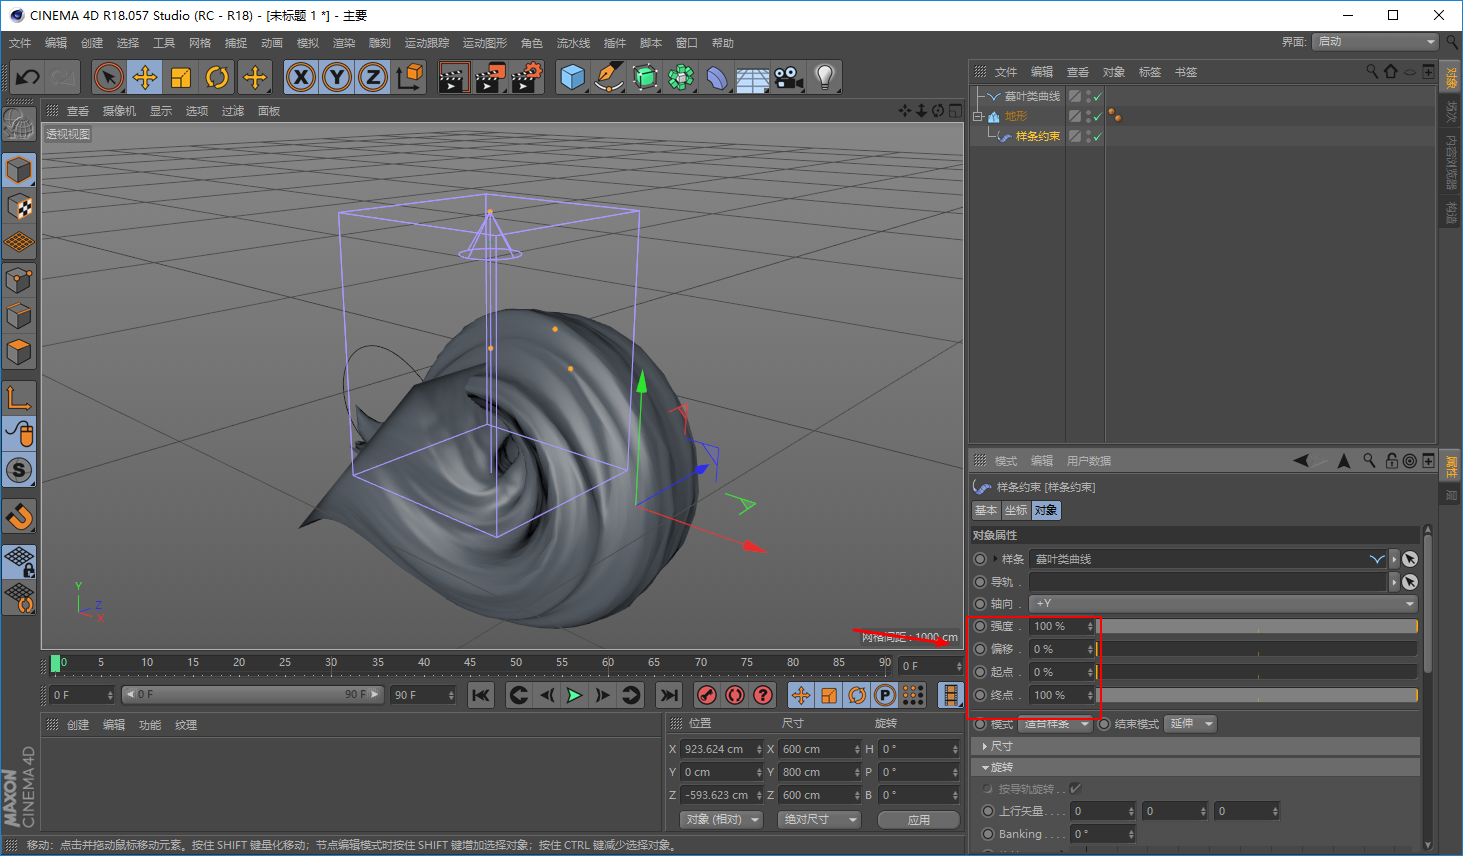
For the parameters here, I also suggest that you try them out to understand their specific meanings.
I just want to explain here that the maximum value of the parameters in the red box can exceed 100, and except for the intensity, the values of the other three items can be negative:
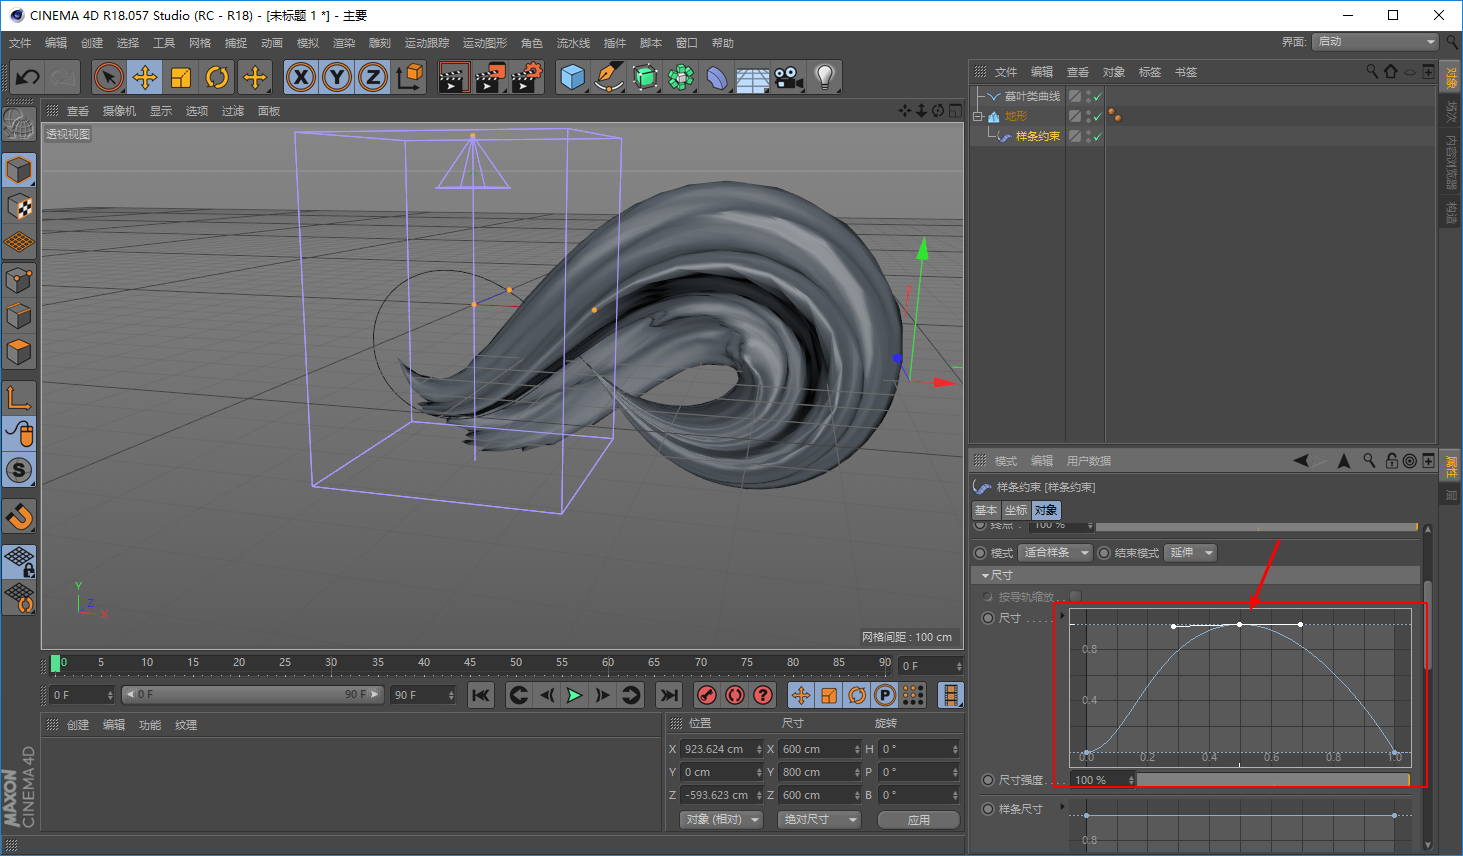
Size Here we can use the curve to change the size of different positions of the object, hold down the CTRL key and click the mouse to add points on the curve:
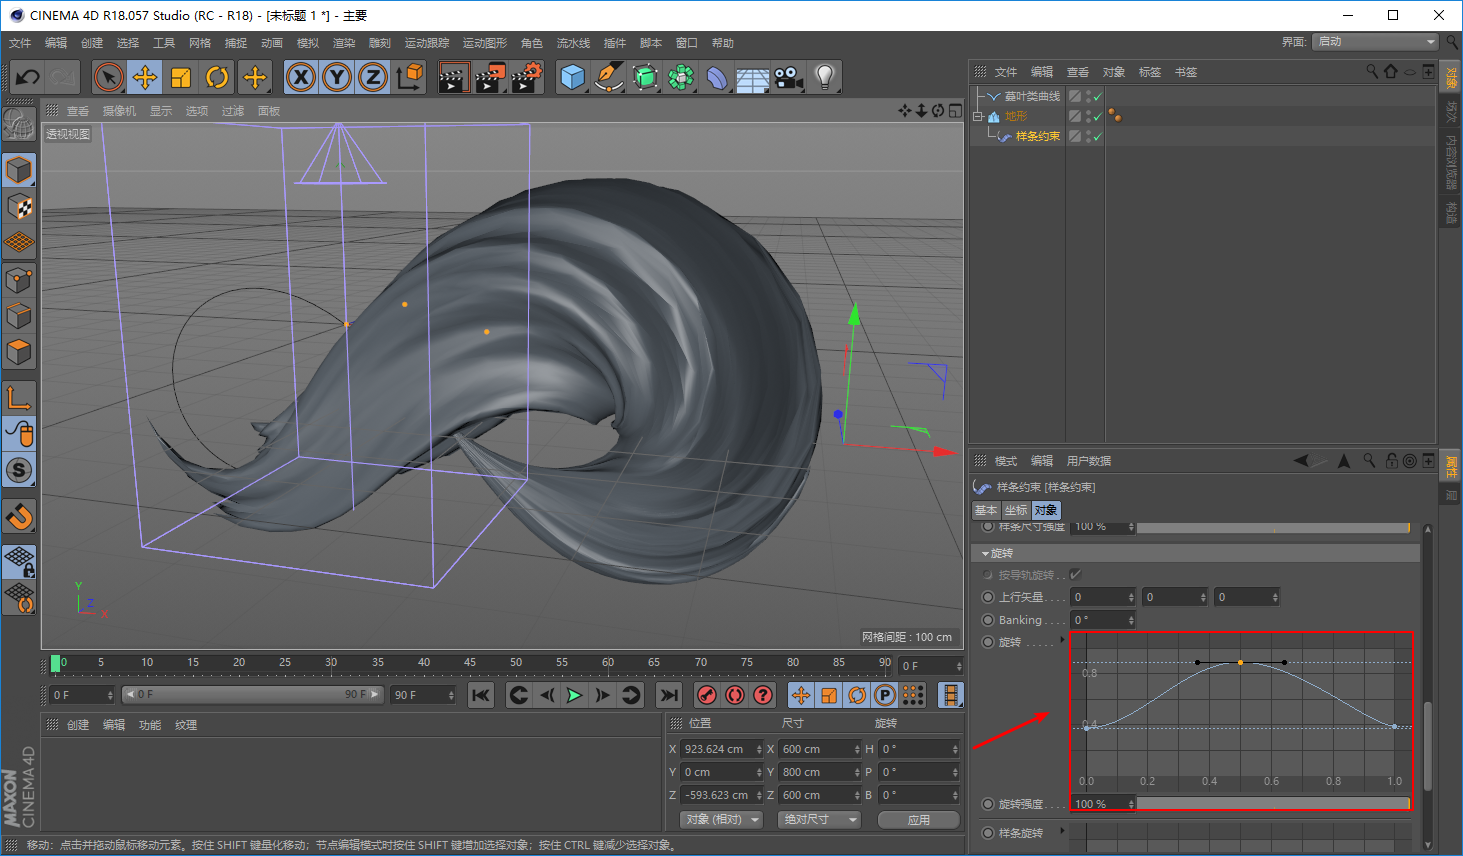
The operation method of rotation here is the same as that of size, the difference is the different positions used to rotate the object:
Next you just need to adjust the other parameters of the spline constraints:
As well as all aspects of the terrain parameters, just look at the effect and adjust it. If your spline is drawn by yourself, you can also adjust the parameters of the spline such as the position of the anchor point.
Since I'm just introducing the tool through this small case here, it won't be so troublesome:
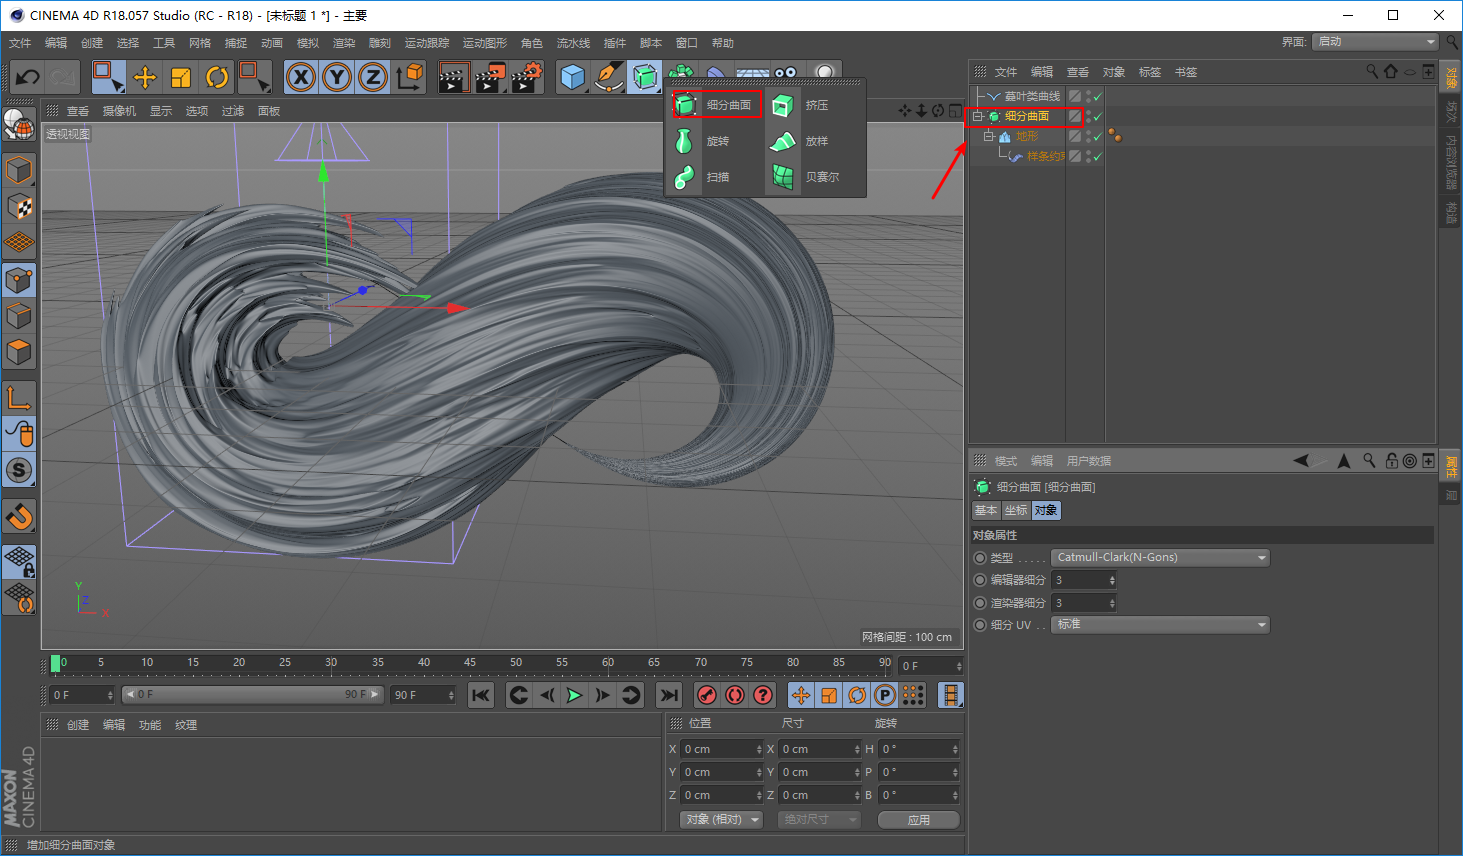
You can also add a subdivision surface if you want the texture to be less sharp.
Of course, the subdivision surface is added, and it will be more stuck:
Through this small case, we can understand the role of the spline constraint: Let the geometry change shape according to the spline path, while retaining the texture of the geometry.
This point is a bit similar to the scan we shared before, the difference is that the scan is to let the spline scan out the shape according to the path, and there will be no texture that can preserve the geometry like the spline constraint.

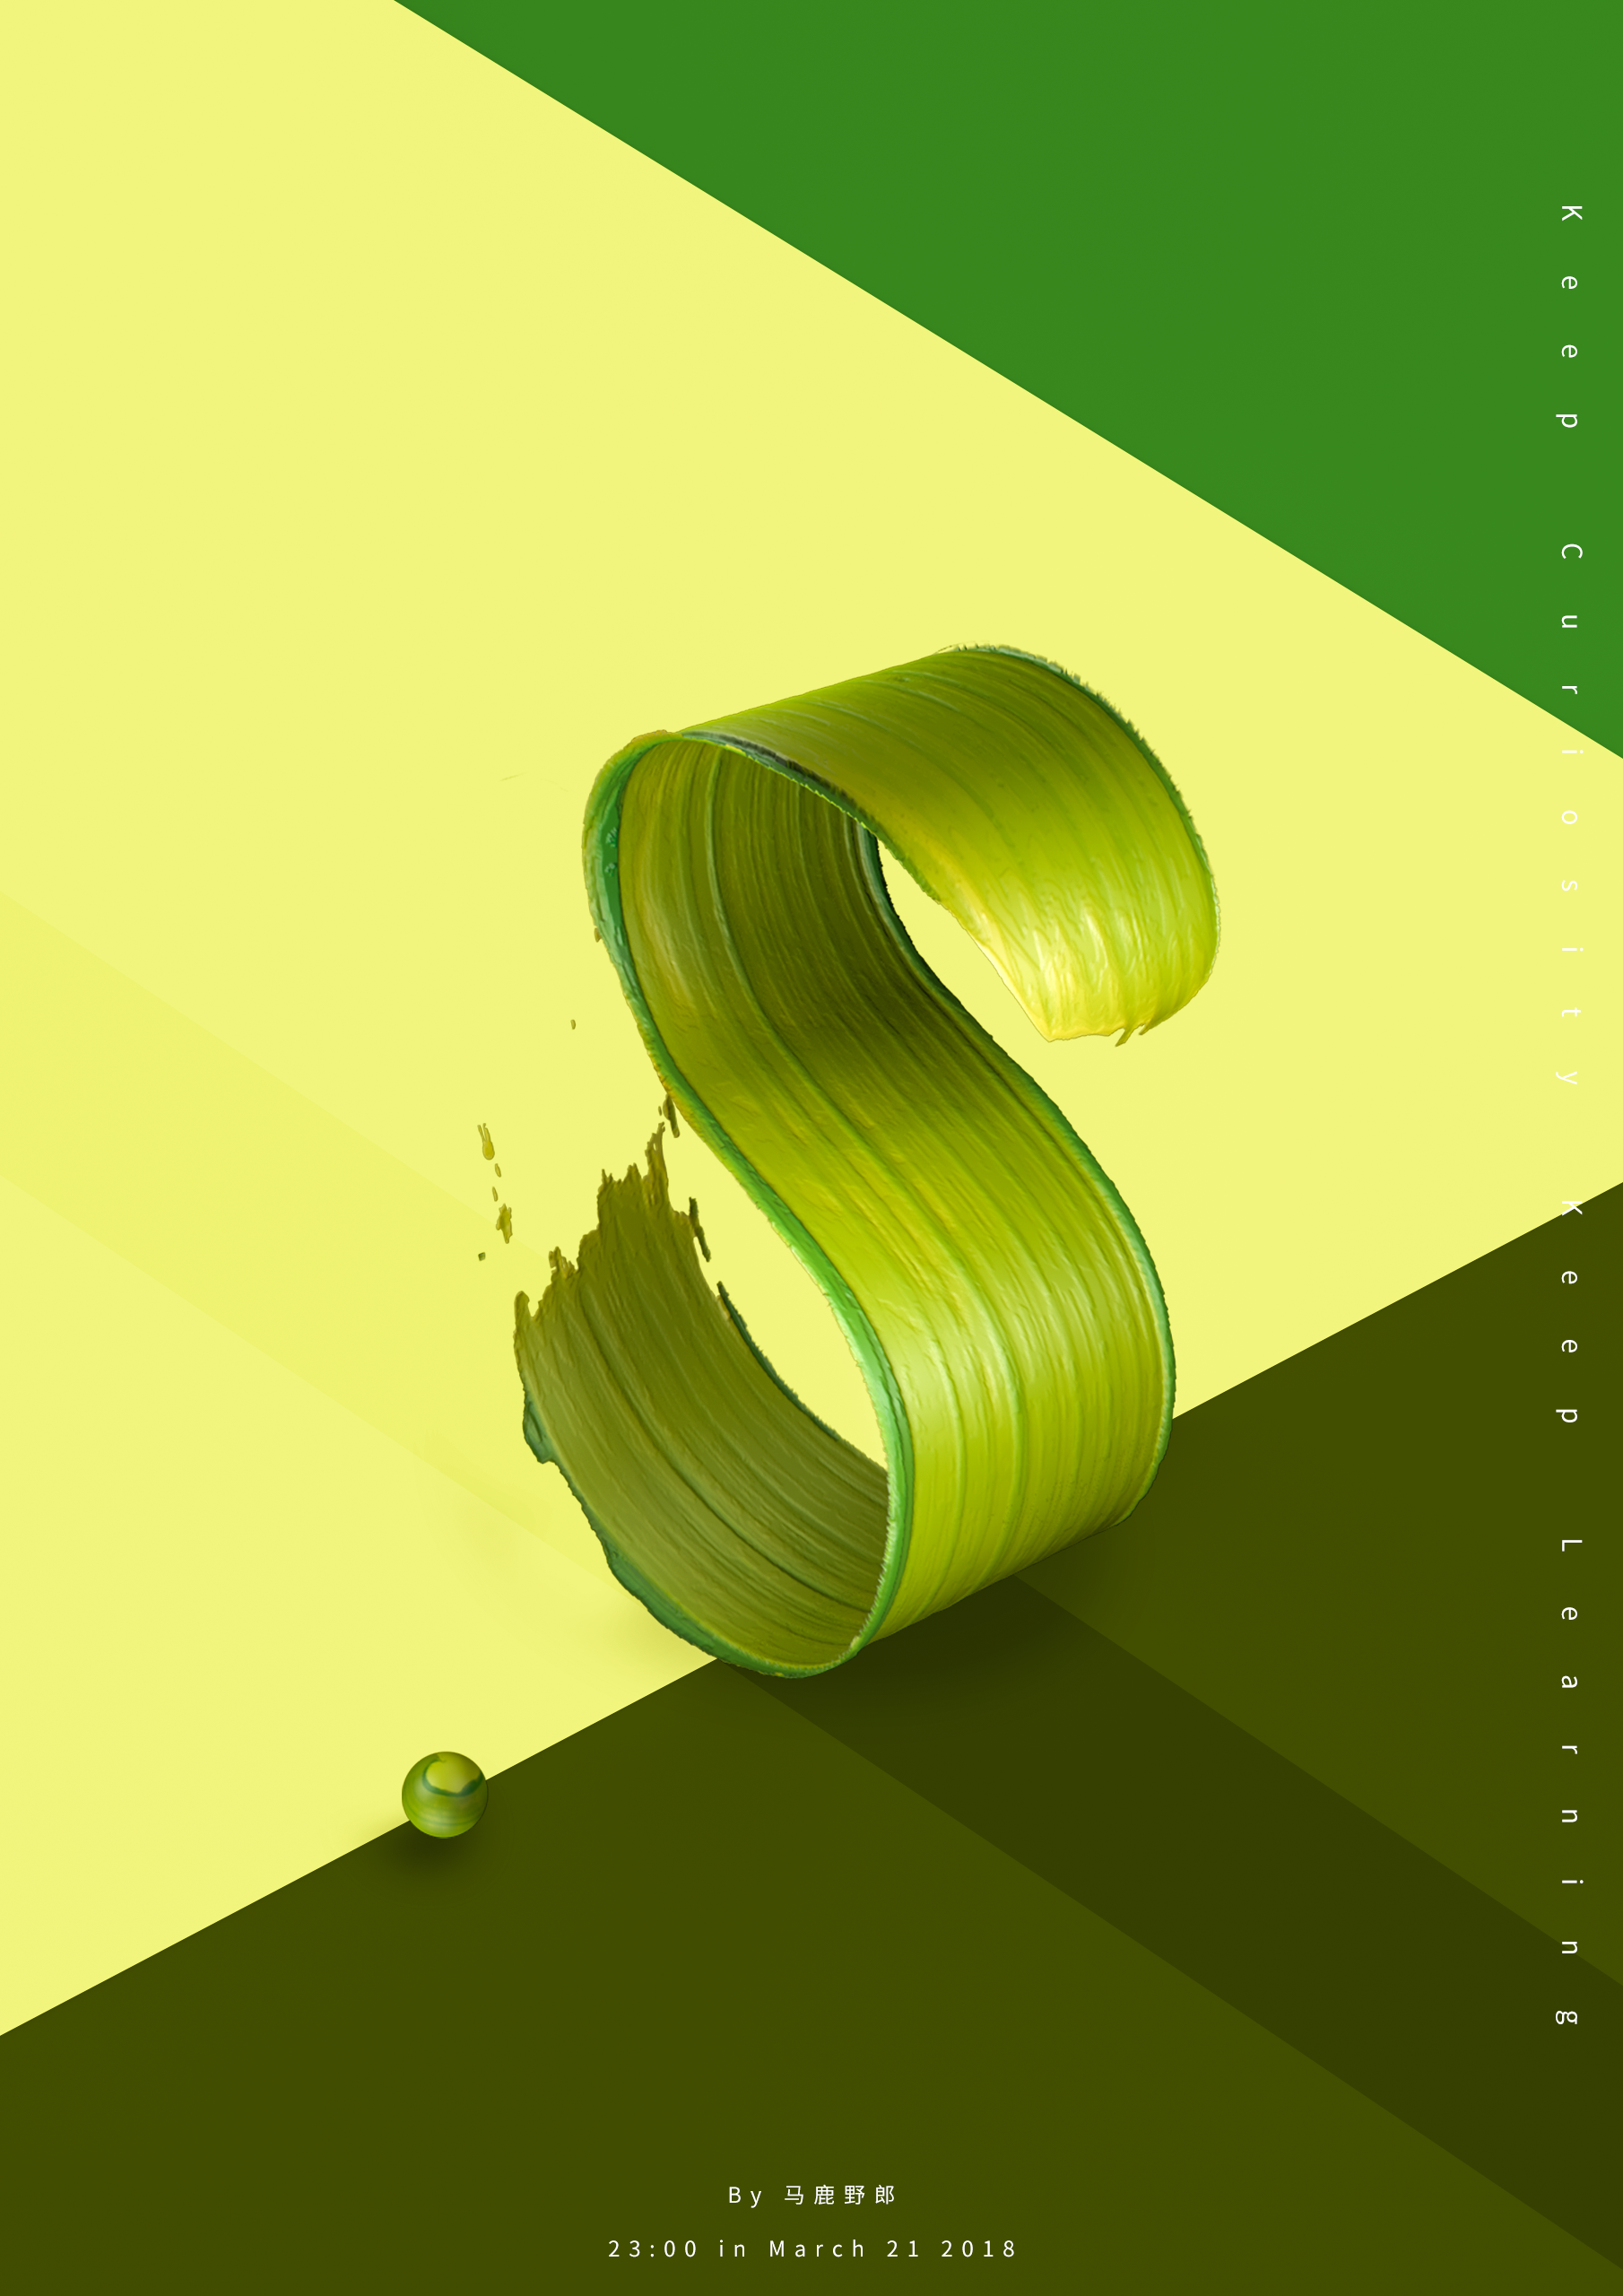
After the introduction of the function of the tool, let's start today's topic of making oppo R15 paint effect text.
Before you start, you need to do some prep work, you can find some paint materials.
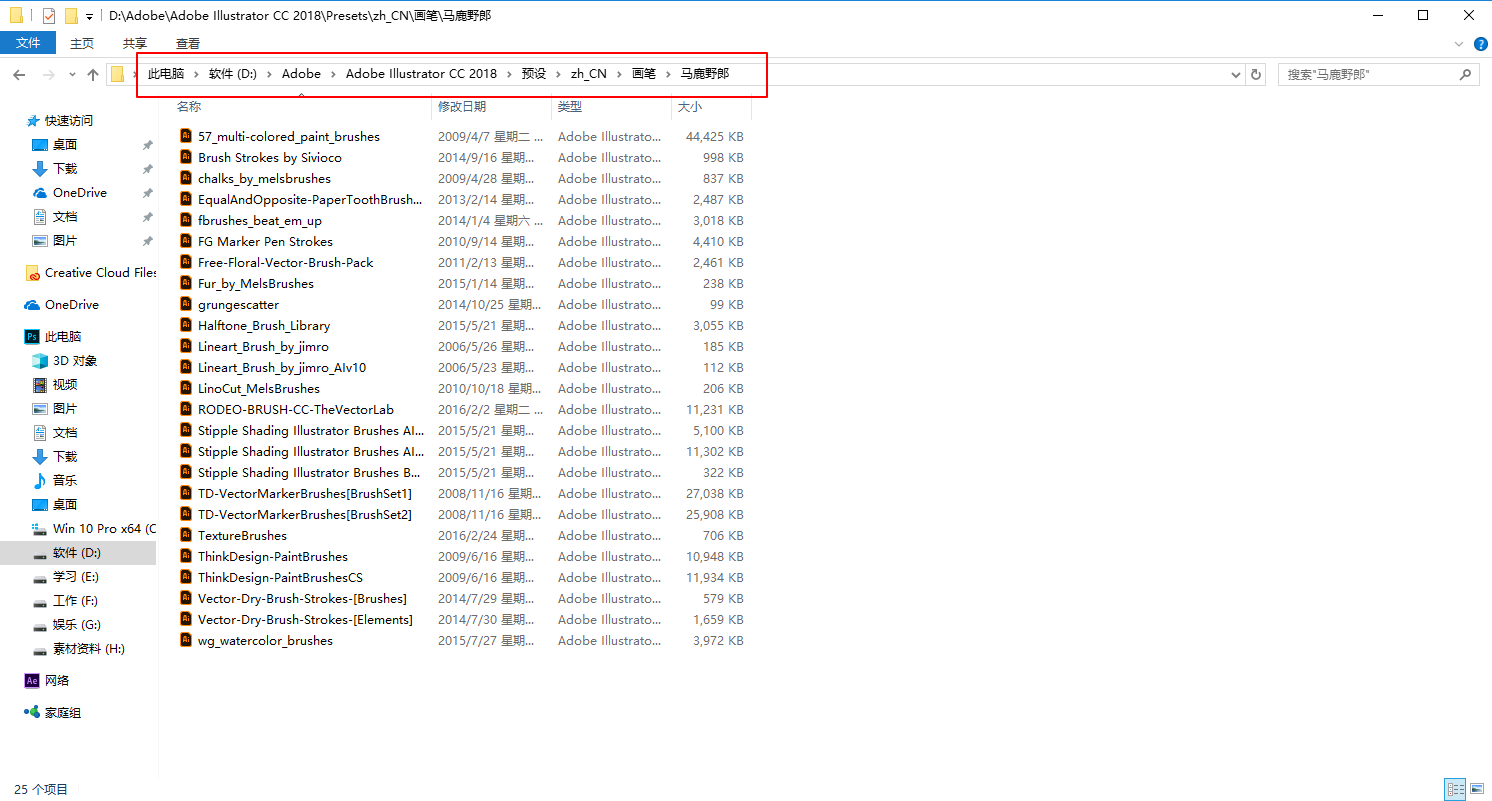
Since Yelang originally had some Ai paint brushes, I was too lazy to find them. I will also share these brushes with you:
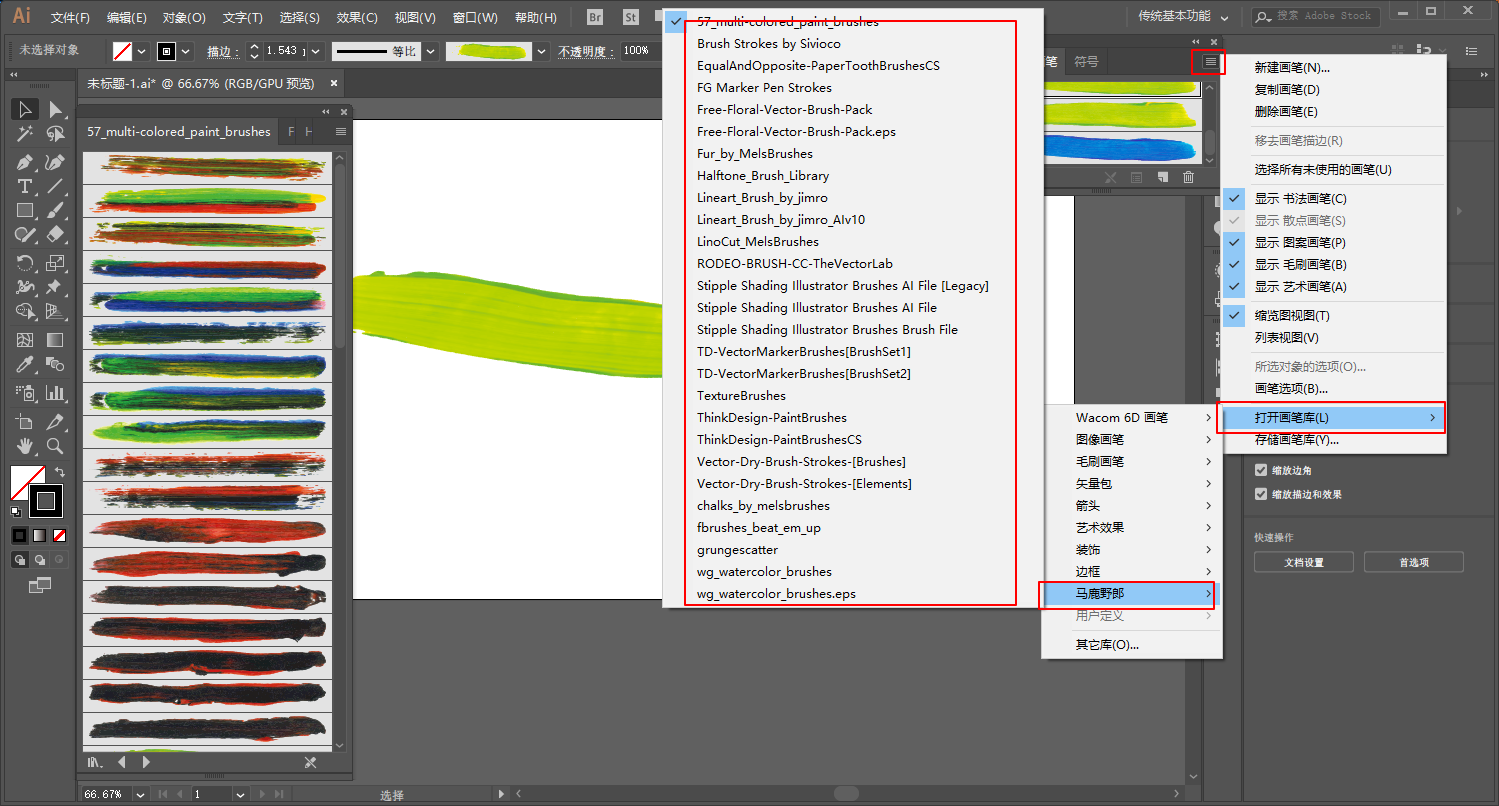
One more thing about installation, just put them in the file path as shown in the picture and restart Ai:
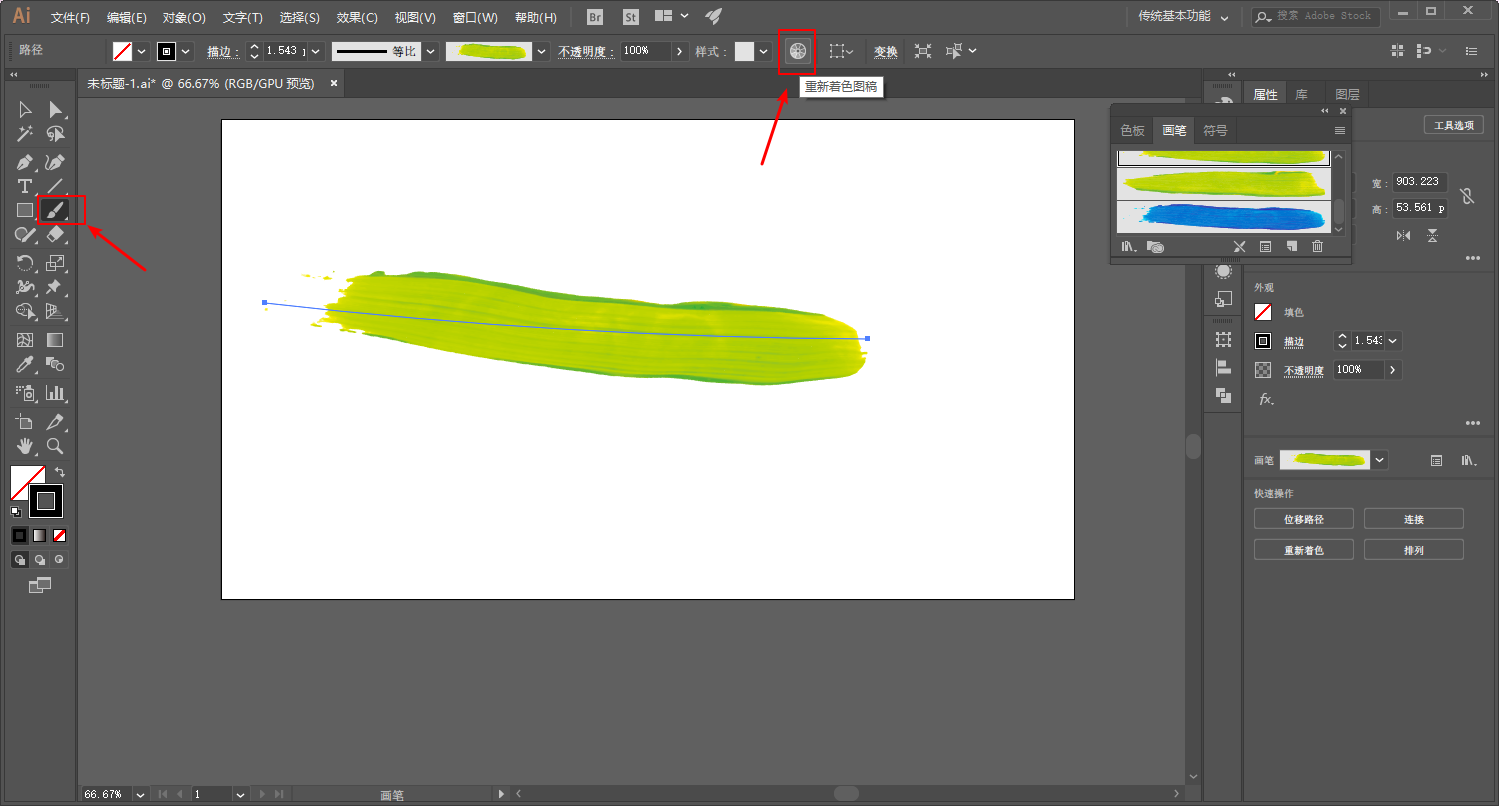
If you want to change the color of the brush, you can choose the brush you want, draw it with the brush tool, and then click the recolor artwork at the red arrow:
Click Edit, check the color chain, and modify it:
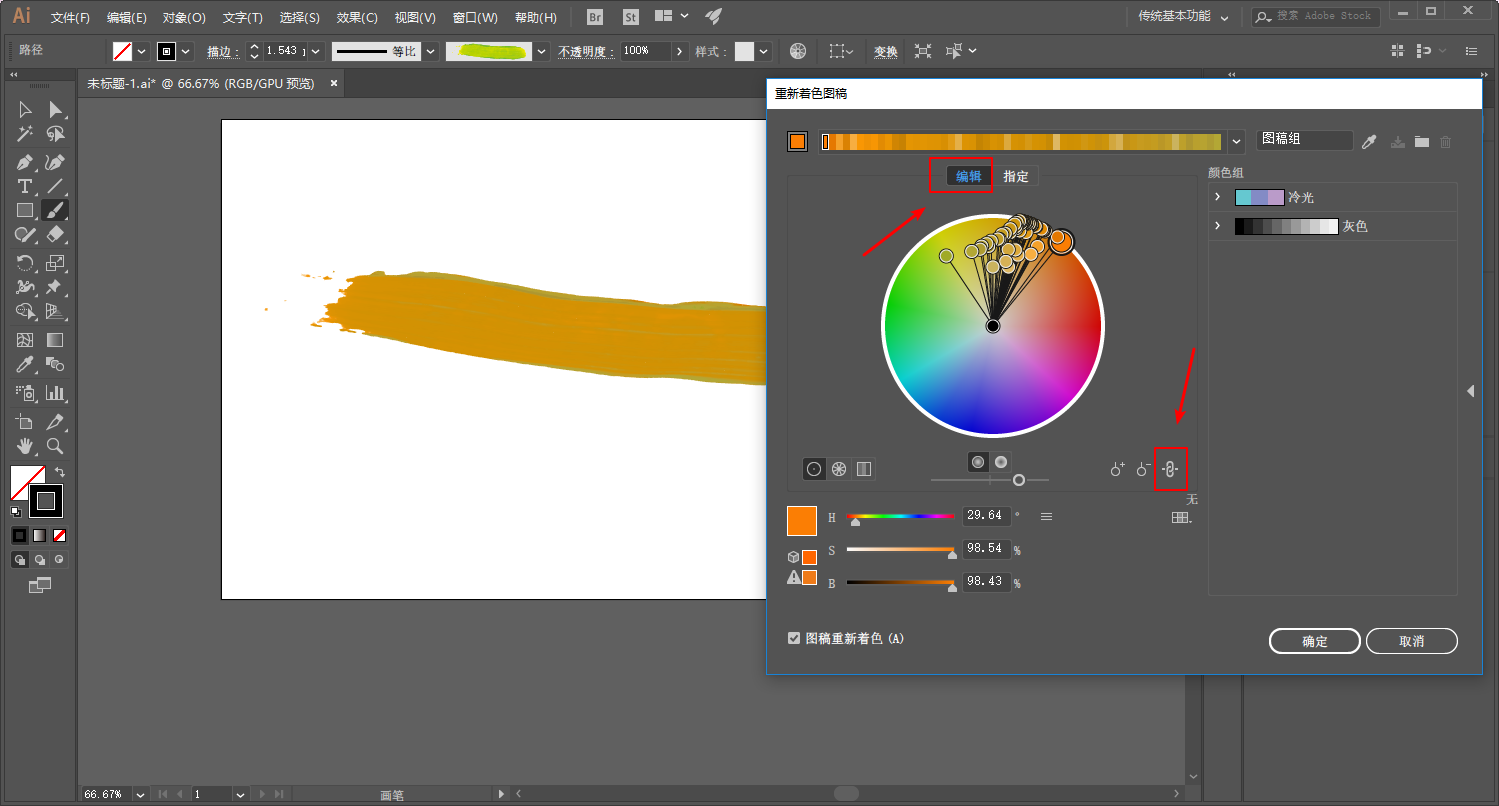
I will not change the color here, and export it directly as a png image:
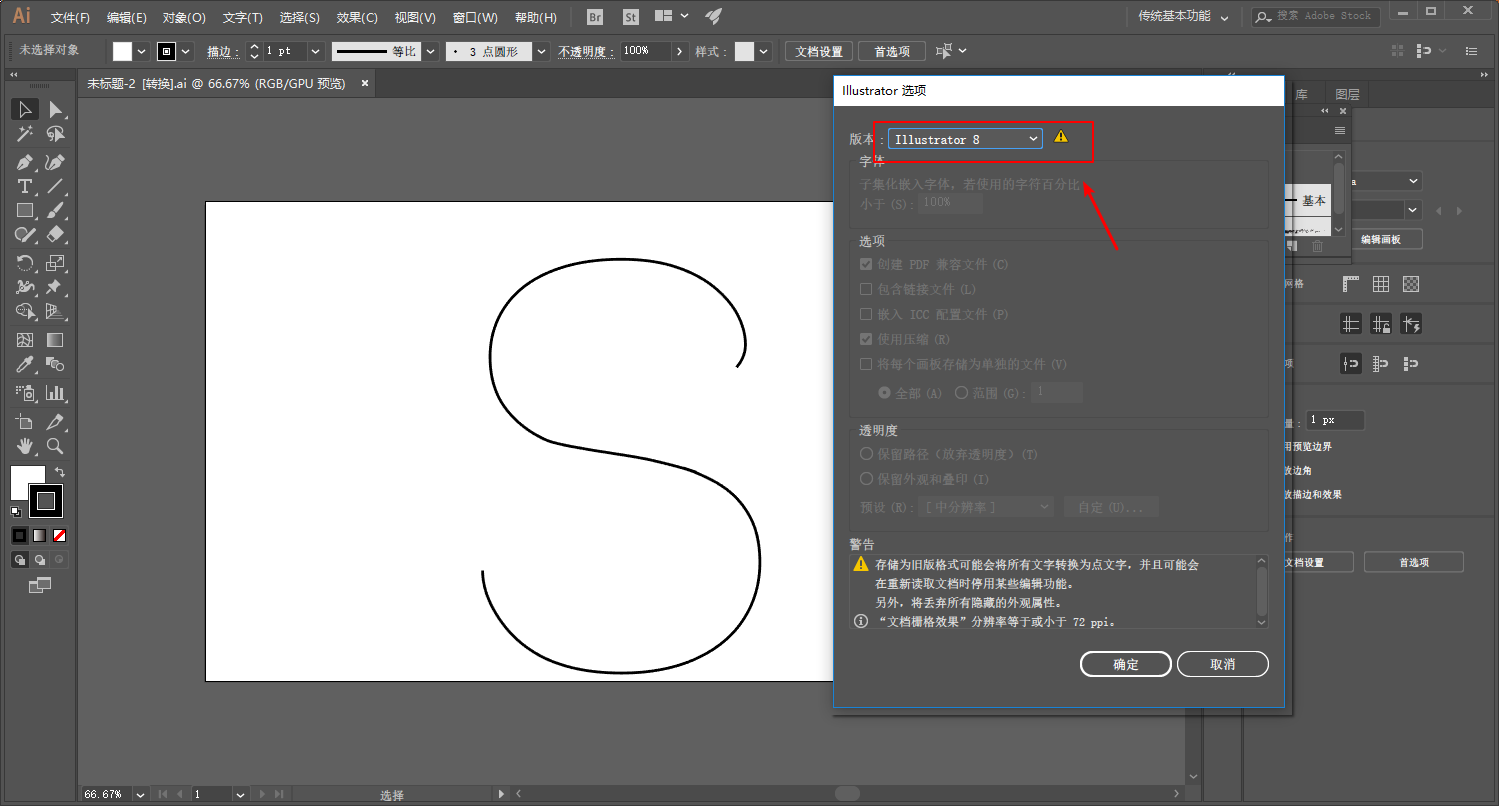
Since I am really not used to the pen tool of C4D, I made an additional path of a text S with Ai, and saved it as Ai 8, and then imported it into C4d:
After the preparations are done, open C4d and execute the file-merge object:
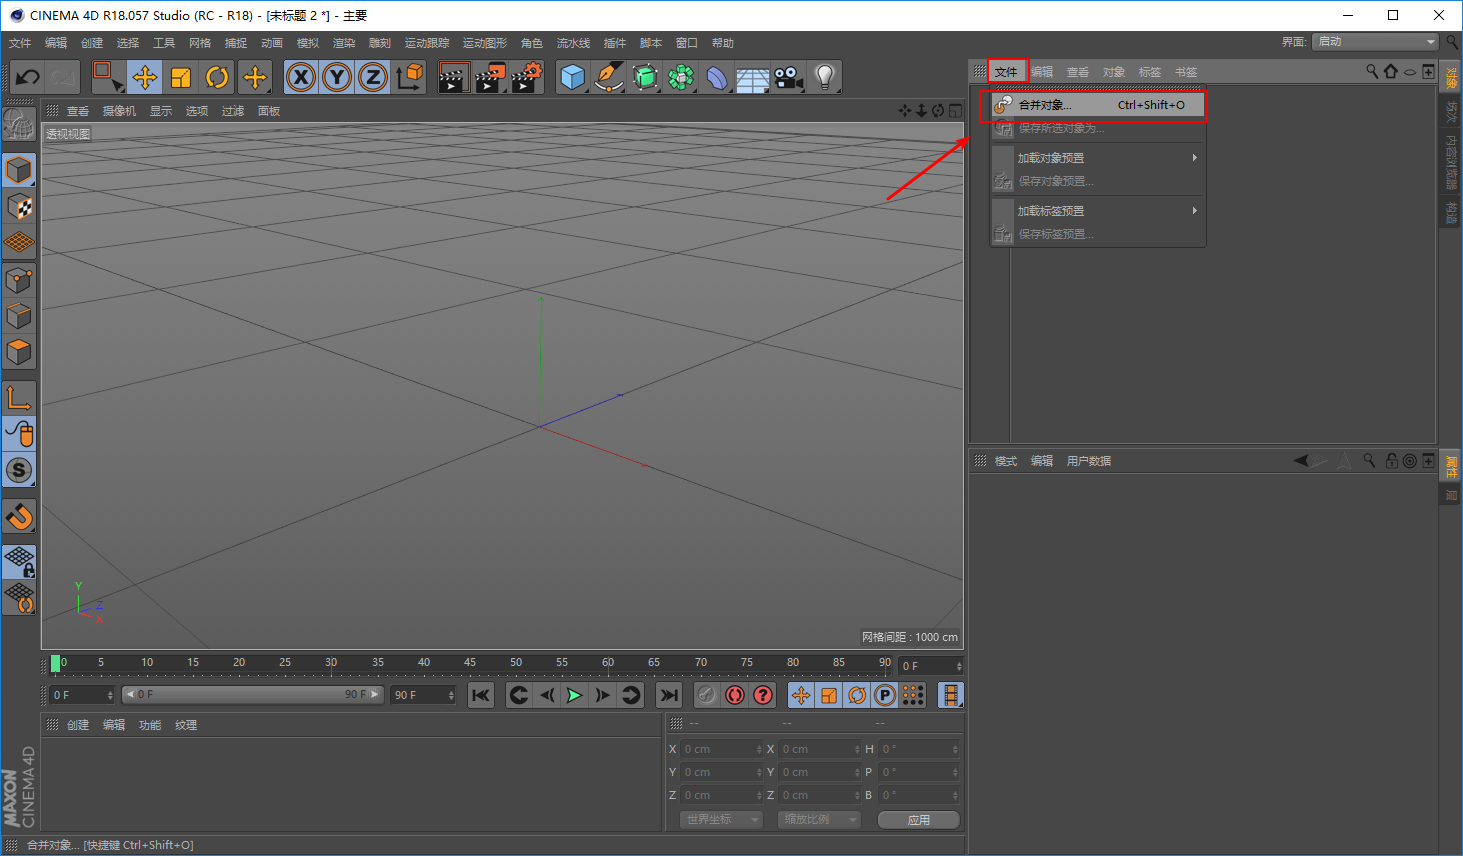
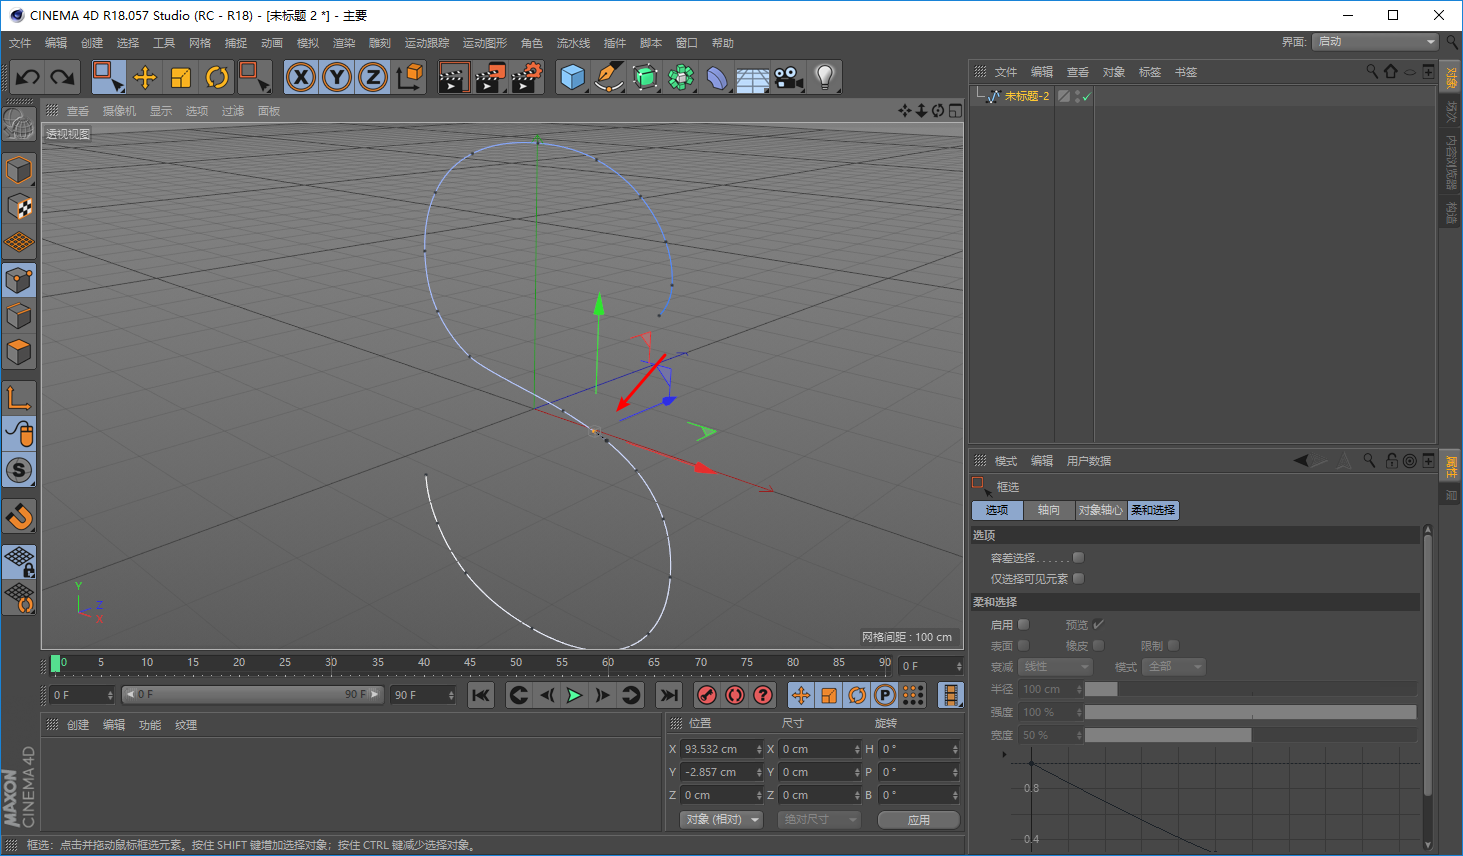
Import the path made with Ai:
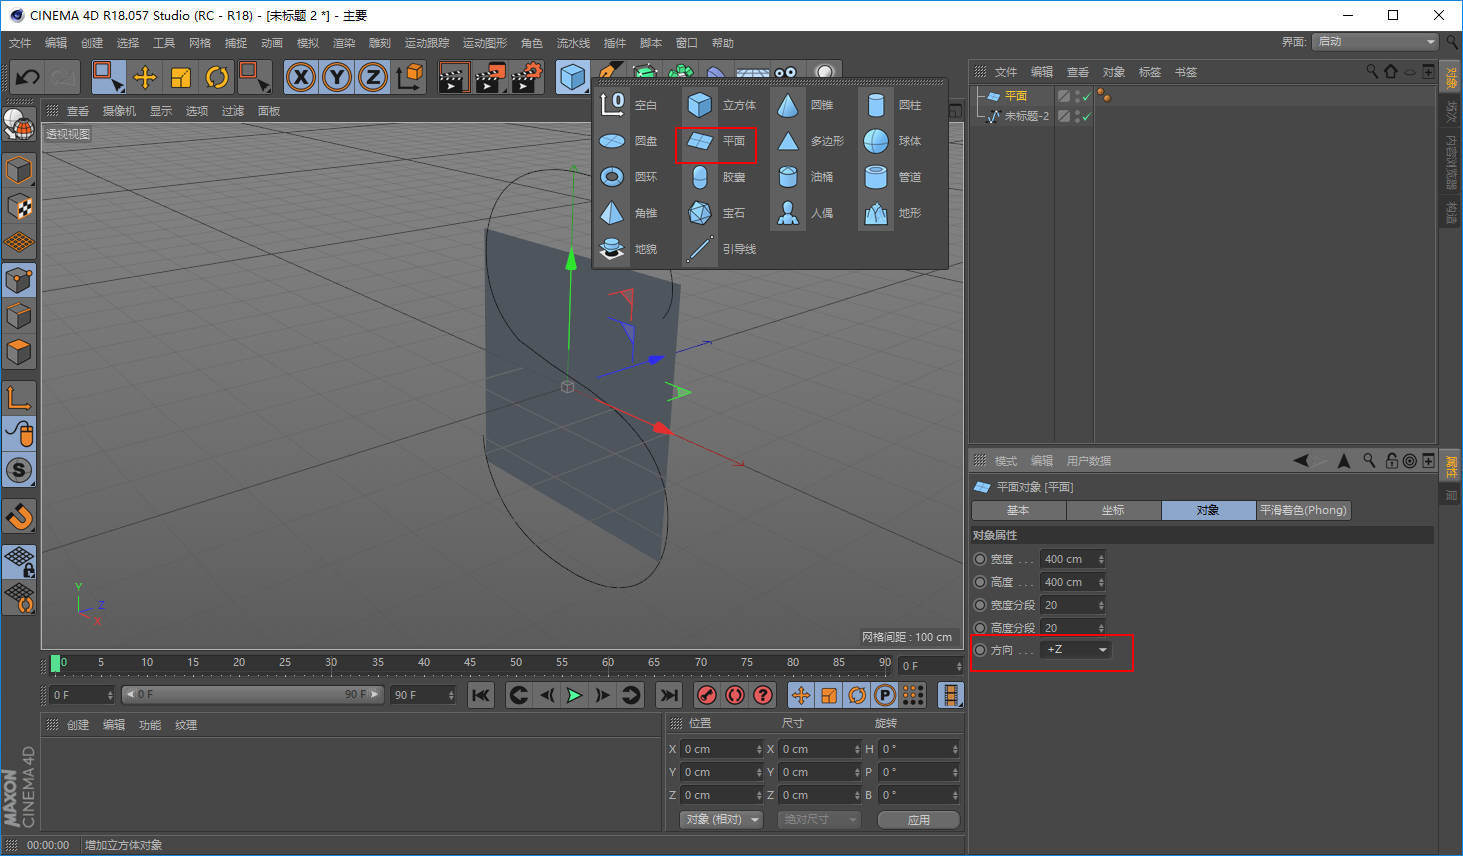
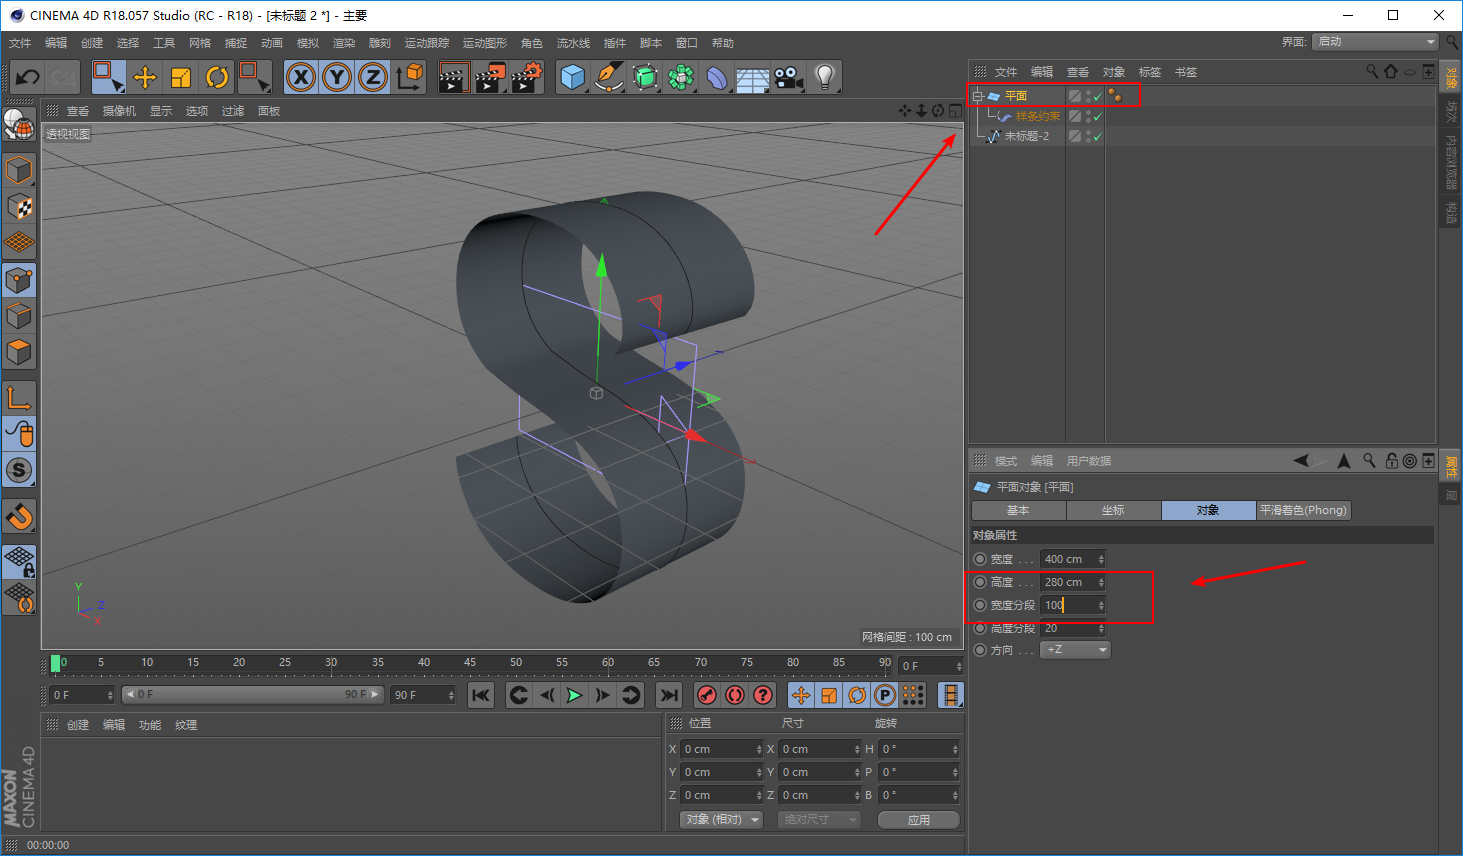
Create a new plane and change its orientation to the Z axis:
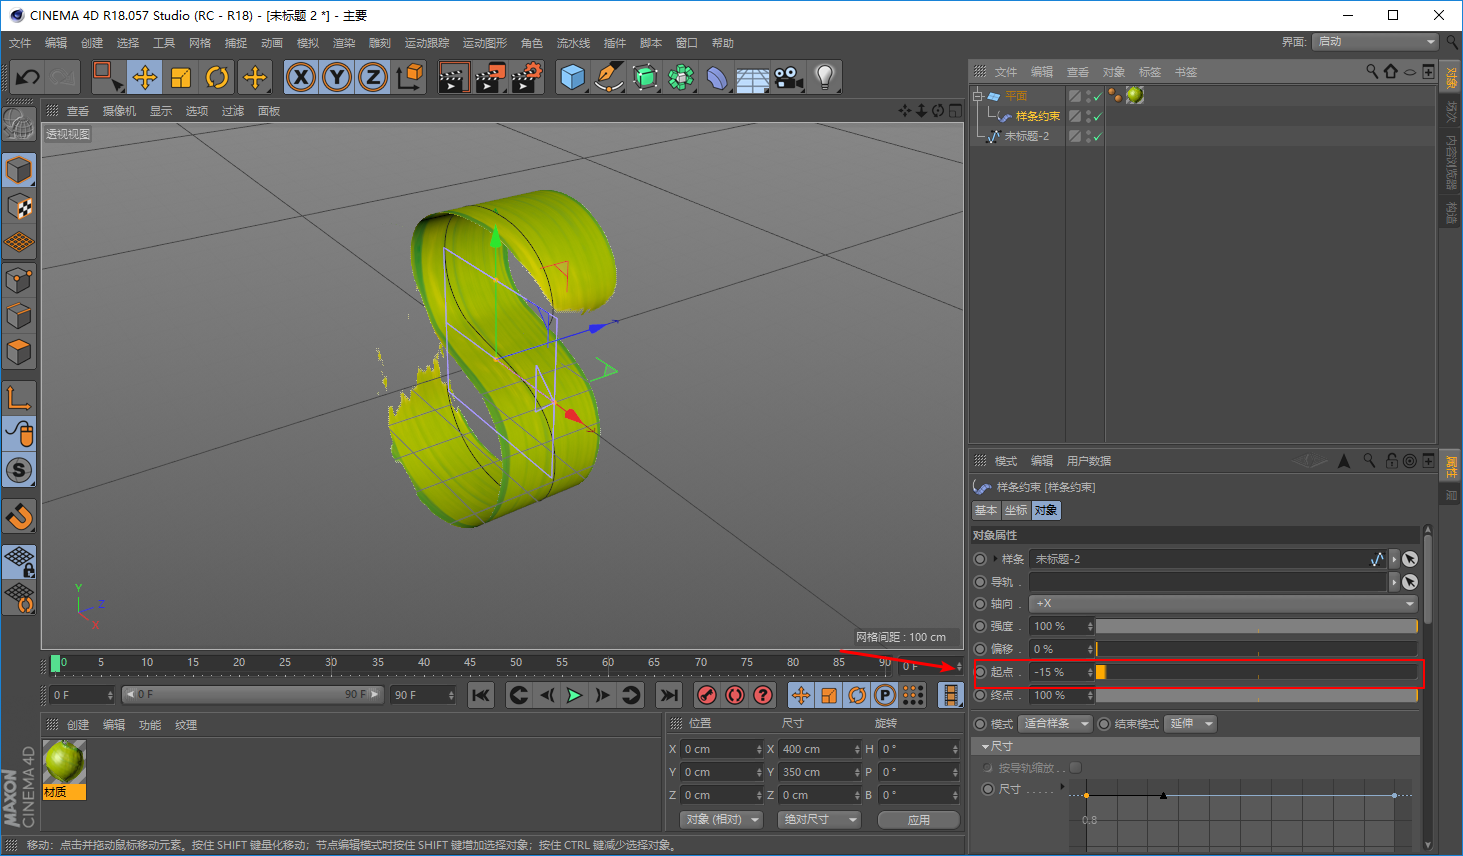
Create a new spline constraint, make it a subset of the plane according to the method we introduced before, and drag the spline to the position indicated by the arrow:
Then change the corresponding parameters of the plane and the segmentation to make it look smoother:
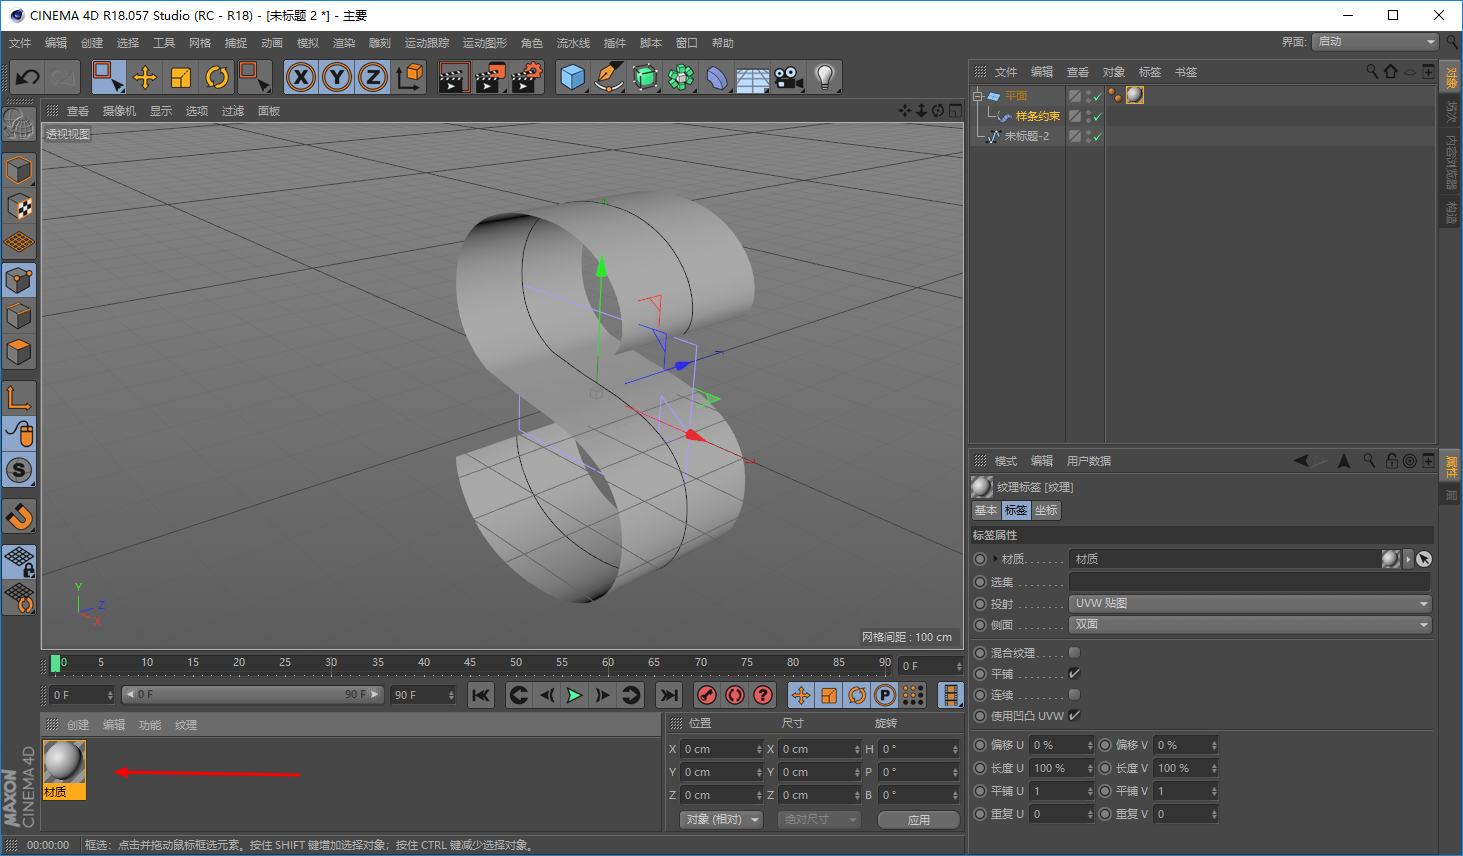
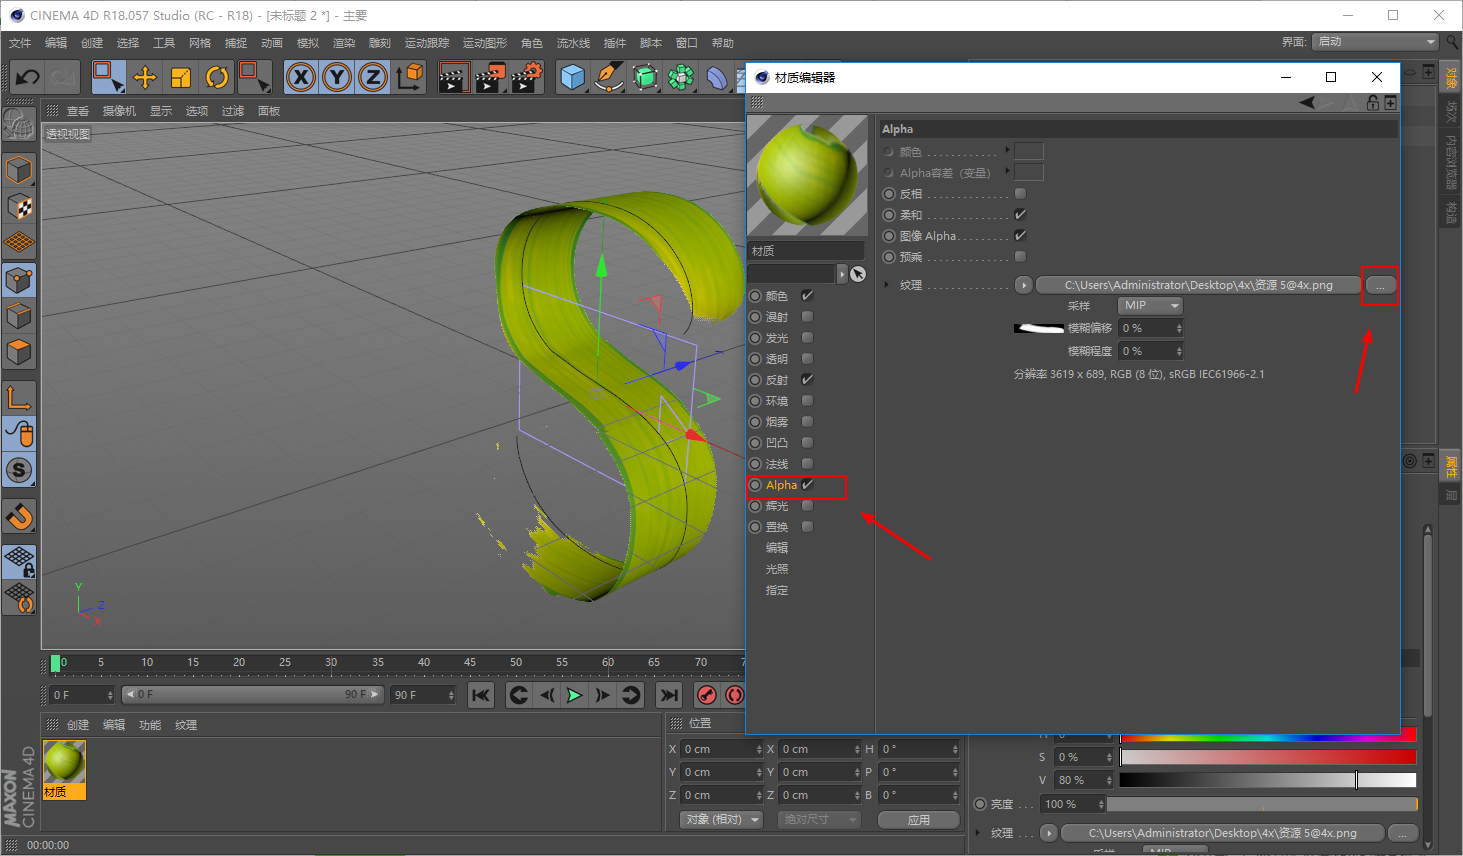
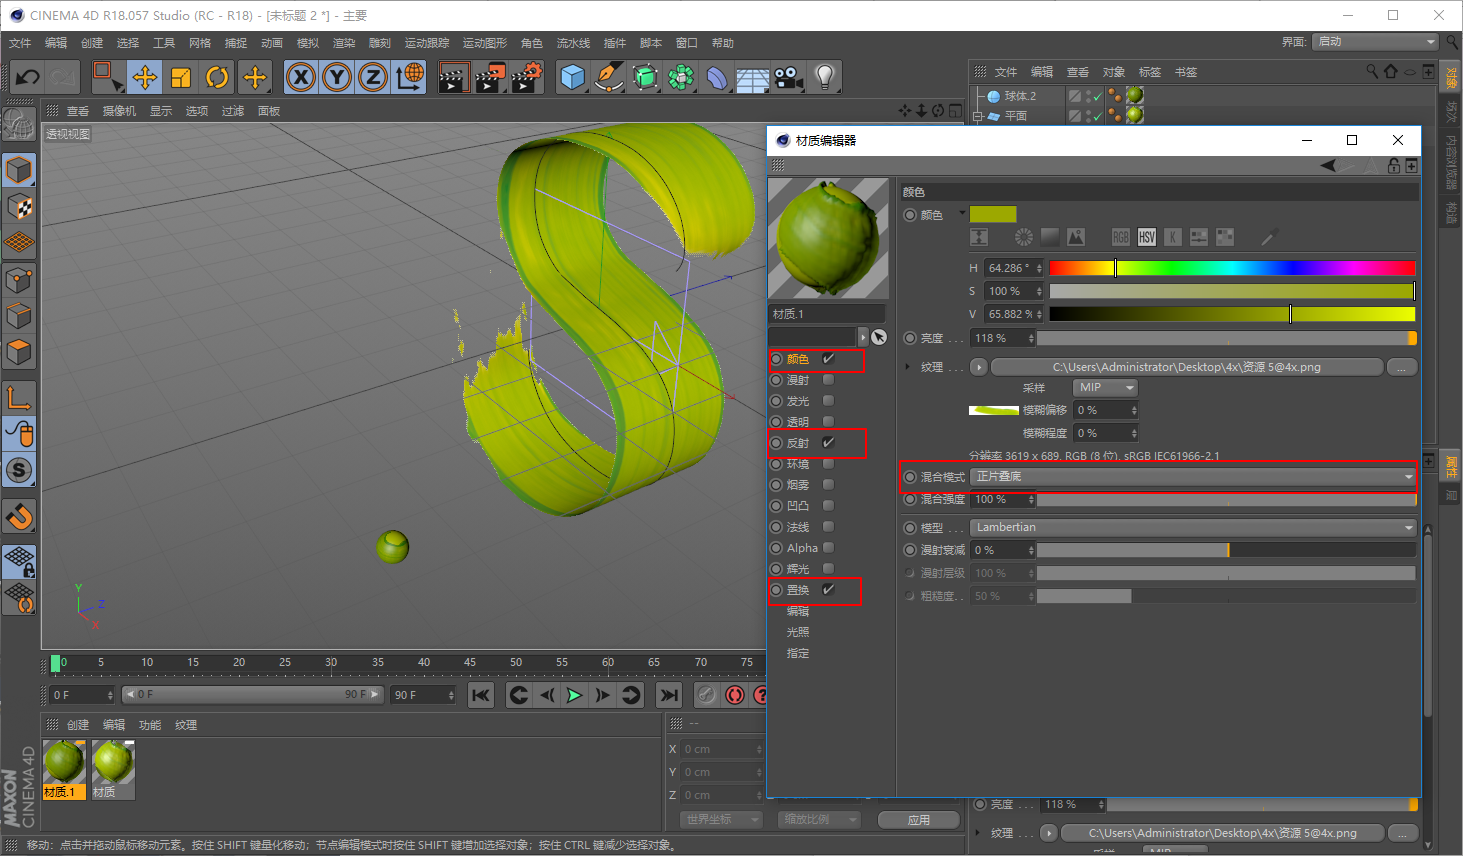
To create a new shader, first assign it to the object:
Double-click the shader ball, click the red box in the texture of the color channel to load the paint material map just made:
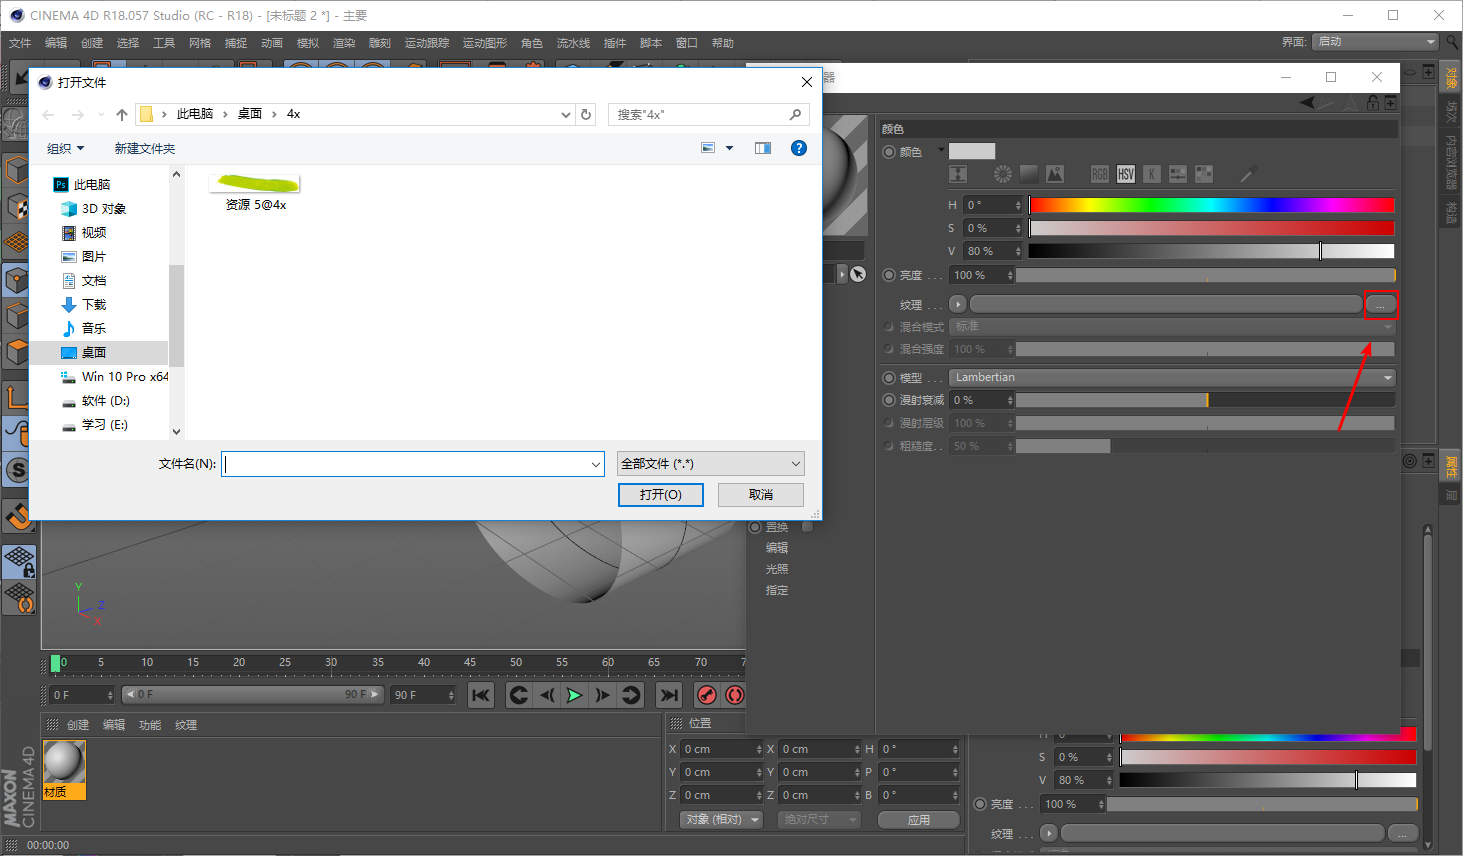
Just choose not to create a copy here:
Check the Alpha channel, and also load the png image:
Appropriately change the value in the reflection channel, and watch the material ball adjust:
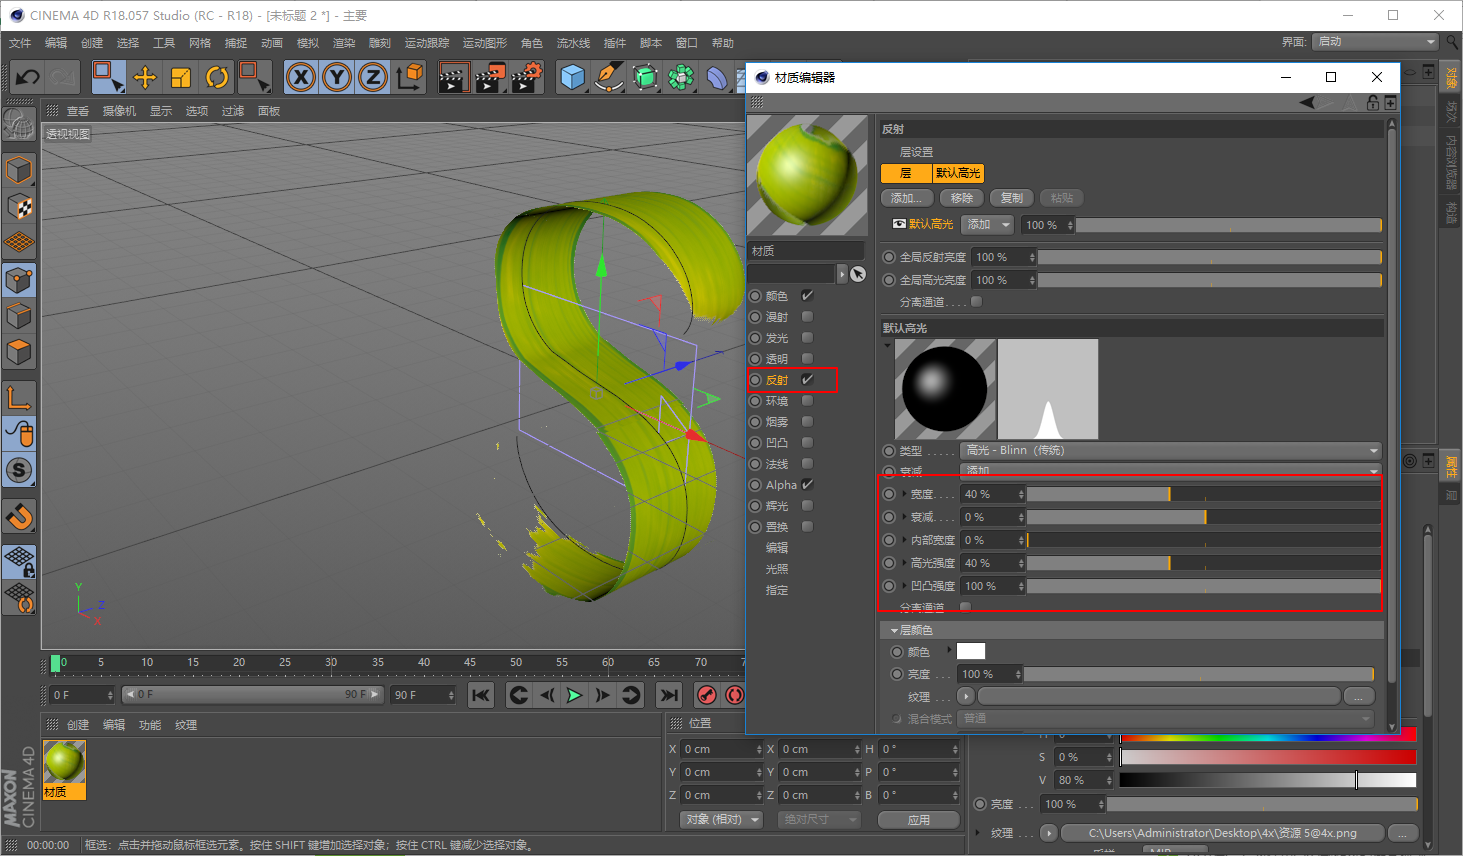
The material is also loaded in the displacement channel, so that it has a bumpy feeling, and the parameters are easy to follow:
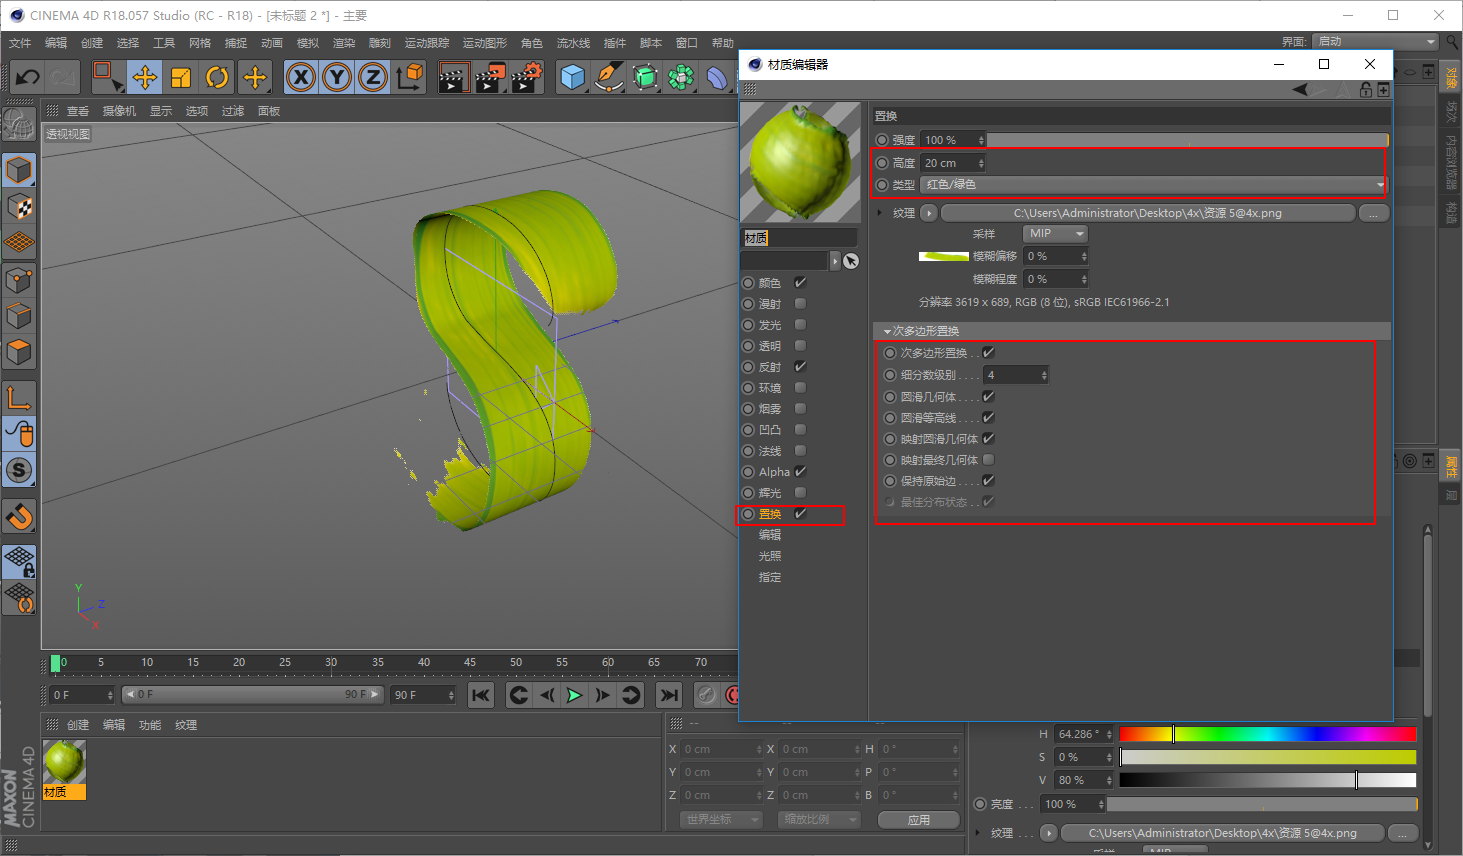
Next, slightly change the parameters in the spline constraint, I think it will be fine:
You can make another small ball like this for decoration, the parameters of the material can be figured out:
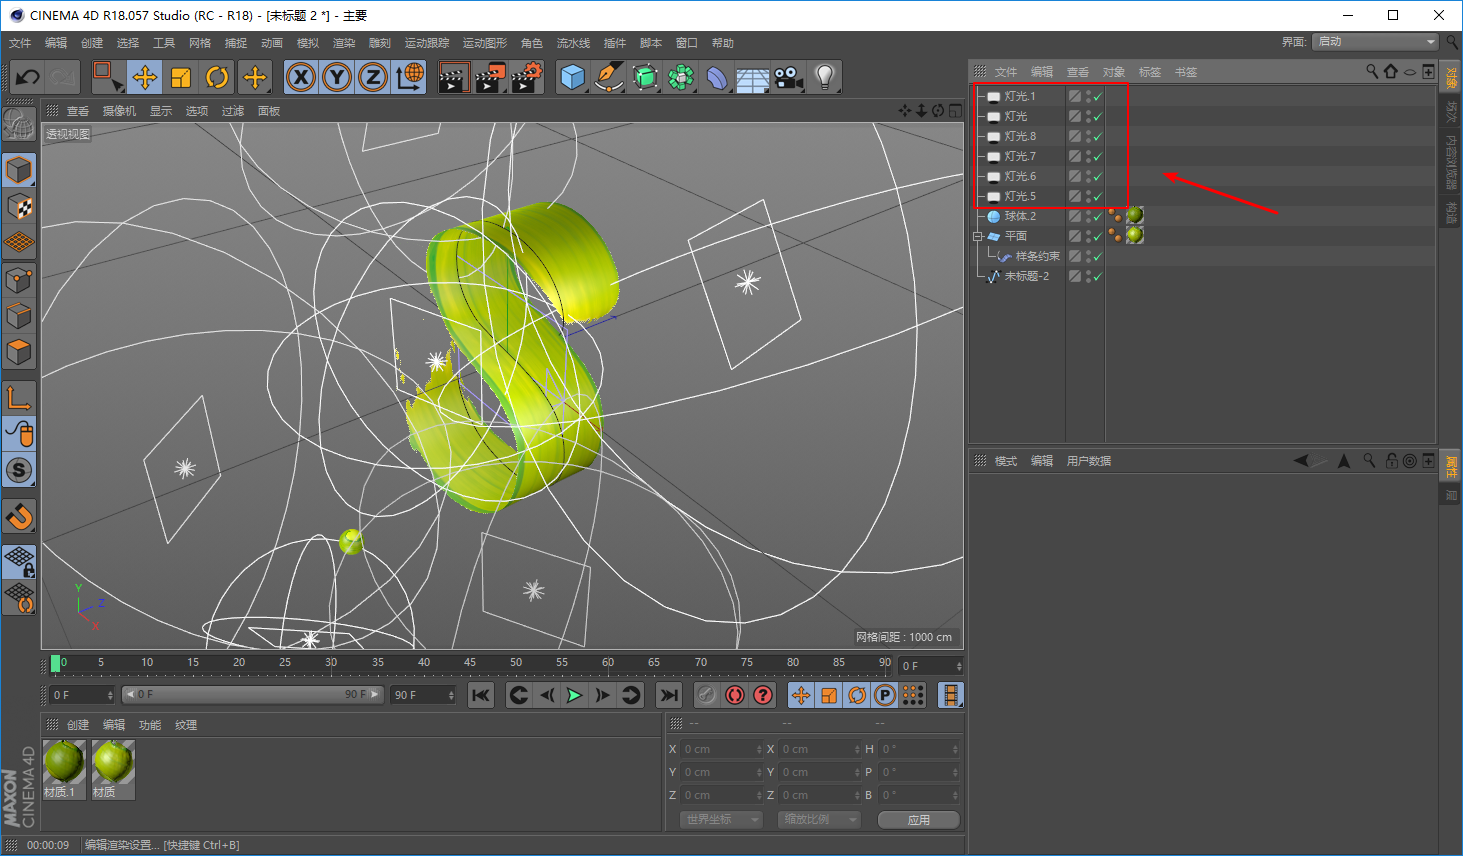
The next step is lighting. Everyone knows that I am not very good at lighting, so I won’t talk about how I did it here. Let’s see how it feels:
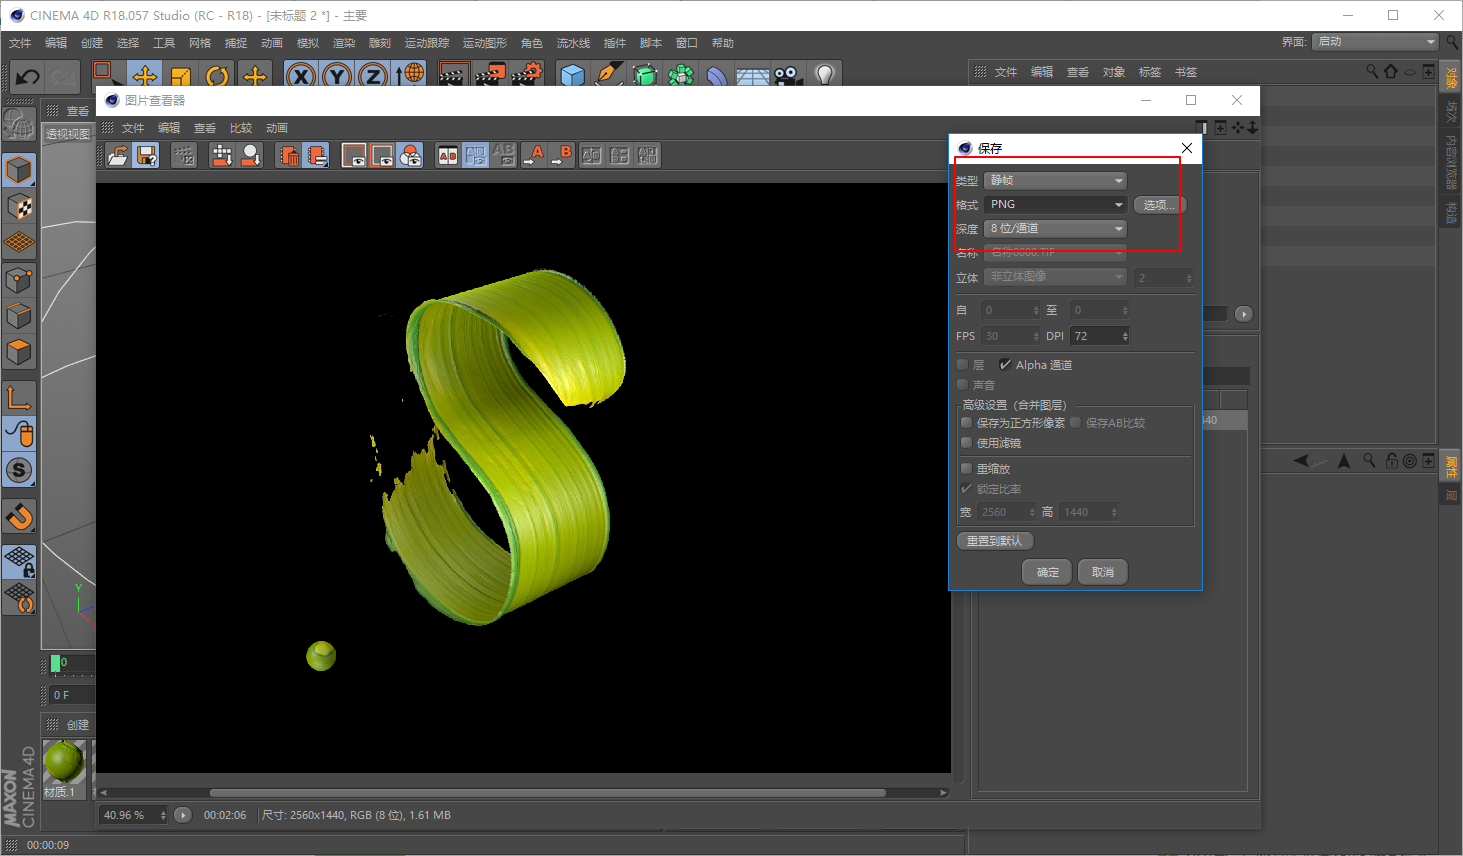
In the rendering settings, change the size in the output, remember to check the Alpha channel in the save, and then check the best in the anti-aliasing:
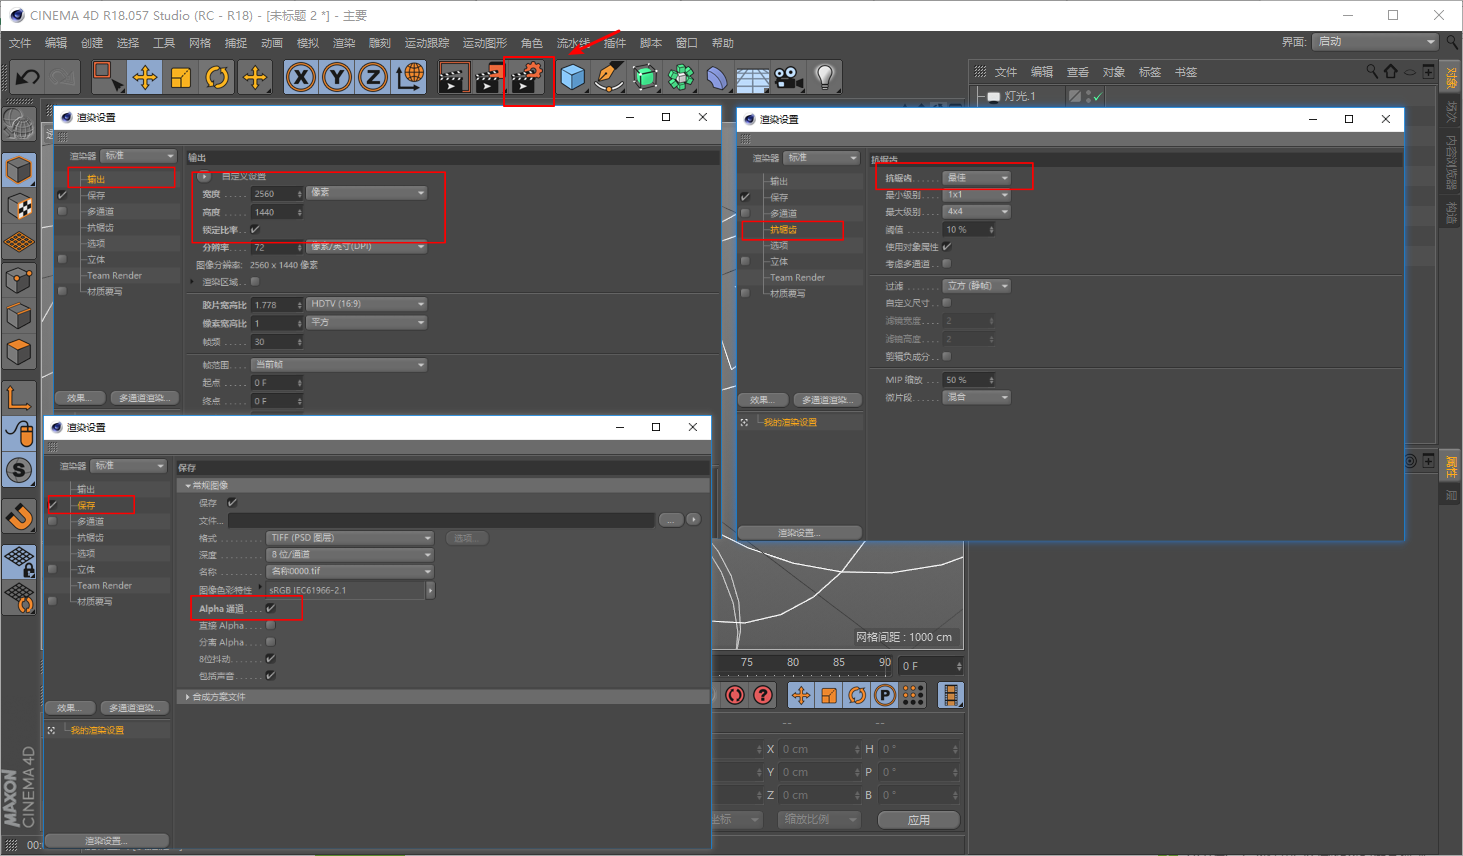
The rendered image is saved in Png format:
The next step is to operate in PS, first draw a shape like this:
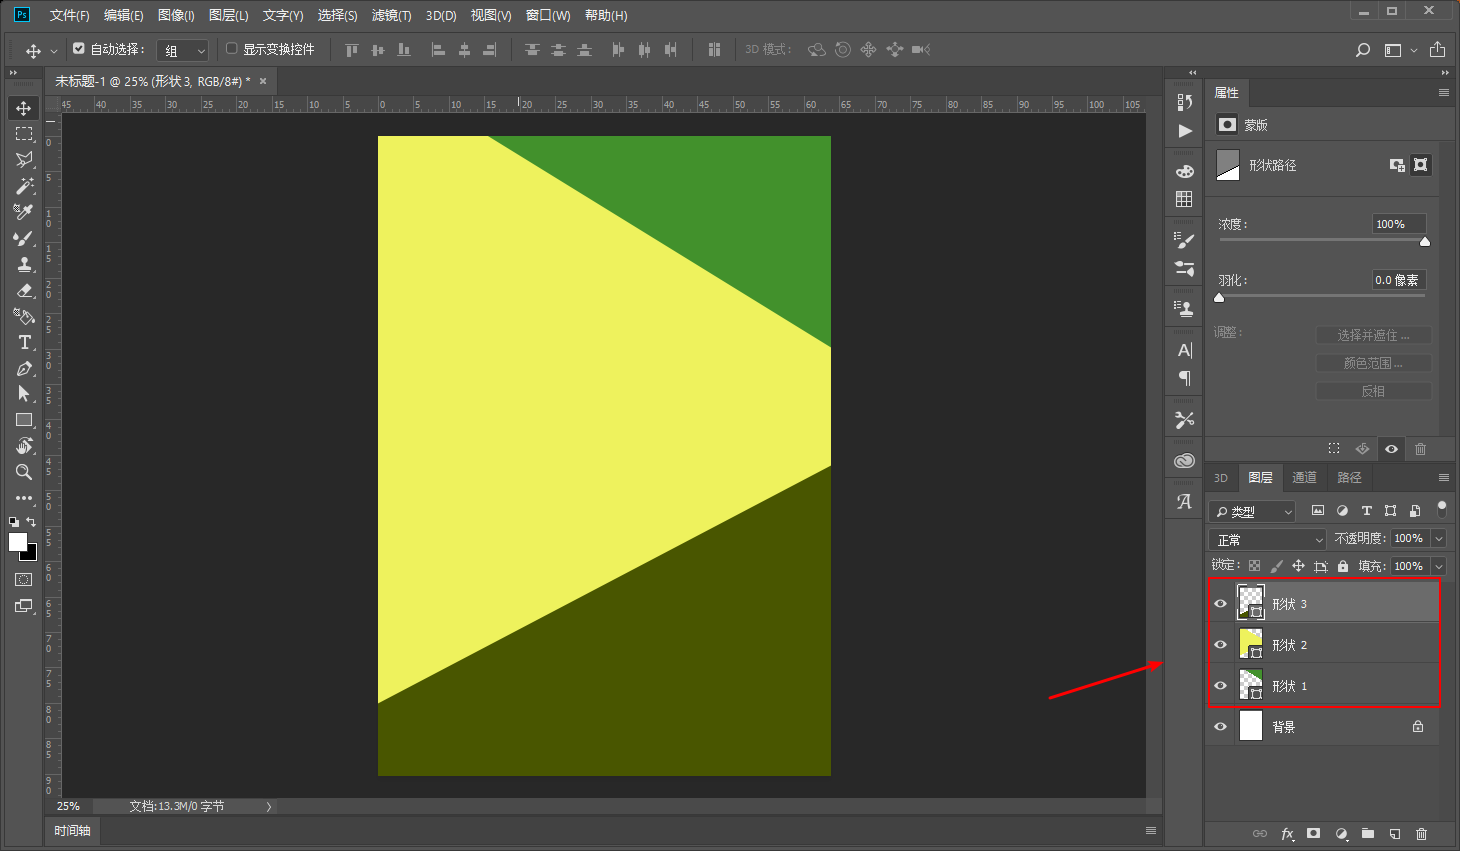
Put the letters and balls in the appropriate positions, this step needless to say:

Use a dark ellipse and Gaussian blur to make projections, this step does not need to be said:
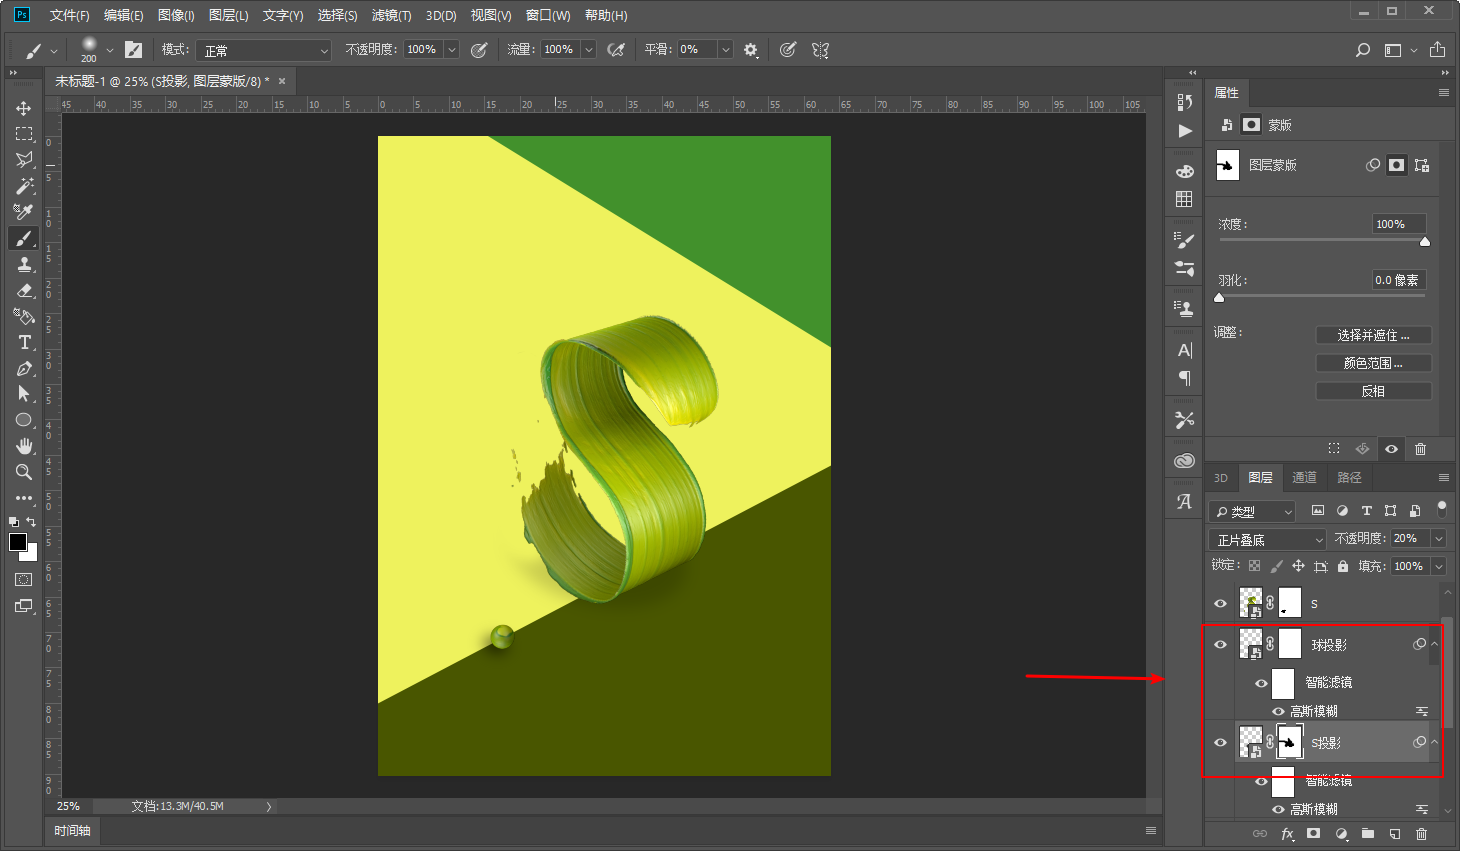
Make another projection decoration:
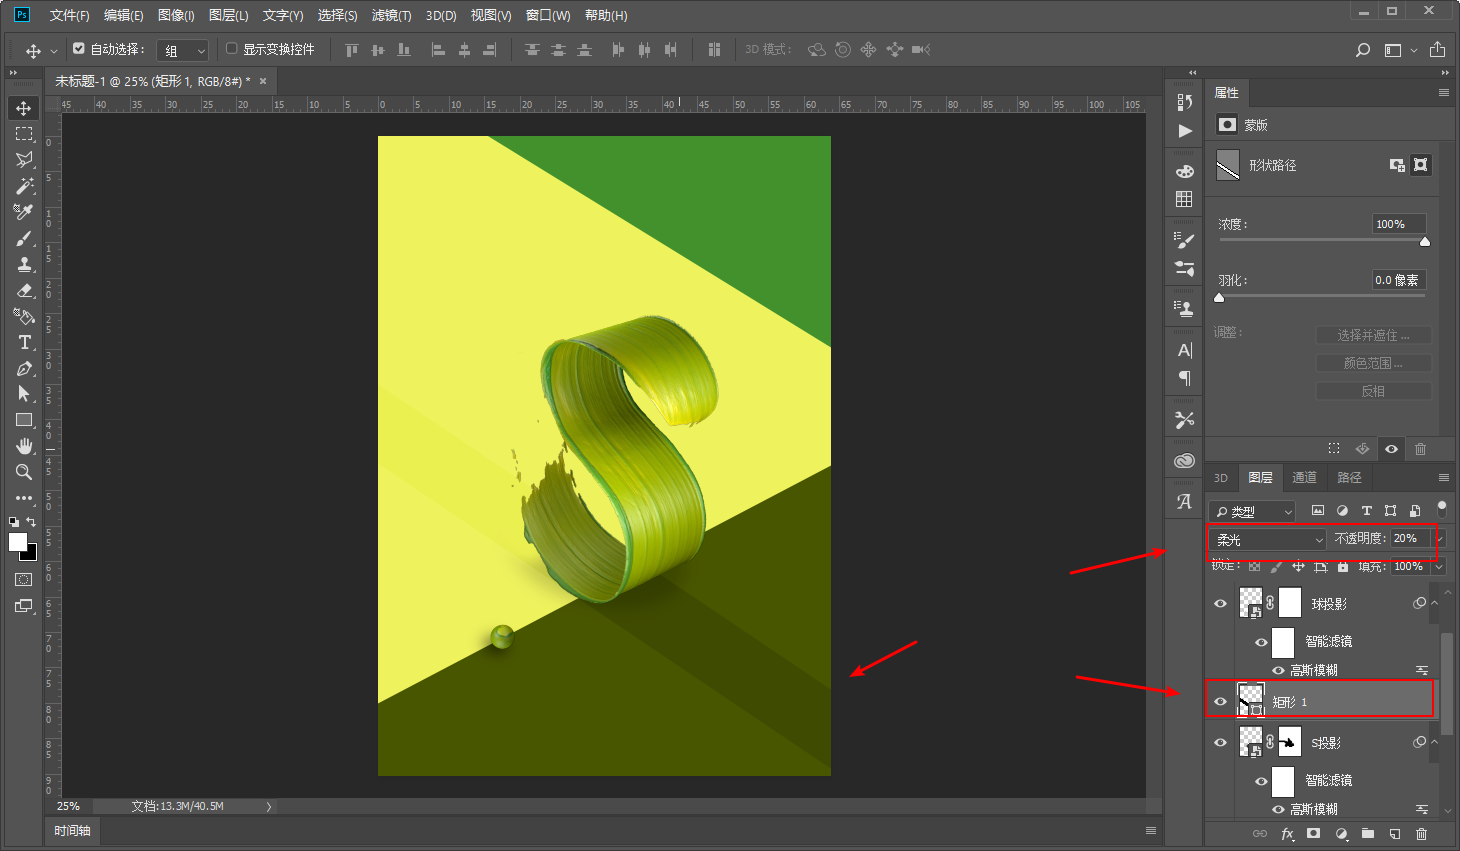
Color it to your liking:
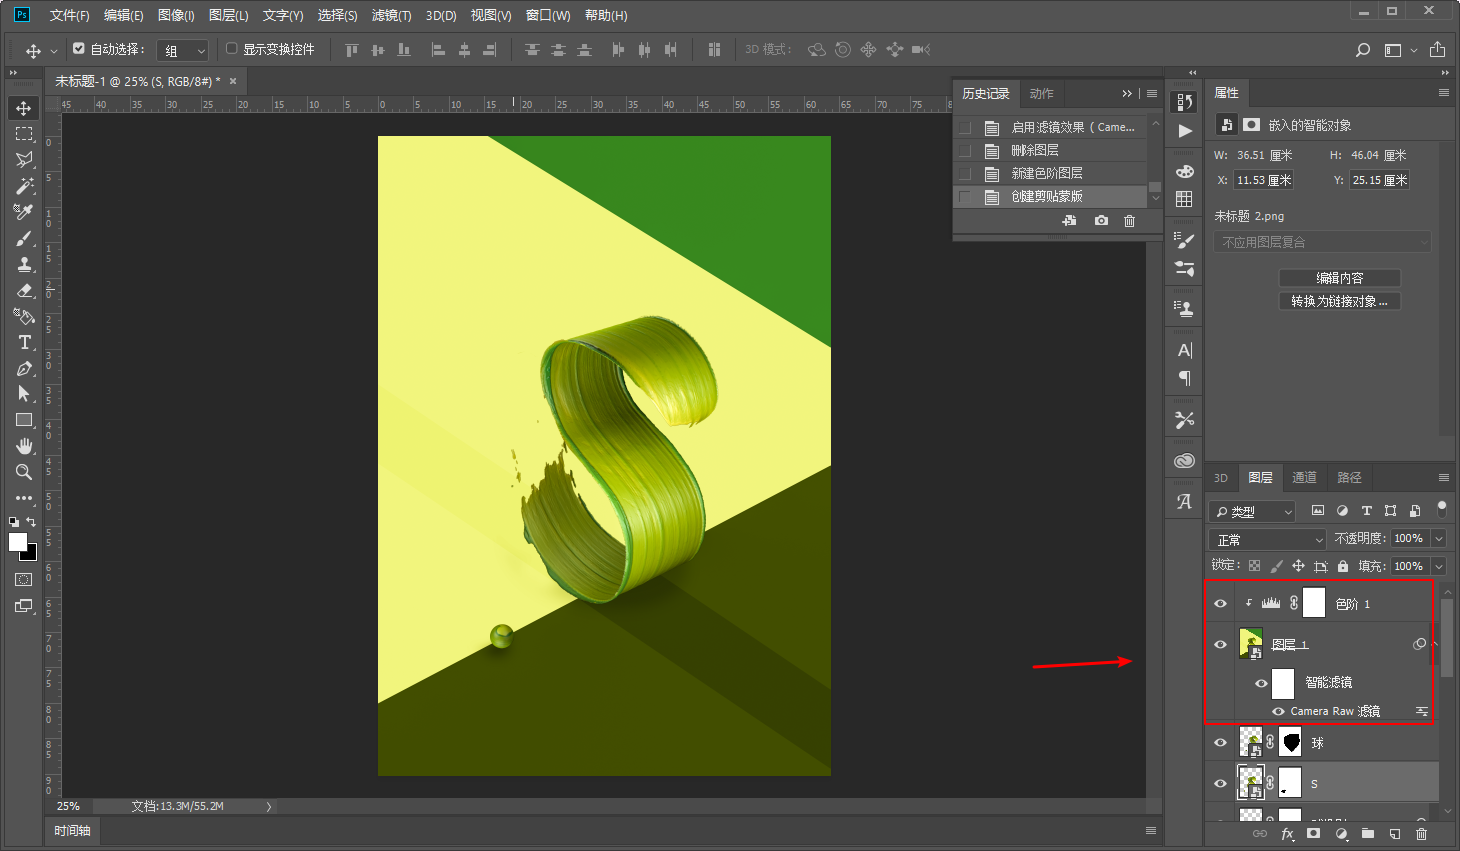
Finally, simply typesetting and exporting pictures to see the effect:
That's about it. I tried to use Ai's 3D textures to do it, but it was too stuck, so I might as well use C4D to do it.
Alright, that’s all for today’s sharing, if you want to practice, Tick me to get the brushes and source files!
This article was published by "Wild Deer"
Please contact the author "Red Deer Yelang" before reprinting
private transfer must be investigated

Keep Curiosity Keep Learning
Public account ID: yeluzhi666
WeChat ID: maluyelang666
Articles are uploaded by users and are for non-commercial browsing only. Posted by: Lomu, please indicate the source: https://www.daogebangong.com/en/articles/detail/C4D%20Wild%20TutorialHow%20to%20make%20the%20OPPO%20R15%20font.html
 支付宝扫一扫
评论列表(196条)
测试