Note: This tutorial is an English translation tutorial, friends who are not skilled in software operation, try it carefully. If there are deficiencies in translation, make up for it by yourself. Materials required: https://pan.baidu.com/s/1vcDdv7R0tXvEea3FQy3RKw Extraction code: 2fi5

1. Text settings
step 1
For this text effect, we'll use a cartoon style background. Start Adobe Photoshop, instead of creating a new document, open the background from the tutorial material.

step 2
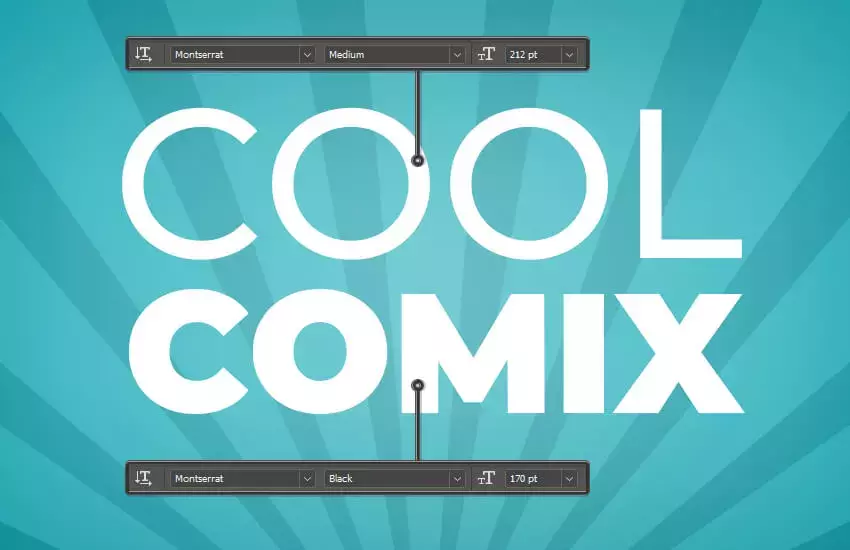
Take the Type Tool (T) and enter the word "COOL" using the Montserrat font at a size of 212 pt. Then, on a new layer, write the word "COMIX" in Montserrat Bold, 170 pt.
step 3
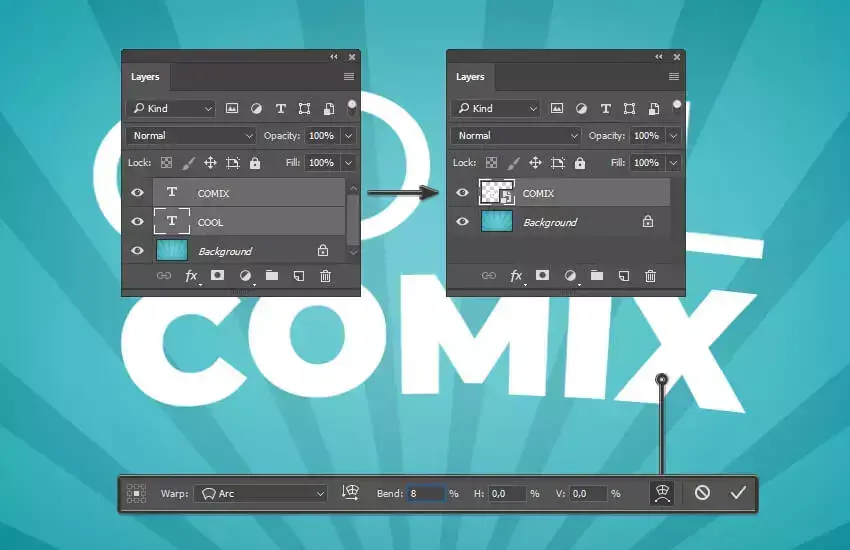
Select both text layers in the Layers panel and go to Layer > Smart Objects > Convert to Smart Object. Then go to Edit > Transform > Warp and select the arc, set the Bend to 8%. Submit the conversion.
Step 4
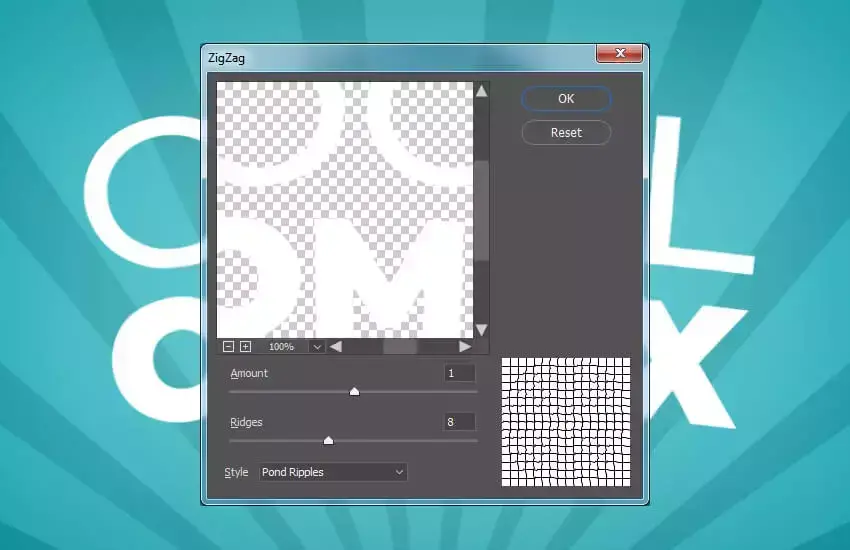
The last step before we start creating the 3D effect is to add filters. Go to Filter > Distort > Ripple and set the Amount to 1, the Relief to 8, and choose Style: Pool Ripple. Click OK.
2. Create 3D effects
step 1
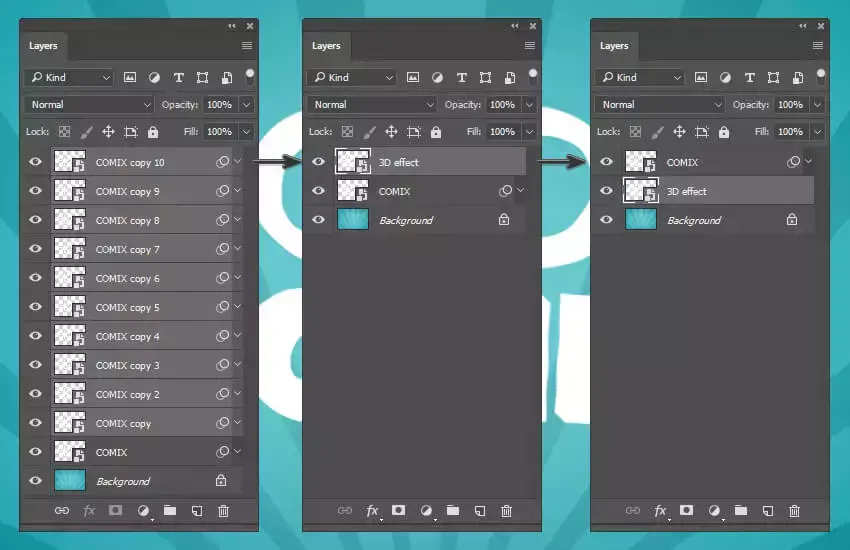
Now we will create 3D depth for the text effect by duplicating and moving the layer. Press Ctrl-J to duplicate the layer. Then use the Arrow keys Down (↓) and Right (→) to move this duplicate layer one at a time. Now repeat duplicating and moving the duplicated layers until you have created and moved ten copies of the original layer.
step 2
Select all duplicate layers in the Layers panel and go to Layer > Smart Objects > Convert to Smart Object. Change the layer name to 3D Effect, then go to Layer > Arrange > Send Backward.
3. Layer style
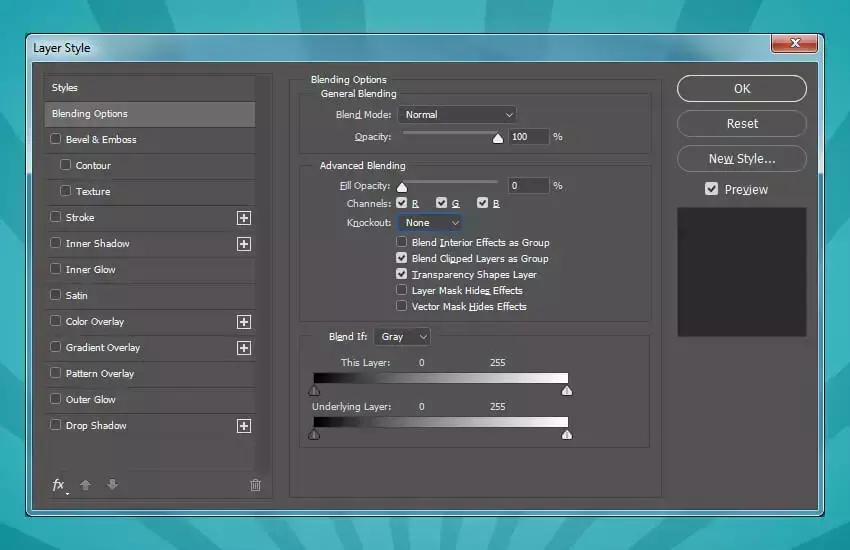
Select the "3D Effect" layer and go to Layer > Layer Style > Blending Options... to apply the following layer style.
In the Blending Options, set the Fill Opacity to 0%.
step 2
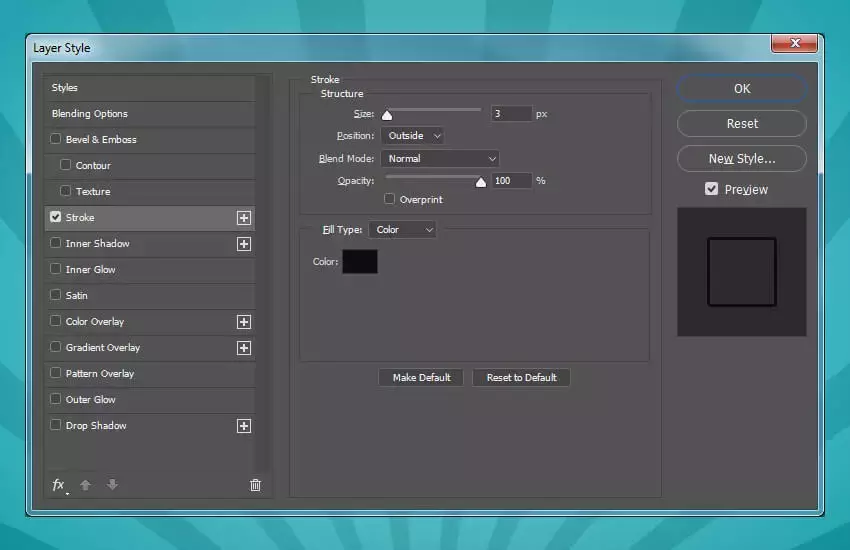
Add a brushstroke stroke to the text effect using the following settings:
- Size: 3px
- Position: Outside
- Color:
- #0d0d0d
step 3
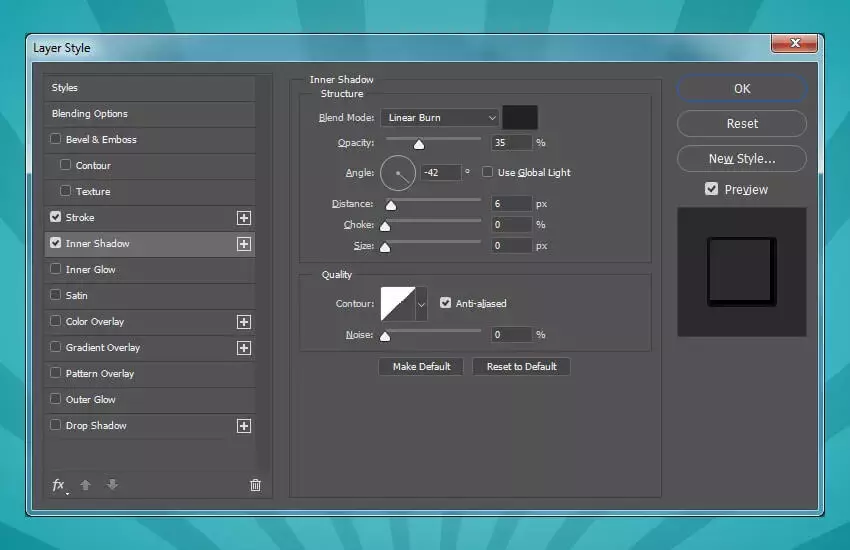
Add an inner shadow with the following settings:
- Blending Mode: Linear Dodge
- #222222
- Opacity: 35%
- Angle: -42°
- Distance: 6 px
- choke: 0%
- size: 0 px
- check anti-aliased box
Step 4
Add a pattern overlay with the following settings:
- Blending Mode: Normal
- Opacity: 100%
- pattern: cb-lines-1 (download from tutorial material)
- scale: 25%
Click OK to apply the layer style.
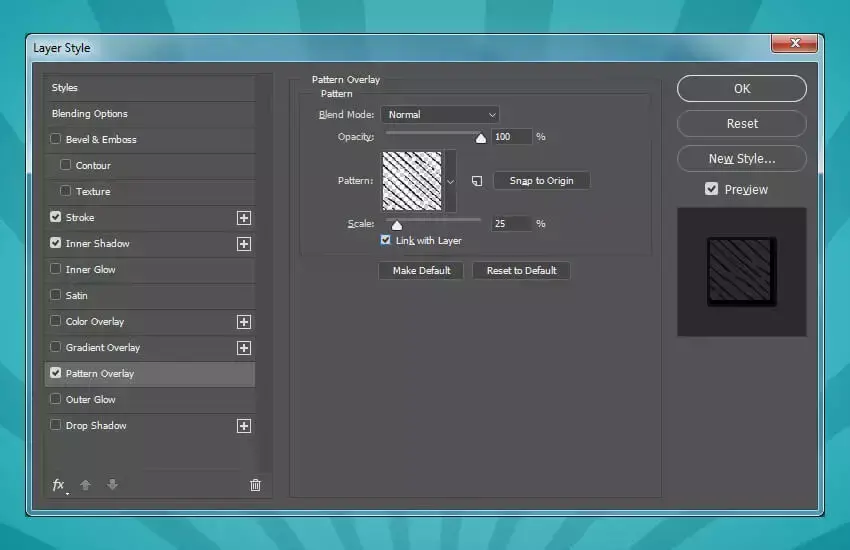
Now we've gone through the depths of creating and customizing 3D text effects.

4. Internal lines
step 1
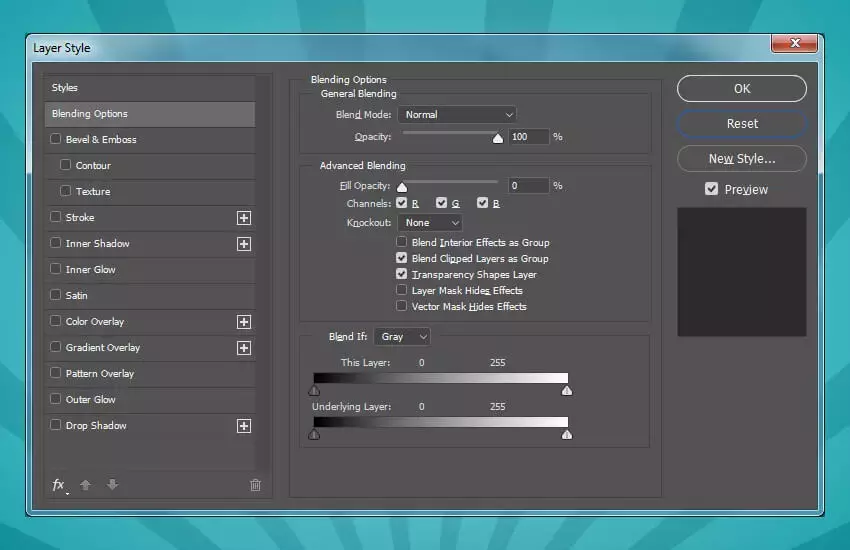
Select the "COMIX" layer and go to Layer > Duplicate Layer... and name it Interior Details. Then go to Layer > Layer Style > Blending Options... to apply the following layer style.
In the Blending Options, set the Fill Opacity to 0%.
step 2
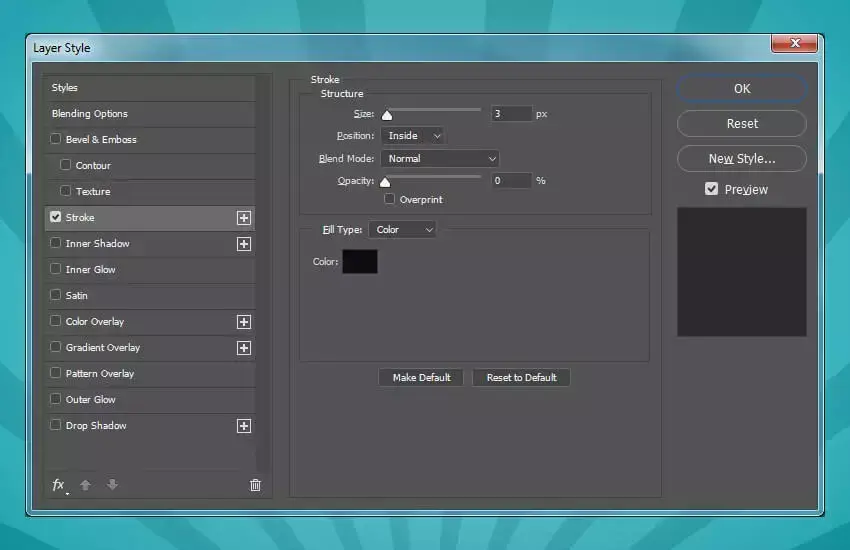
Add a stroke to this text effect with the following settings:
- Size: 3px
- Position: Inside
- Opacity: 0%
step 3
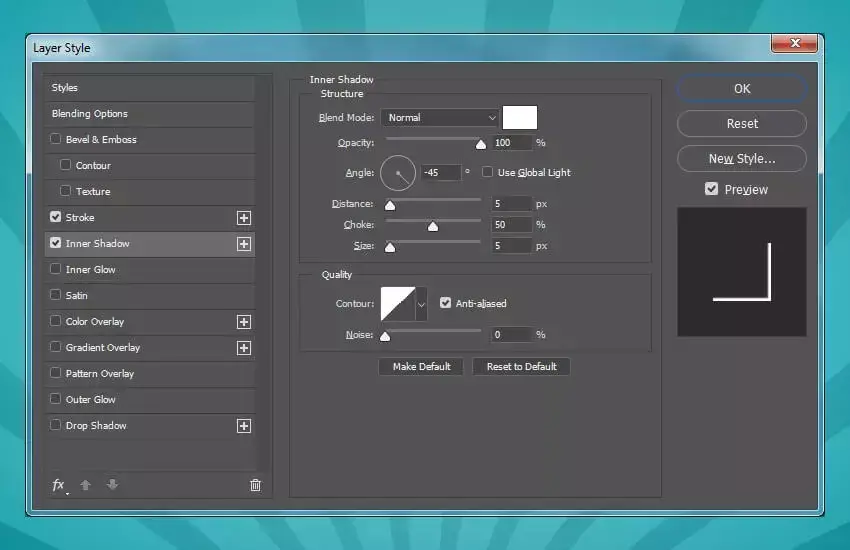
Add an inner shadow with the following settings:
- Blend Mode: Normal
- White
- Opacity: 100%
- Uncheck the Use Global Light box
- Angle: -45°
- Distance: 5 px
- Smoke: 50%
- Size: 5px
- Check anti-aliasing box
Click OK to apply the changes. Then go to Layer > Smart Objects > Convert to Smart Object.
Step 4
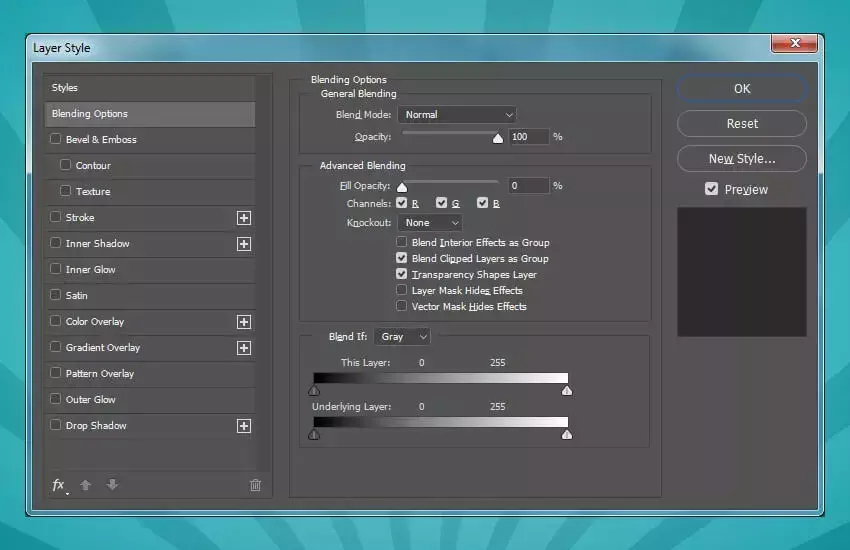
With the newly created Smart Object layer selected, go to Layer > Layer Style > Blending Options... again and apply the following Layer Style.
In the Blending Options, set the Fill Opacity to 0%.
Step 5
Use these settings to add a pattern overlay to complete the inner details of the text effect:
- Blending Mode: Normal
- Opacity: 100%
- pattern: cb-lines-1 (download from tutorial material)
- scale: 12%
Click OK to apply the layer style.
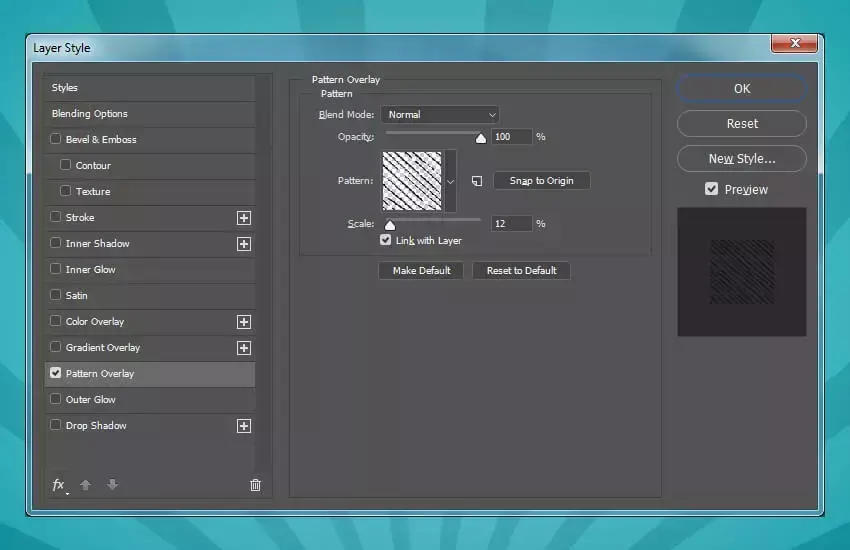
This is the result after applying all layer styles to this text effect.

5. Coloring
step 1
The last layer we need to customize for the text effect is the "COMIX" text layer. Select it and go to Layer > Layer Style > Blending Options... and apply the following layer style.
Add a stroke with the following settings:
- Size: 3px
- Position: Outside
- Color:
- #0d0d0d
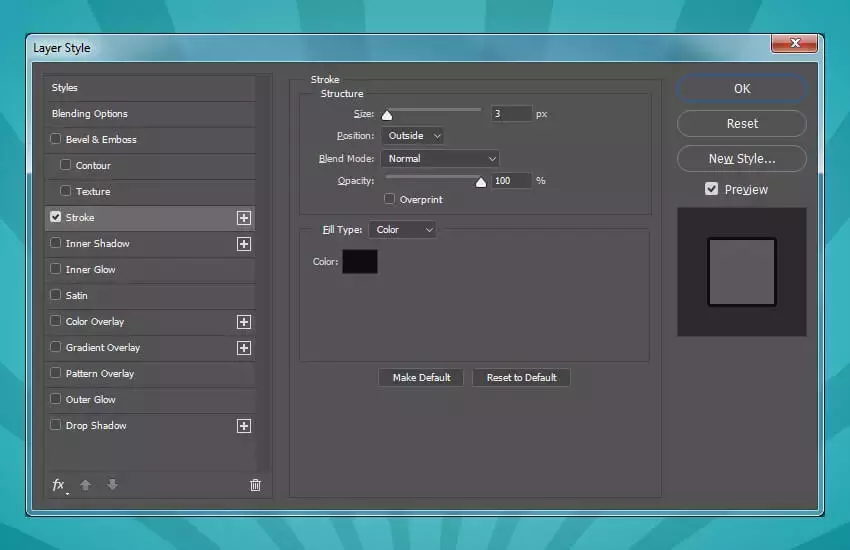
step 2
As the last step for this text effect, add a Color Overlay and choose the color #fcea00 . Click OK to apply the layer style.
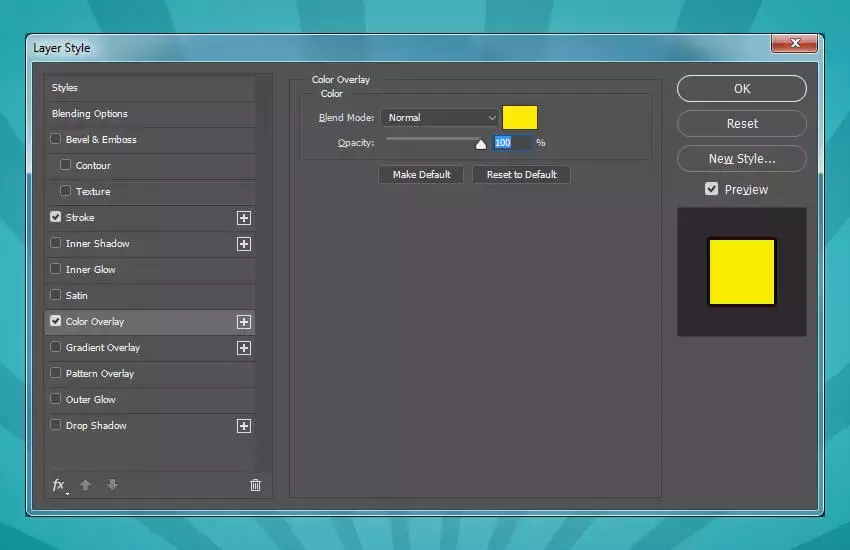
Finish!

Articles are uploaded by users and are for non-commercial browsing only. Posted by: Lomu, please indicate the source: https://www.daogebangong.com/en/articles/detail/Anime%20Text%20Effect%20PS%20Tutorial.html

 支付宝扫一扫
评论列表(196条)
测试