Note: This tutorial is an English translation tutorial, for those who are not skilled in software operation Friends, try it with caution. Please make up for the deficiencies in translation by yourself.

1 .Create pattern brush
Step 1
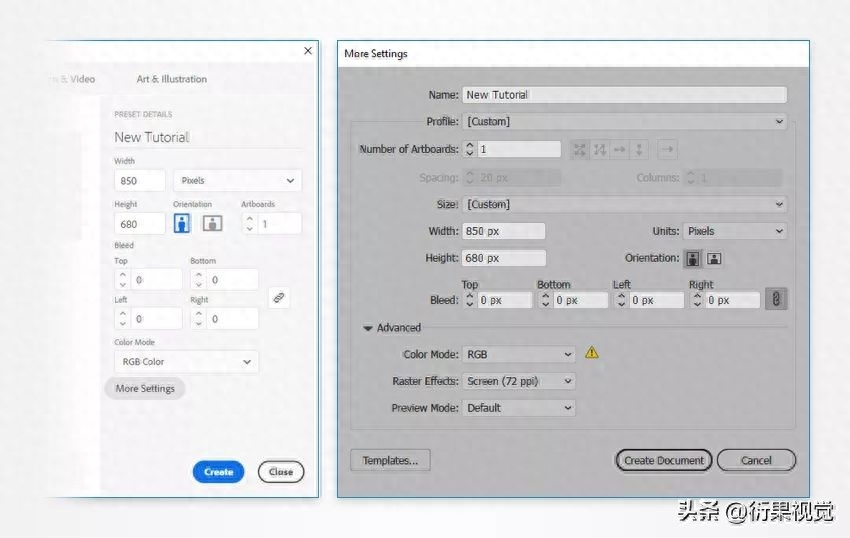
Press Ctrl-N Create a new document. Select Pixels from the Units drop-down menu, enter 850 in the Width box and 680 in the Height box, and click the More Settings button. Select RGB for Color Mode, set Raster Effect to Screen (72 ppi), and click the Create Document button.
Step 2< /span>
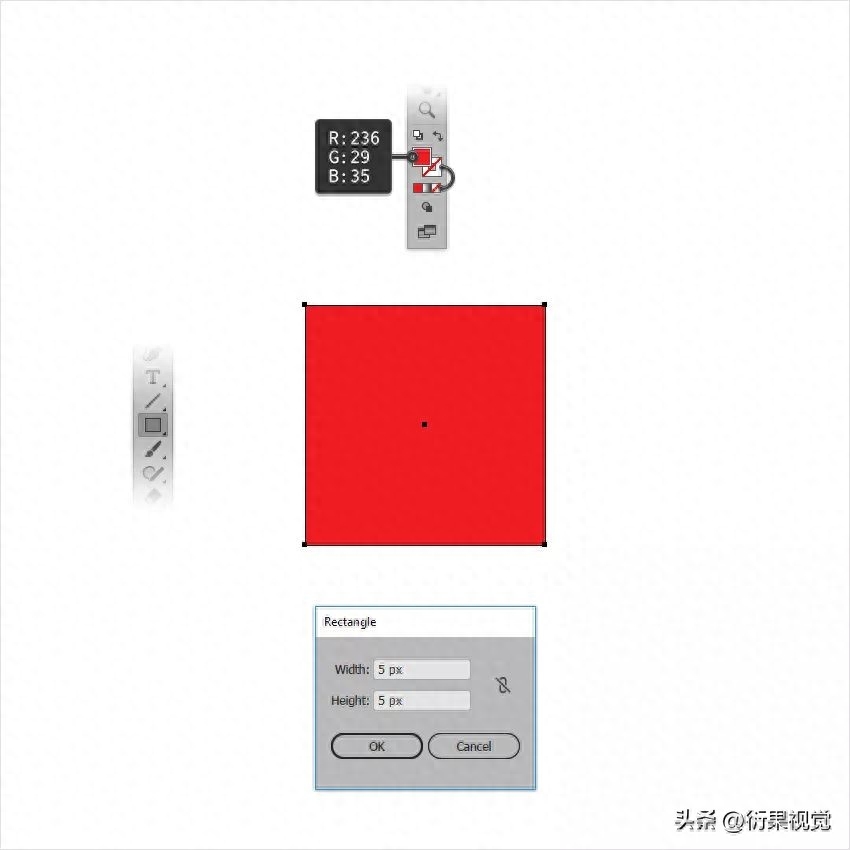
Select the Rectangle Tool ( M) and put focus on the toolbar. Remove the color from the stroke, then select the fill and set its color to R=236 G=29 B=35. Simply click on your artboard to open the Rectangle window. Set both the width and height to 5 px and click the OK button to create a 5 px square.
Step 3< /span>
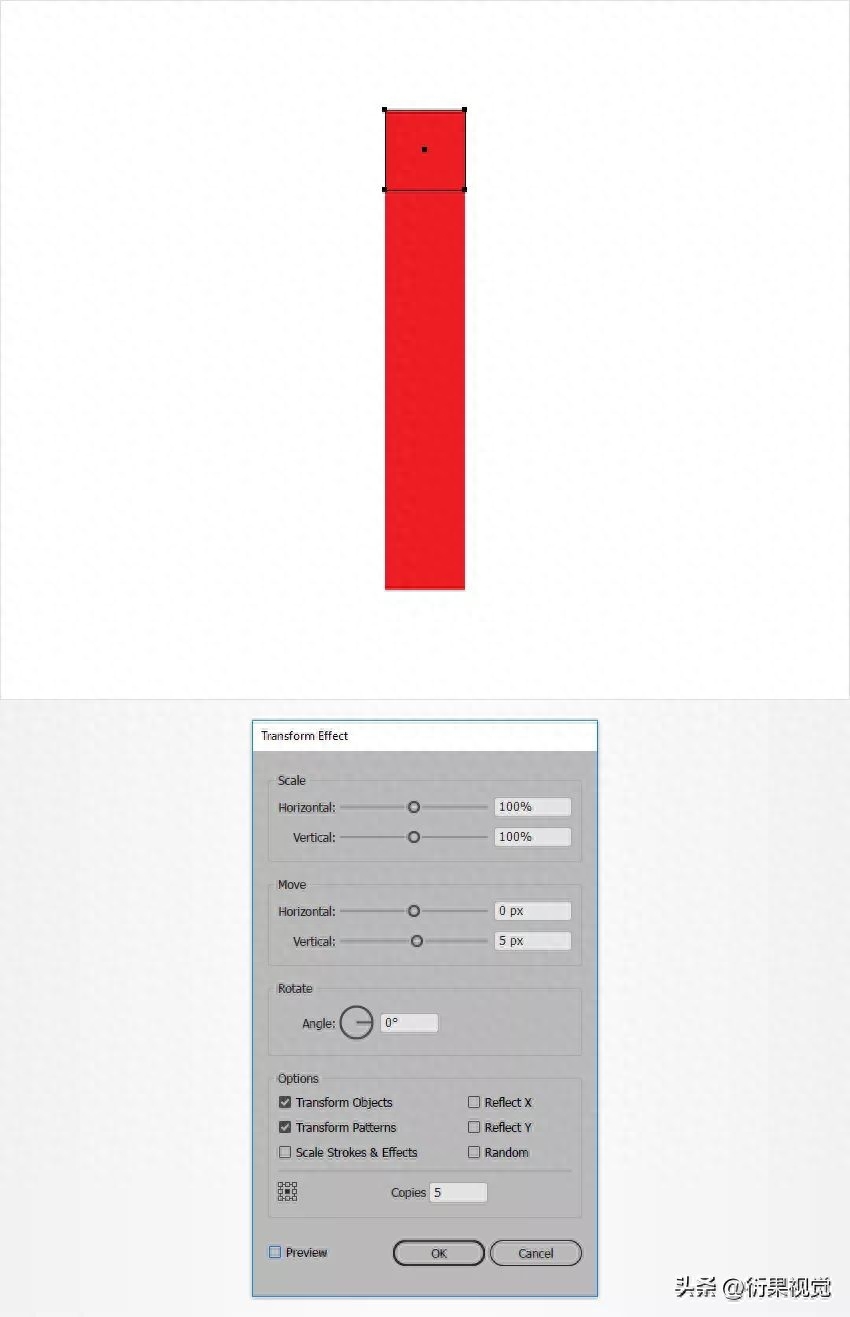
Make sure the square is selected , then go to Effects > Distort & Transform > Transform. Drag the Move - Vertical slider to 5 px, enter 5 in the Copy box, and click the OK button.
Step 4< /span>
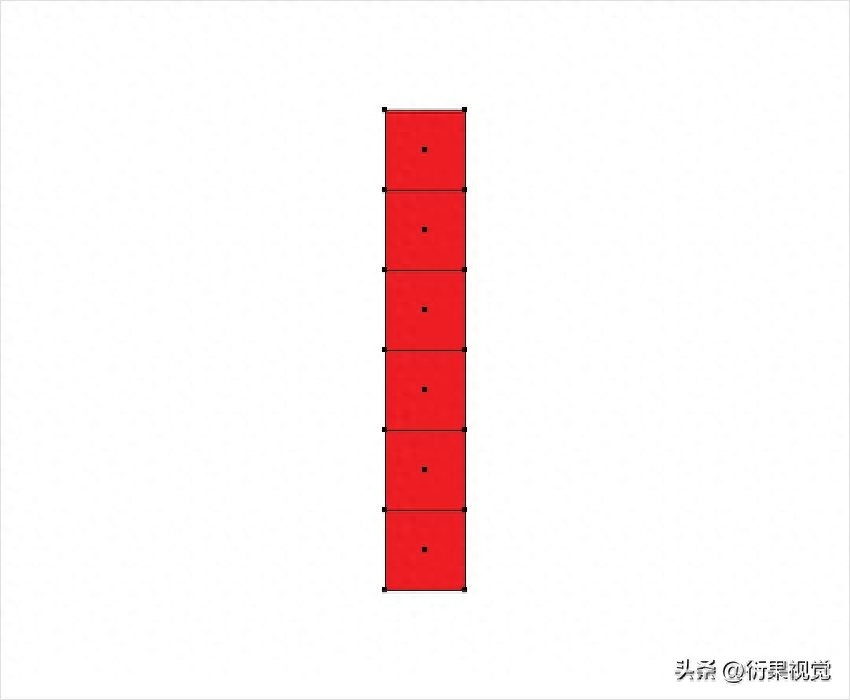
Still select red In the case of blocks, go to Object > Expand Appearance. Make sure the resulting shape group is selected and press Shift-Ctrl-G twice to ungroup it.
Step 5< /span>
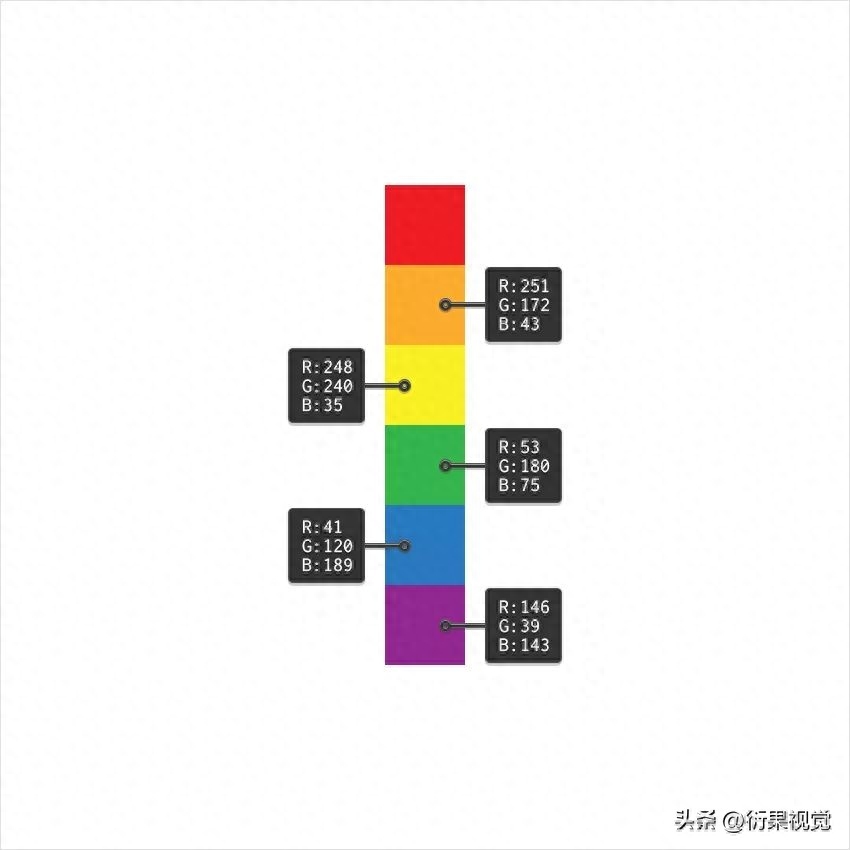
Skip the top block , then select the remaining shapes one by one and replace the existing fill color with the color shown in the image below.
Step 6< /span>
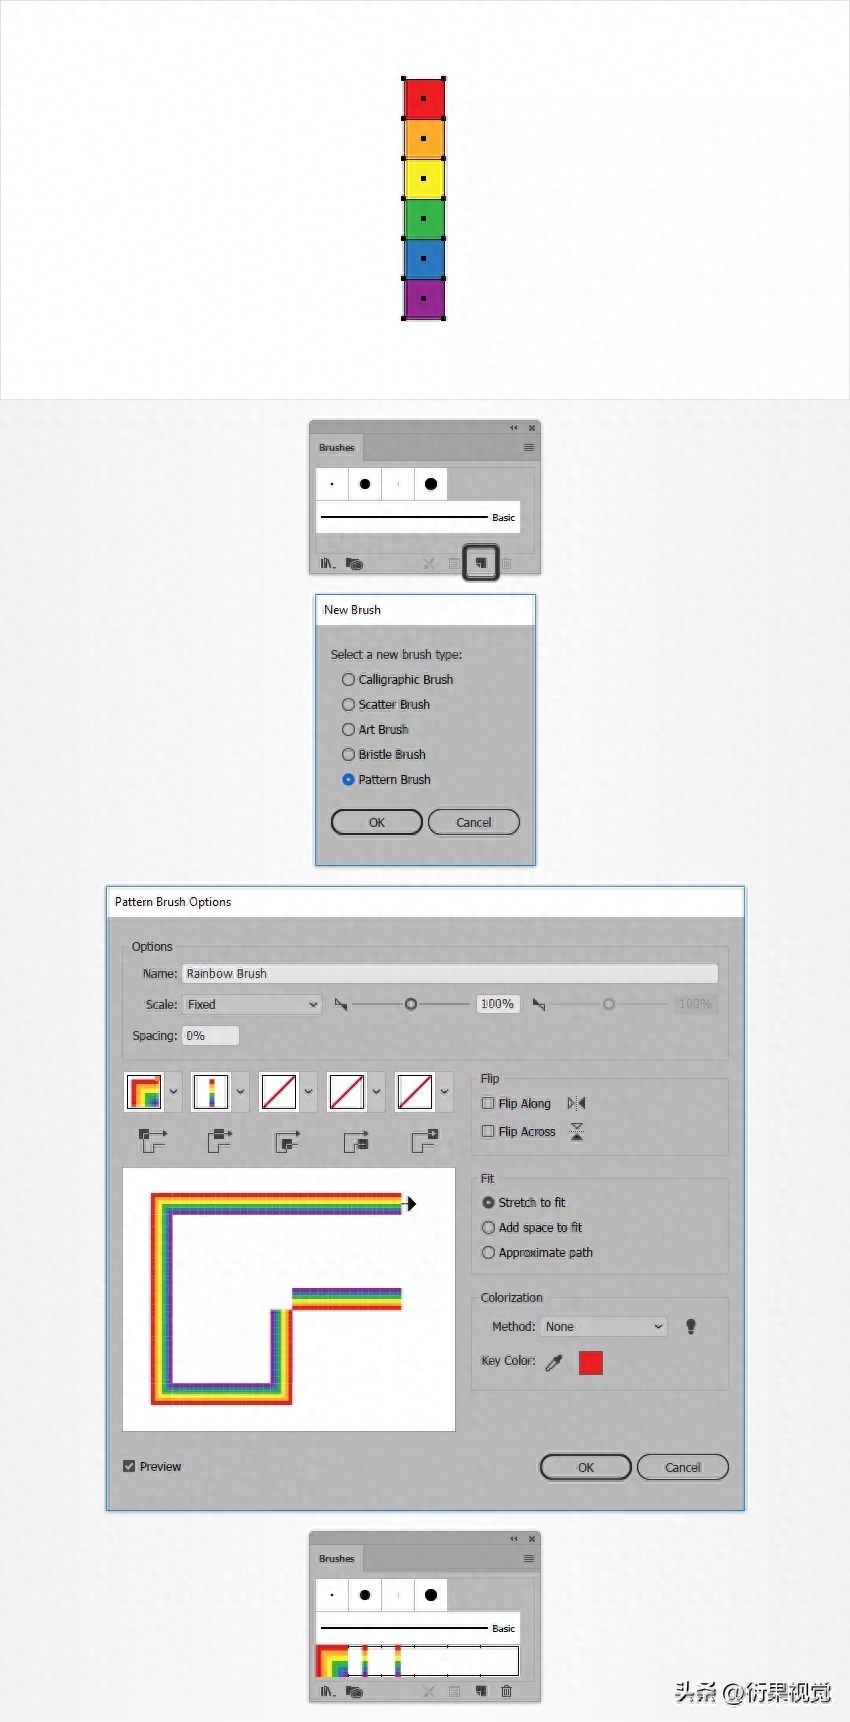
Select all squares, Open the Brushes panel (Window > Brushes) and click the New Brush button. Check the last box and click the OK button to open the Pattern Brush window. Select a name for the brush, enter all properties shown in the image below, and click the OK button.
2 .Create text
Step 1
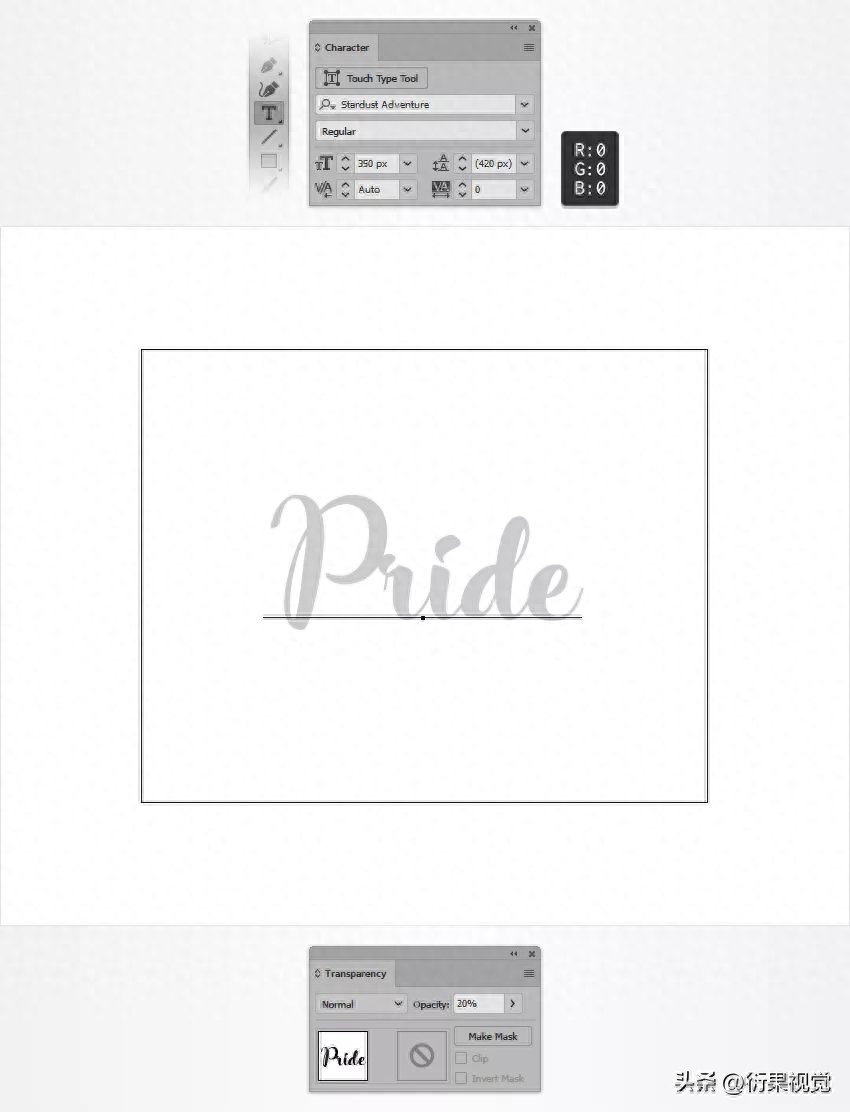
Select the Type tool ” (T) and open the Character panel (Window > Type > Character). Choose your favorite font and set the size to 350 pixels. Just click on your artboard and add "Pride" text. Make it black and lower its opacity to around 20%.
Step 2< /span>
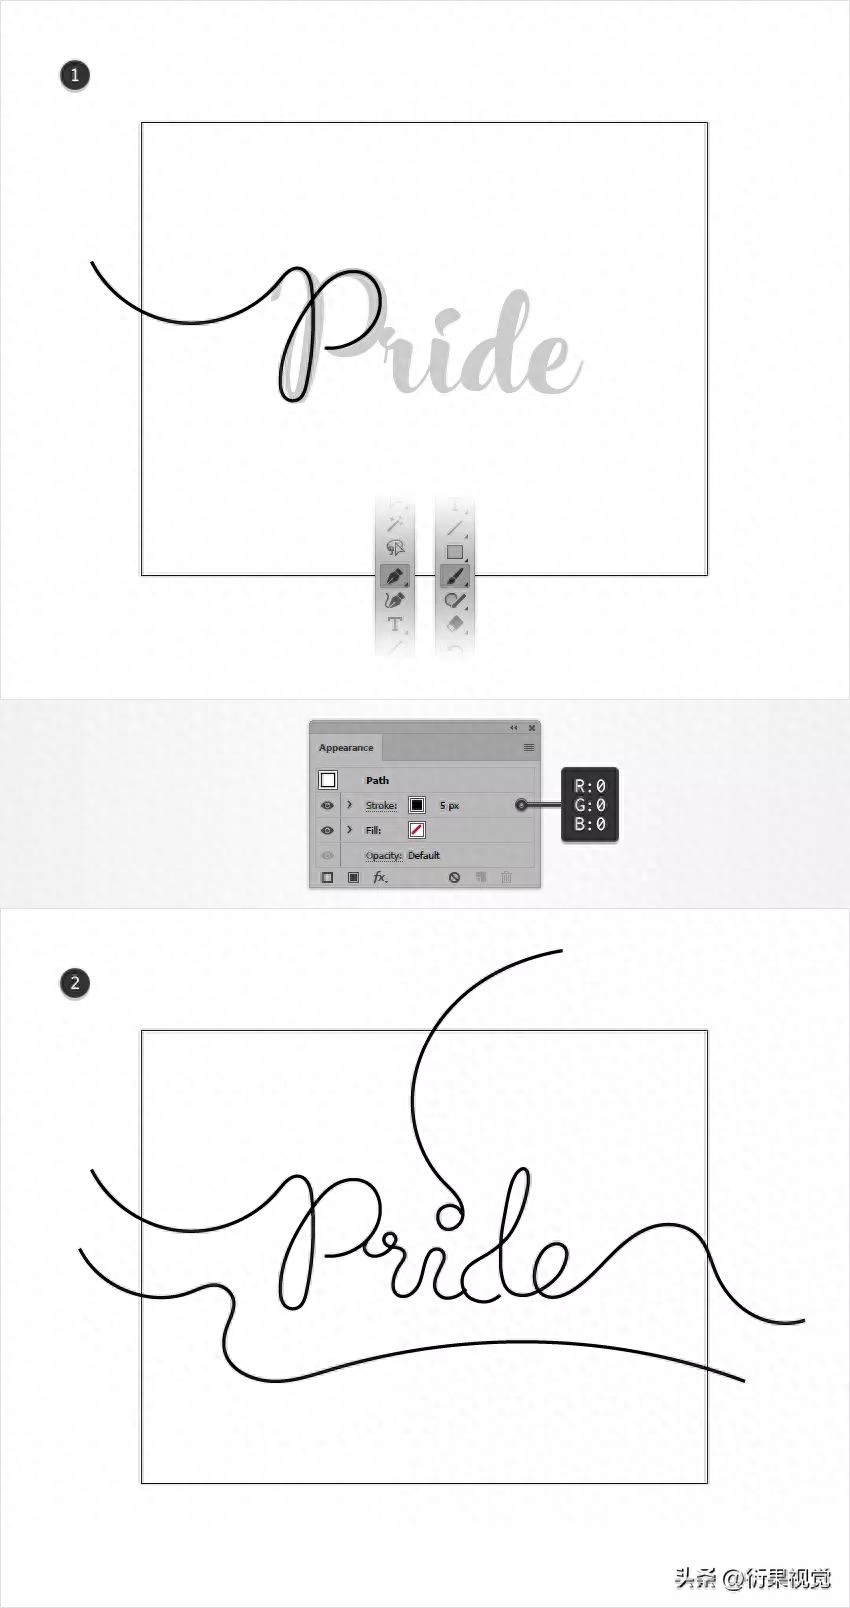
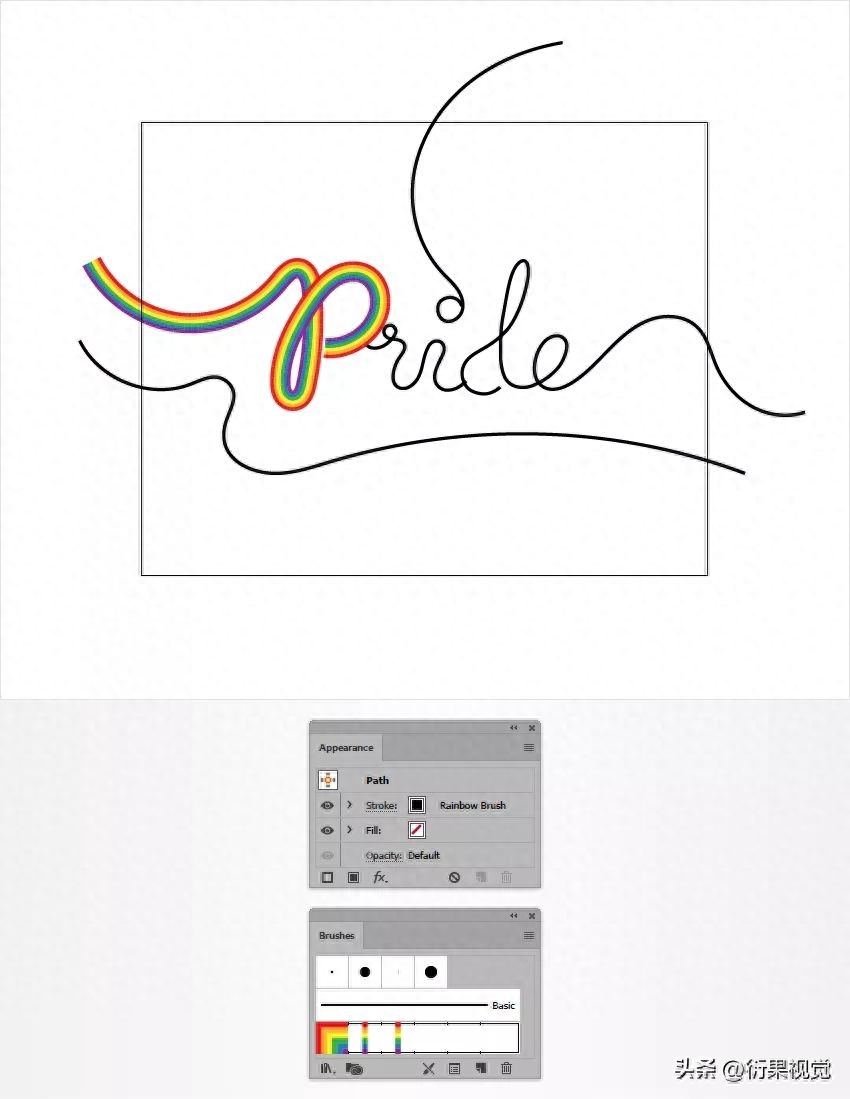
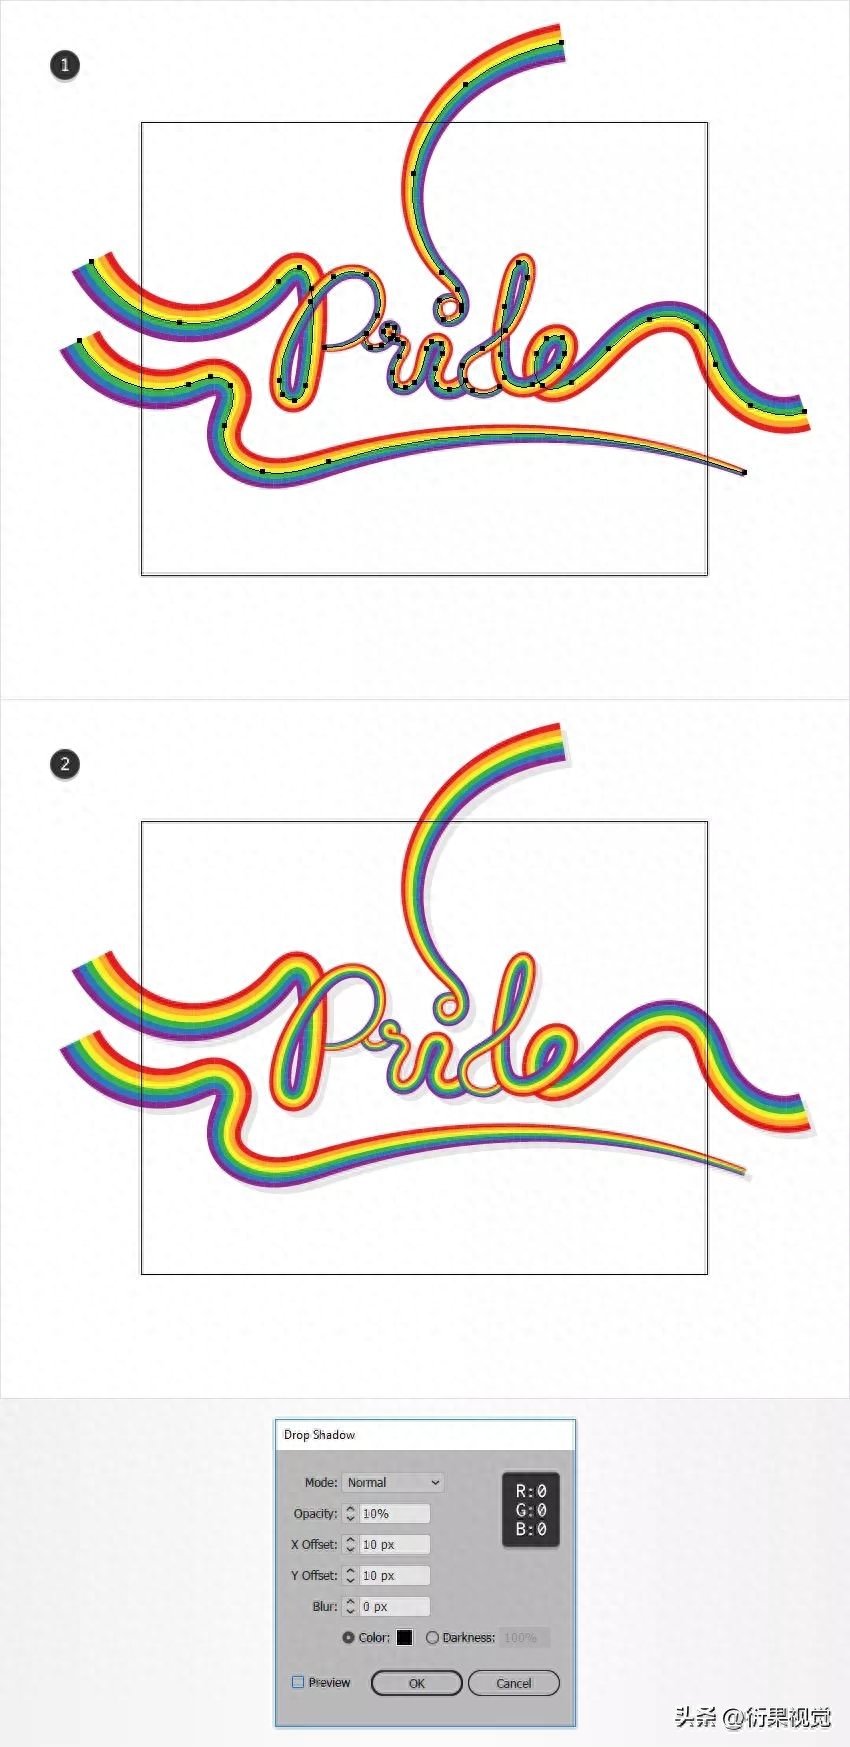
Use the Pen tool ( P) or the Brush Tool (B) and that piece of text as a rough guide, draw some smooth paths as shown in the image below. Now add a simple black stroke to these paths. Once you're happy with the path, you can delete the text.
3 .Apply Pattern Brush
Step 1
Select a path, Then replace the black stroke with the pattern brush in the Brushes panel.
Step 2< /span>
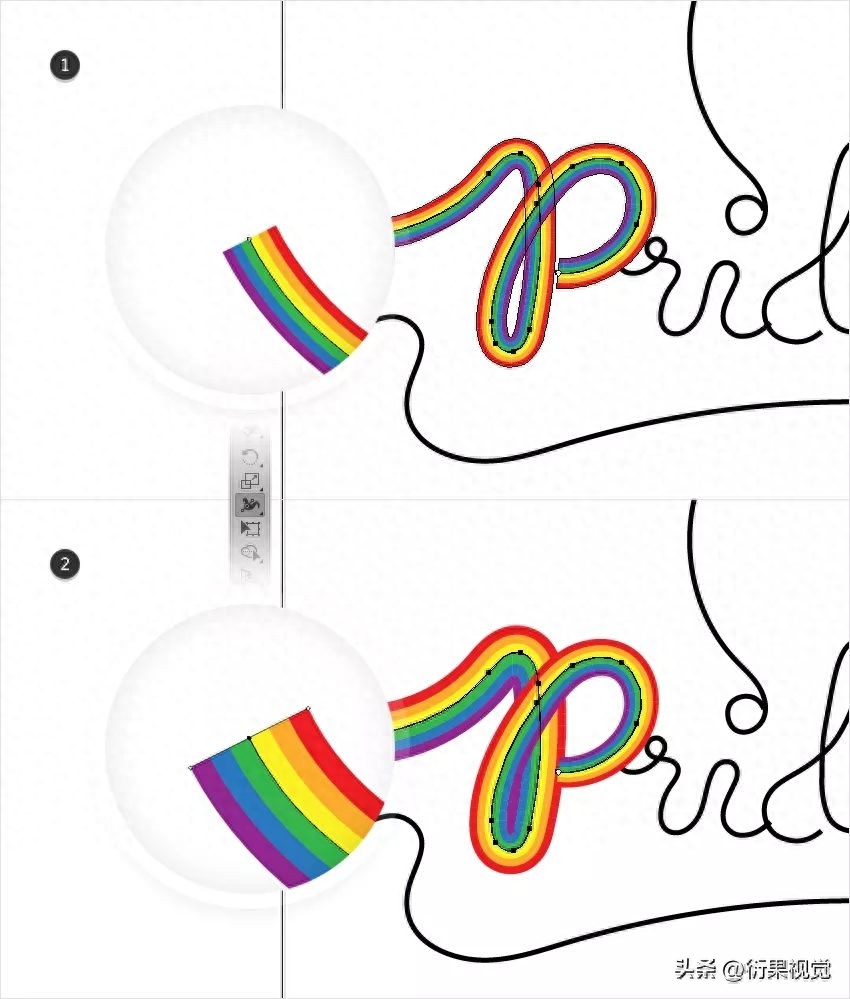
Make sure to still select the Have the path of the pattern brush and focus on the left endpoint. Select the Width Tool (Shift-W), click on that anchor point, and simply drag outward to enlarge the brush.
Step 3< /span>
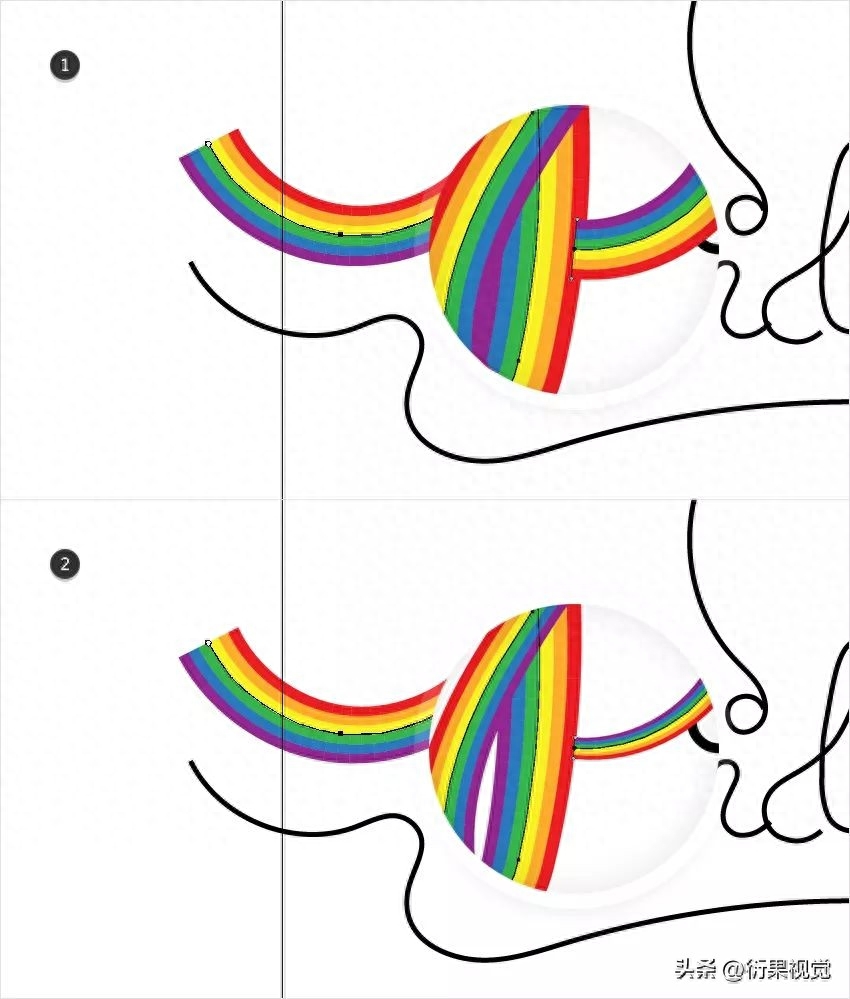
Make sure it is still selected Path with the pattern brush, this time focusing on the right endpoint. Select the Width Tool (Shift-W), click on that anchor point, and simply drag inward to squeeze the brush.
Step 4< /span>
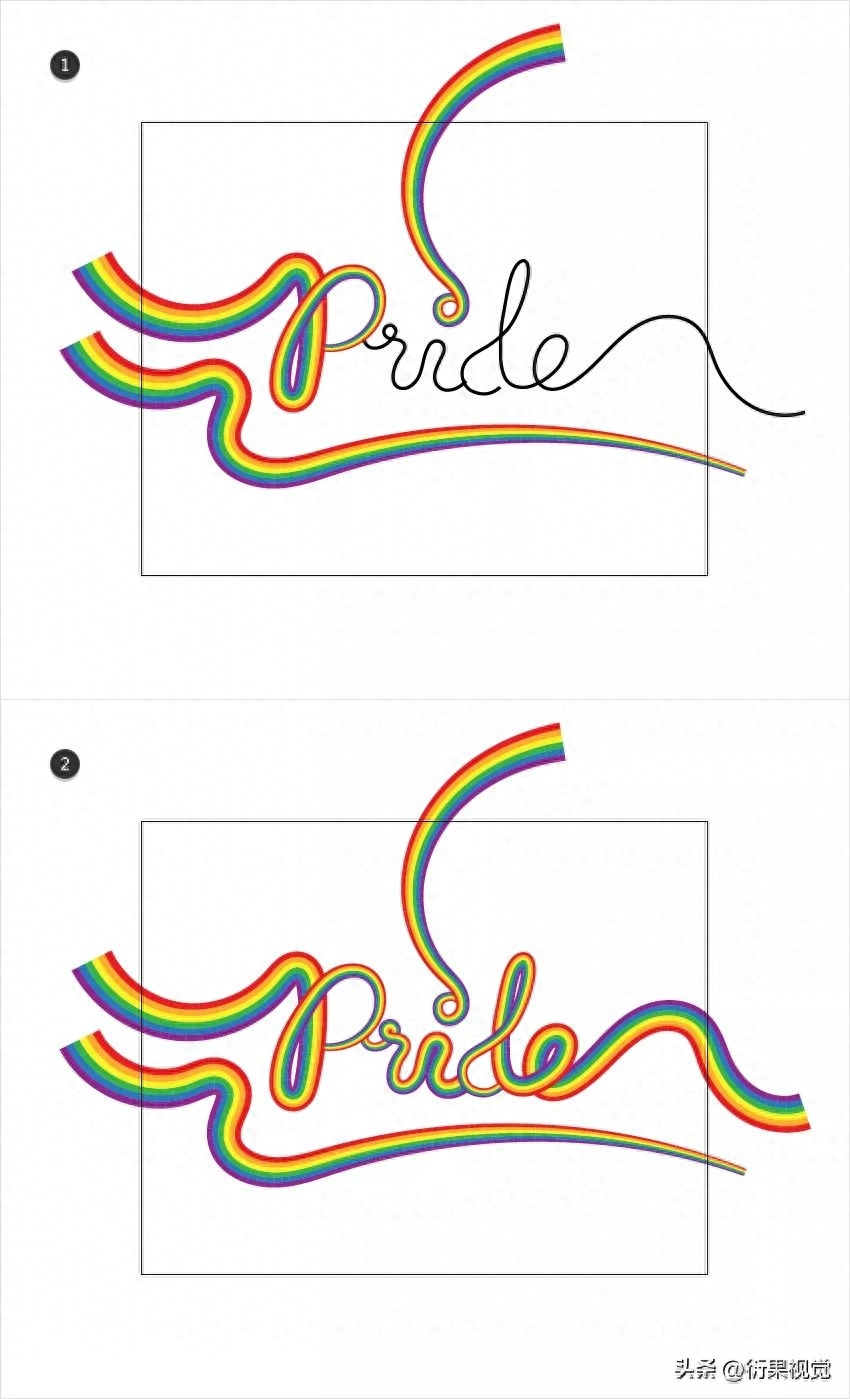
Apply the pattern brush Go to the rest of the paths and resize them using the Width Tool (Shift-W) as shown in the image below.
4 .Add subtle shadows and a simple background
Step 1
Select all paths and Group them (Ctrl-G). Make sure the new group is selected and go to Effects > Stylize > Drop Shadows. Enter the properties shown in the image below and click the OK button. → AI from entry to master (video tutorial)
Step 2< /span>
Select the Rectangle Tool ( M) and create an 870 x 700 px shape. Fill it with white (R=255 G=255 B=255), send it back (Shift-Ctrl-[), and make sure it covers the entire artboard.

Done!

Articles are uploaded by users and are for non-commercial browsing only. Posted by: Lomu, please indicate the source: https://www.daogebangong.com/en/articles/detail/AI-ruan-jian-cai-hong-zi-ti-xiao-guo-she-ji-ji-qiao.html

 支付宝扫一扫
评论列表(196条)
测试