Let’s talk to you today about how to use masters to improve the efficiency of PPT production.

01
What is a master

Simply speaking, the master is a preset layout, such as the position, size, color, etc. of text and pictures. Just modify one page to change the design of all slides. Improve efficiency.
We click View-Slide Master to enter the master editing page.
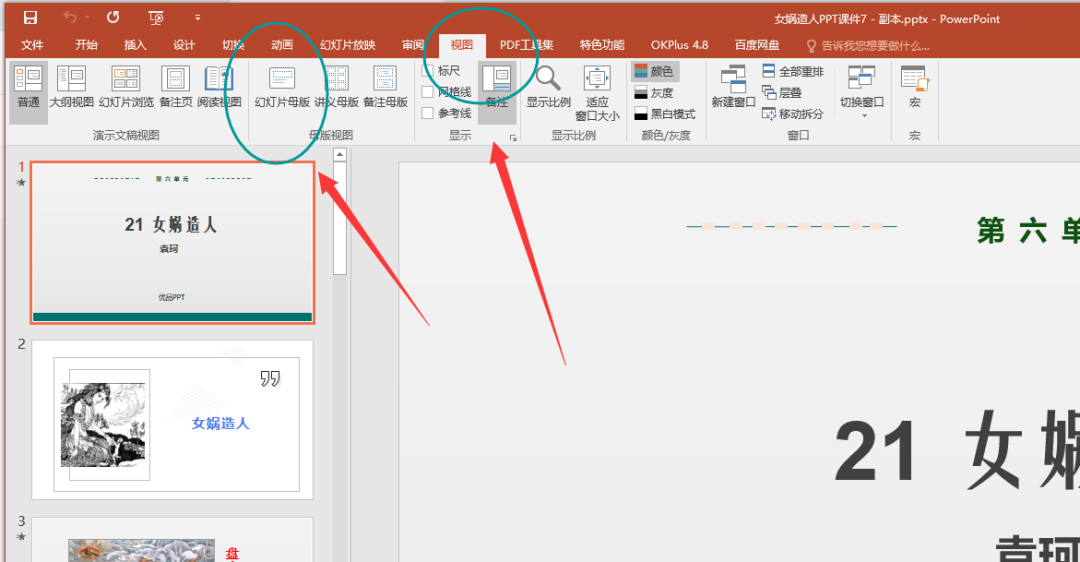
We can see that the master has a large one and a small one. The big one is the master version and the small one is the daughter version.
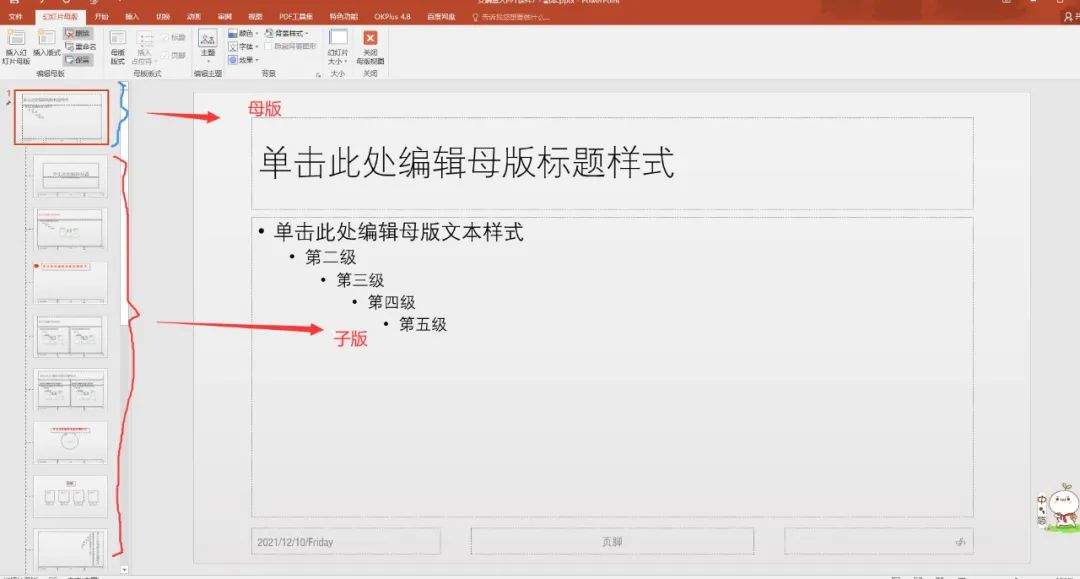
The master controls the entire PPT. If it is modified, all slides will change accordingly.
Let’s take an example to demonstrate.
For example, I draw a triangle on the master. You will find that all slides have this triangle. If you close the master, you can see that the triangle appears in every PPT page. And the size and position are the same. The watermark and logo in PPT are set through the master.
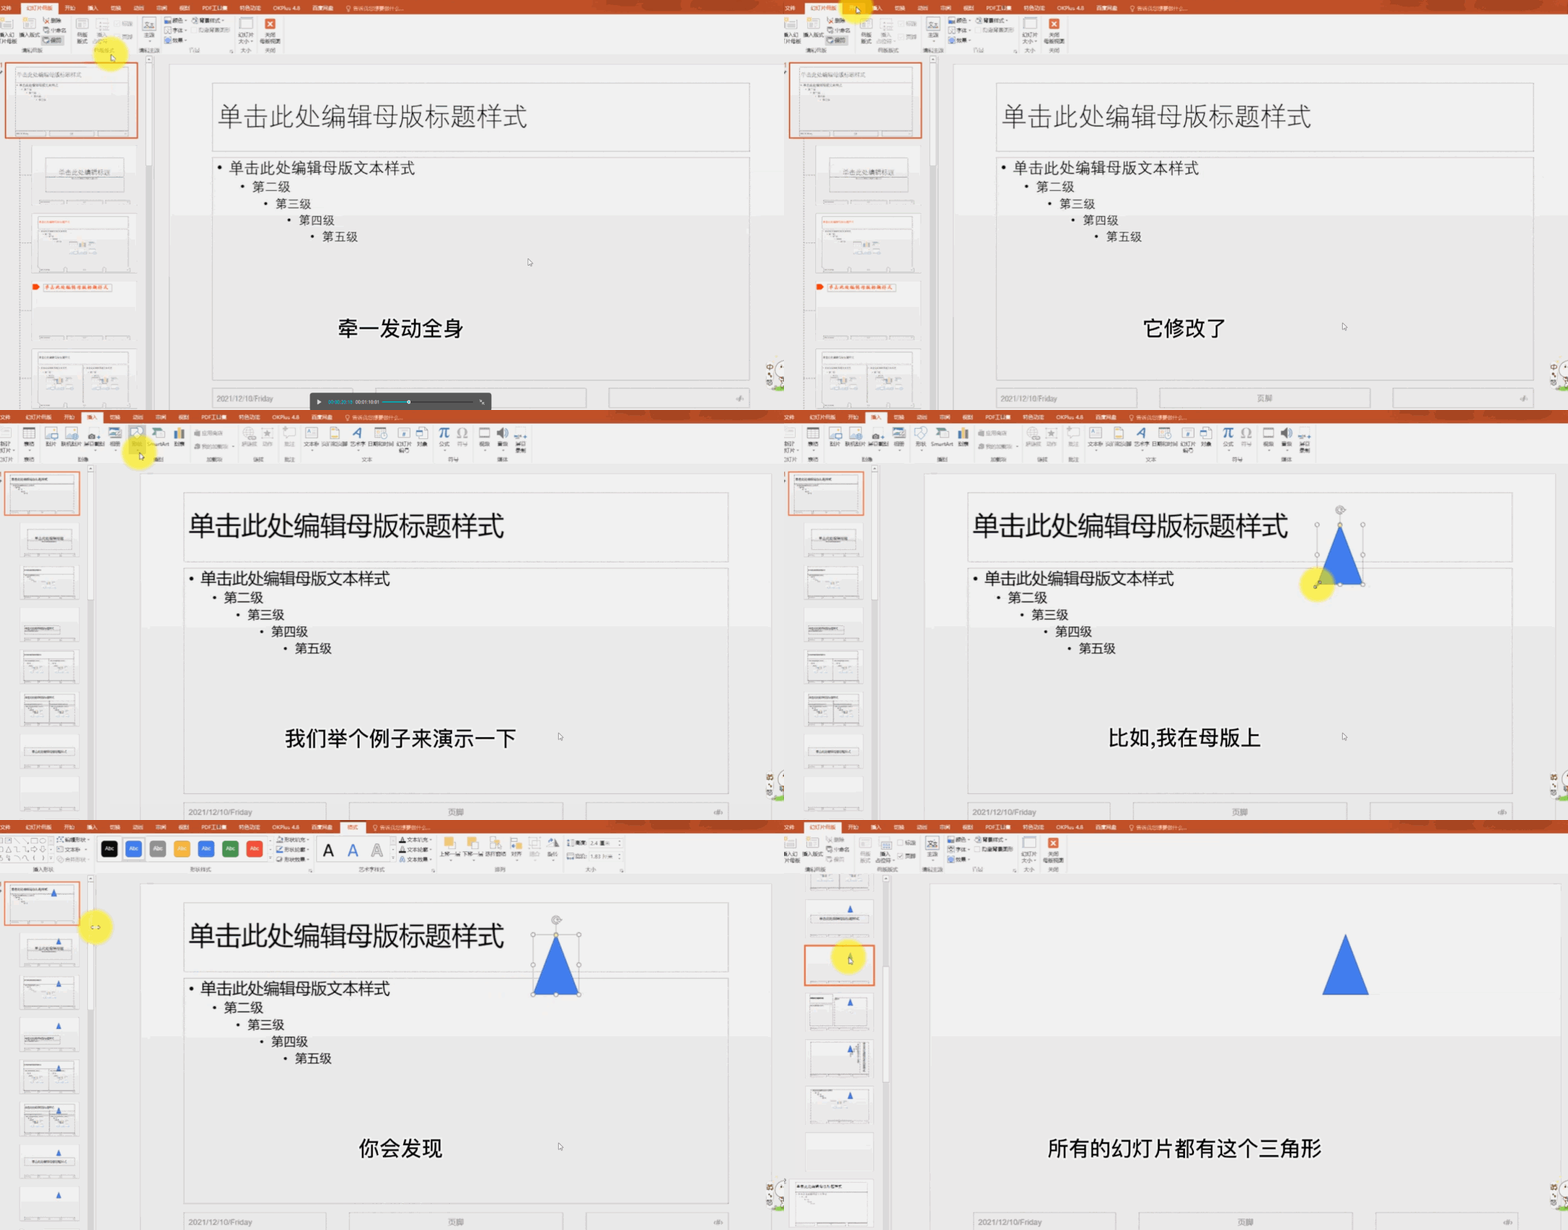
When setting the sub-page and style, only the page that calls this layout will change, and it will not affect other pages.
For example, if we draw a circle, only this page will change. Return to normal view. Insert a slide, select the layout we just set, and the small circle will be fixed here.
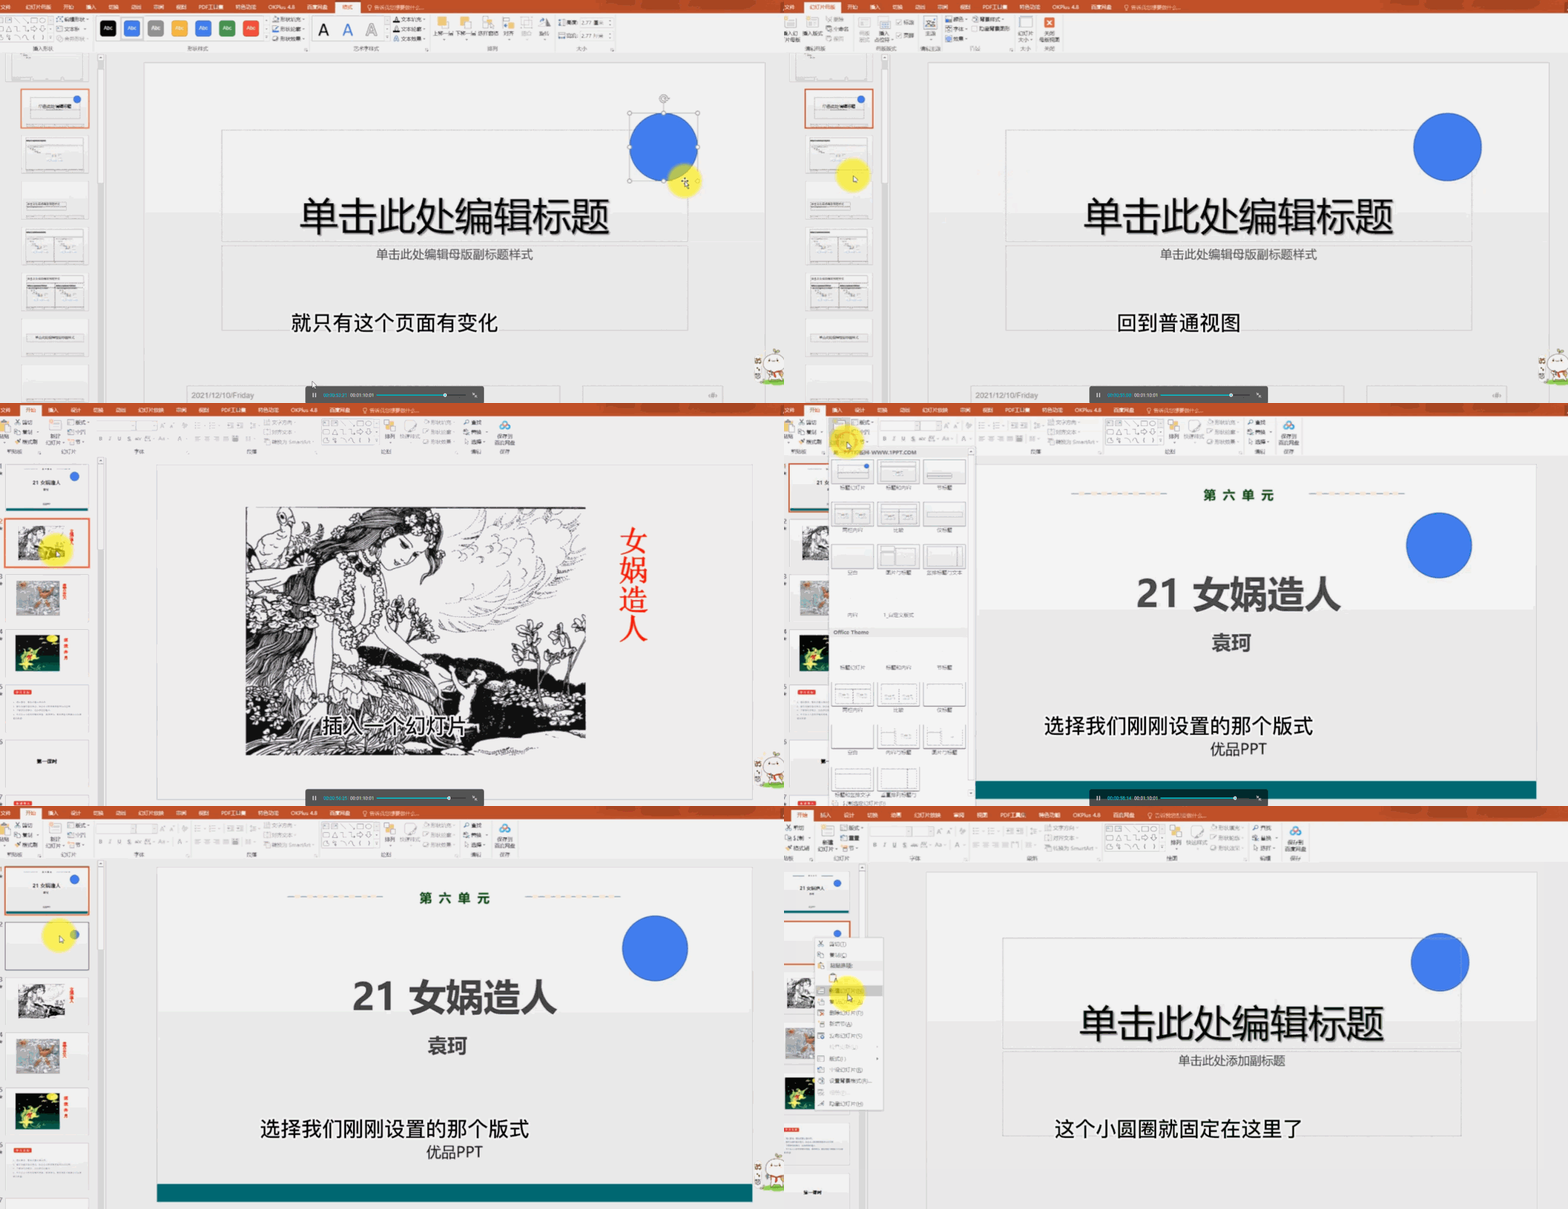
This is the general operating principle of PPT master.
We know the PPT master, let’s talk about its first usage:

02
Quick unified layout

Good-looking PPTs have one thing in common, which is unified color and layout.
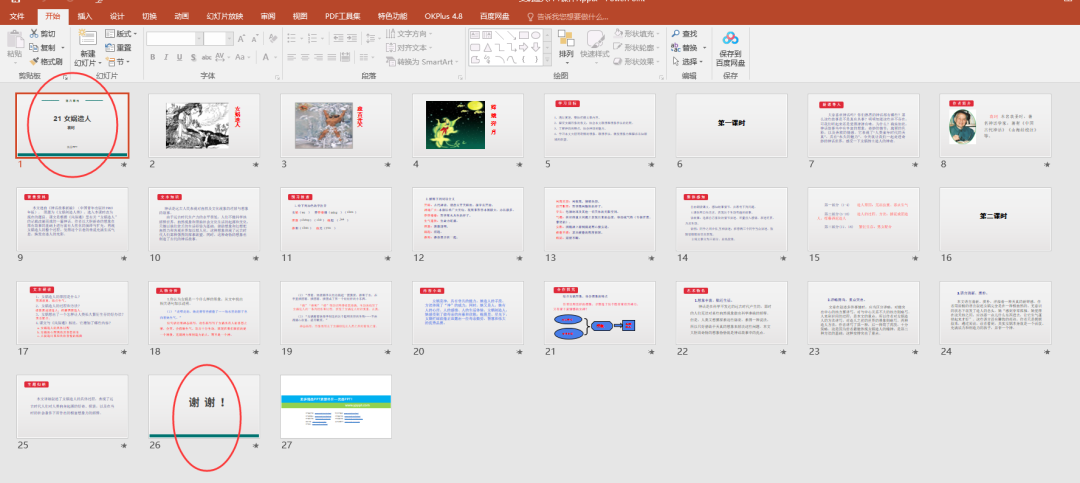
For example, in this PPT, there is a lack of such unity. Only the first and last pages have the same background elements, and the layout of graphics and text is relatively random.
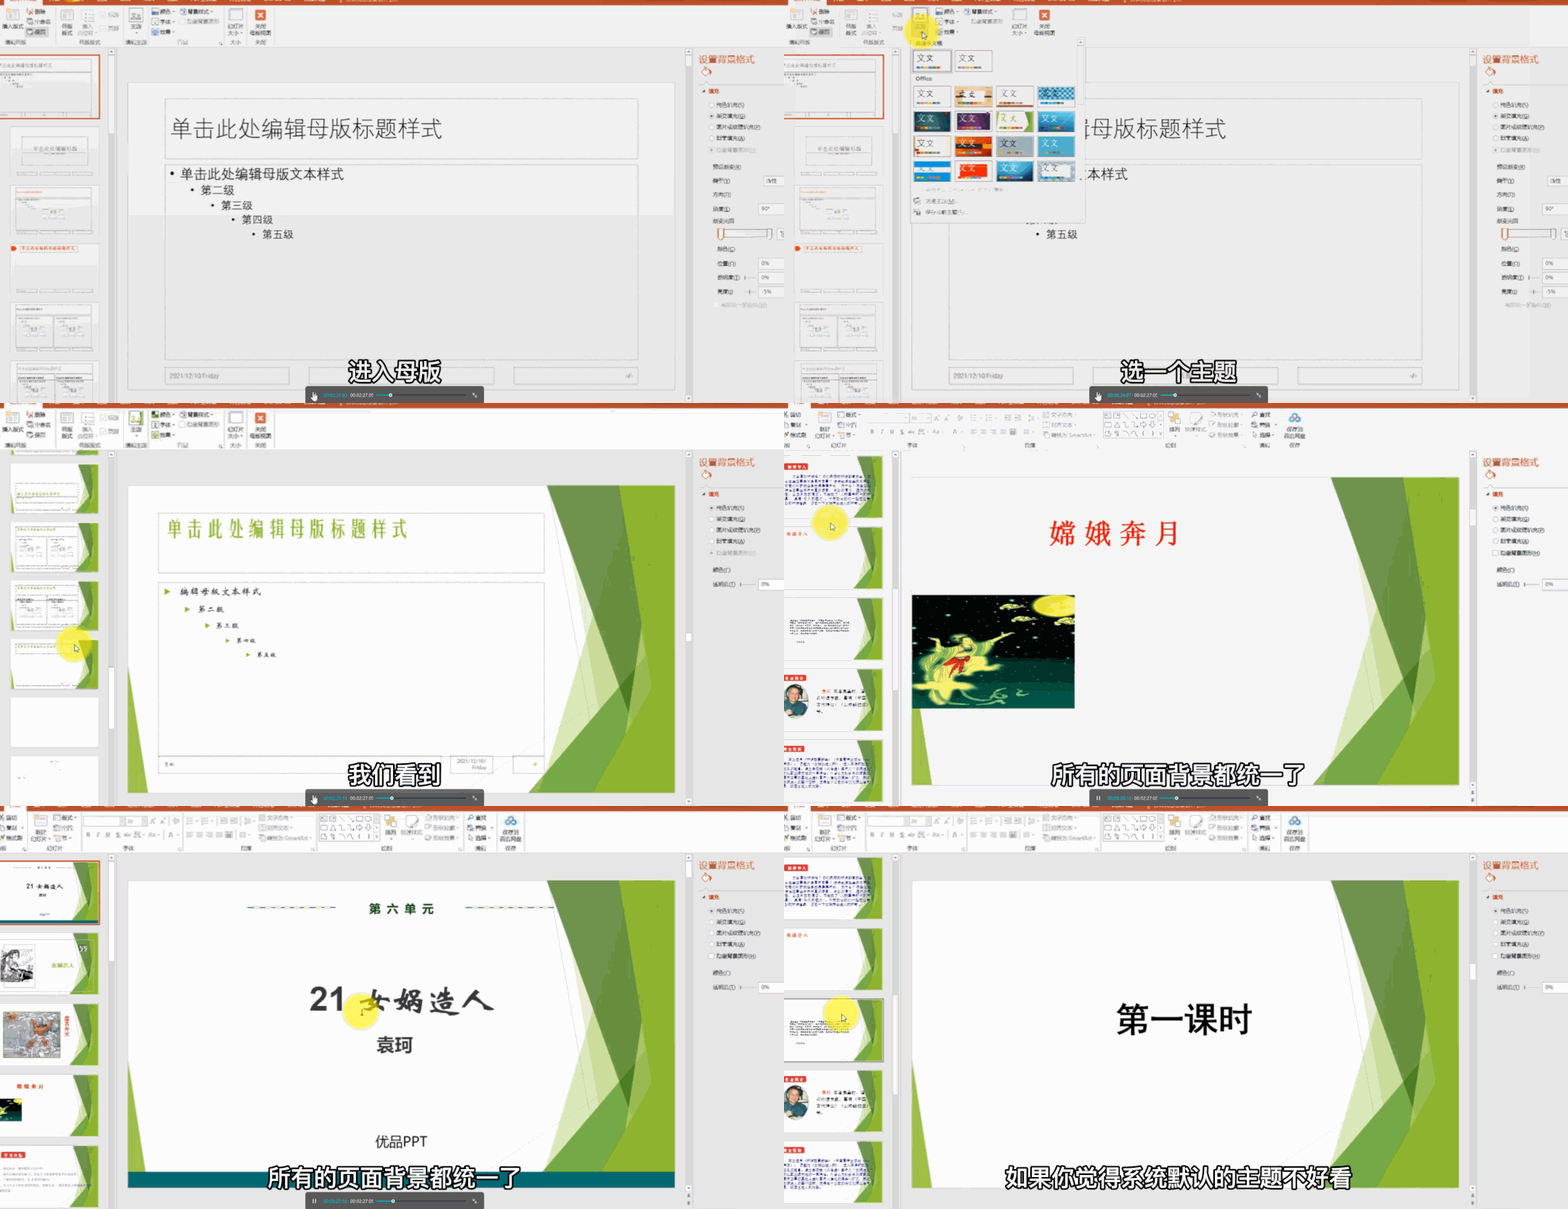
We can unify the style and layout of PPT through the master version. Enter the master page, select a theme, and we see that all page backgrounds are unified. If you think the default theme of the system does not look good, you can design it yourself.
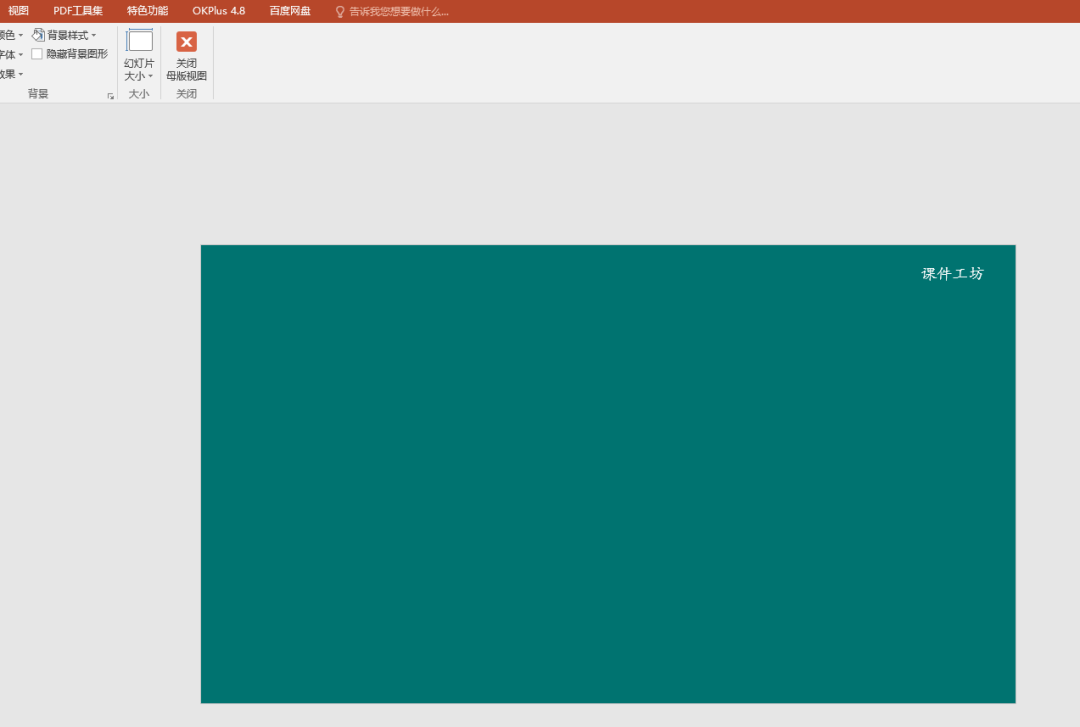
For example, let’s change the background. Select a blank layout, or create a new one. Add a rectangle, fill it with blue, and add a little text watermark. After setting it up, just close the master view.
Okay, let's go back to the slide, where is the master we just created? Click New Slide to see it. You can also right-click the slide on the left to switch to the previous layout. In this way, we have changed all the slides to a unified background.
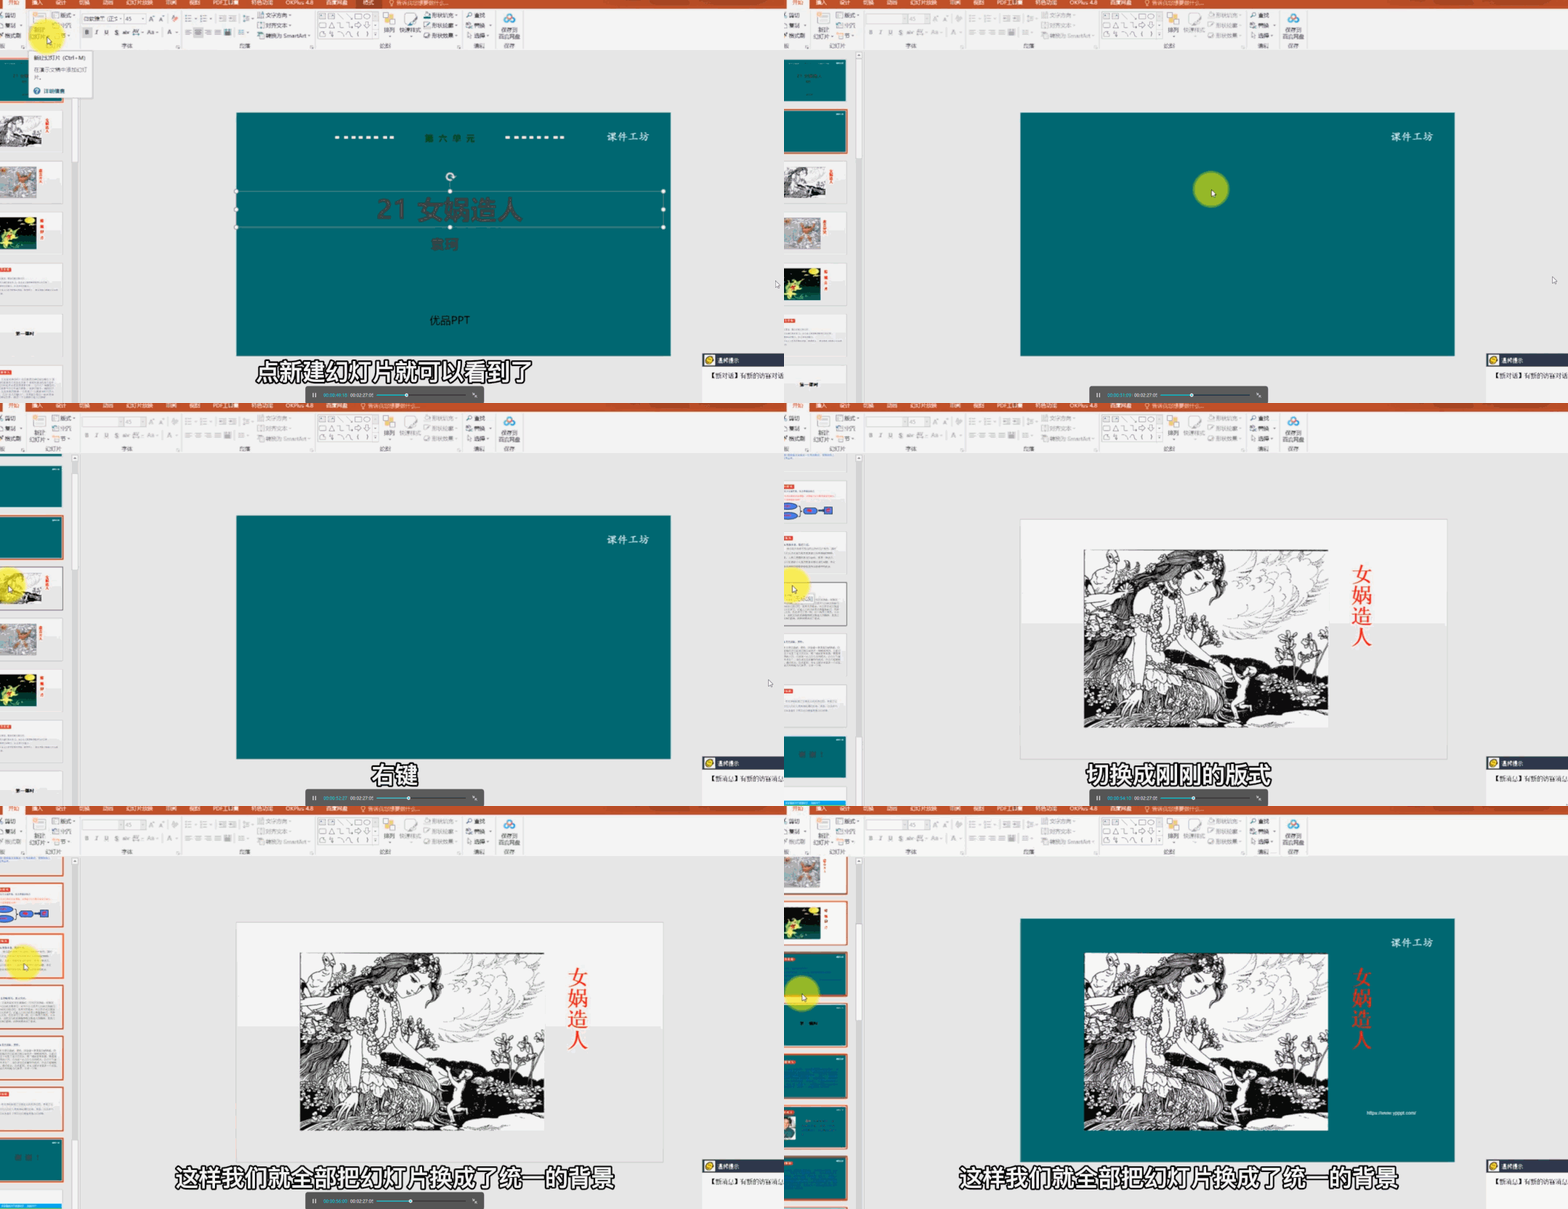
Of course, the faster way is to set it directly in the large master. However, except for the background, logo and other elements that appear on every page, it is not recommended to change them directly in the large master above, otherwise the space and room for adjustment will be too small.
In addition to unifying the background and style, the PPT master can also quickly unify the title and text.
Quickly unify titles and text
For example, the titles in the courseware are copied one by one, which is time-consuming to produce. Once you want to modify it, you need to change it one by one. We can use PPT master to be lazy.
In the master, create a new layout and create a title style. Set the font, size, color, etc. of the title, and draw a cut head to decorate it. Horizontal alignment. Close the master.
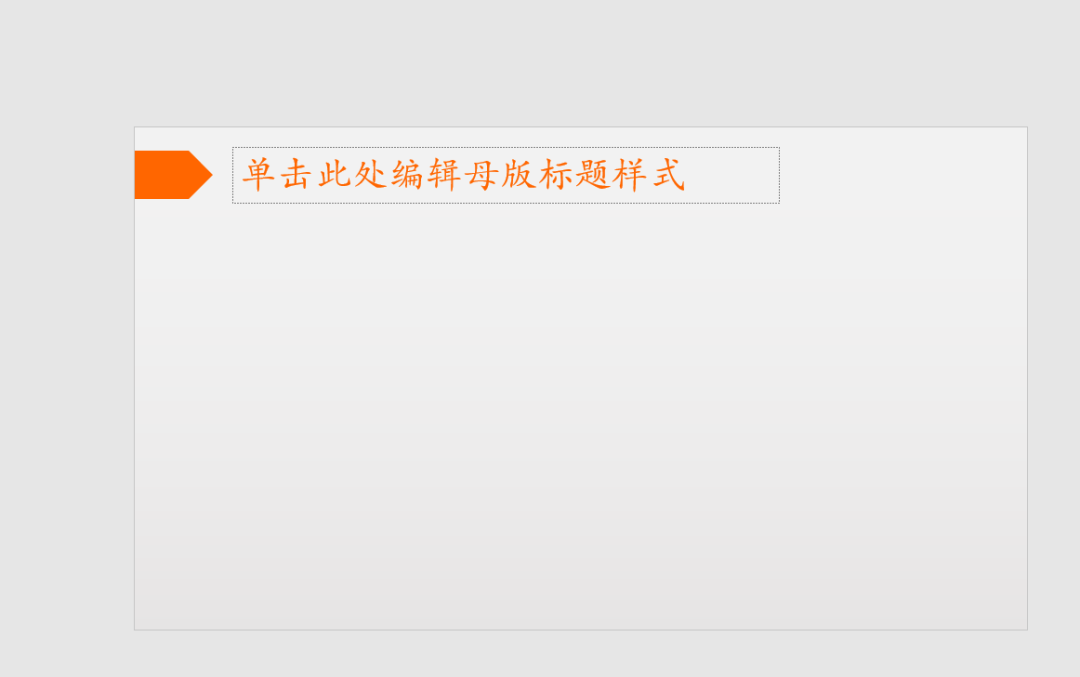
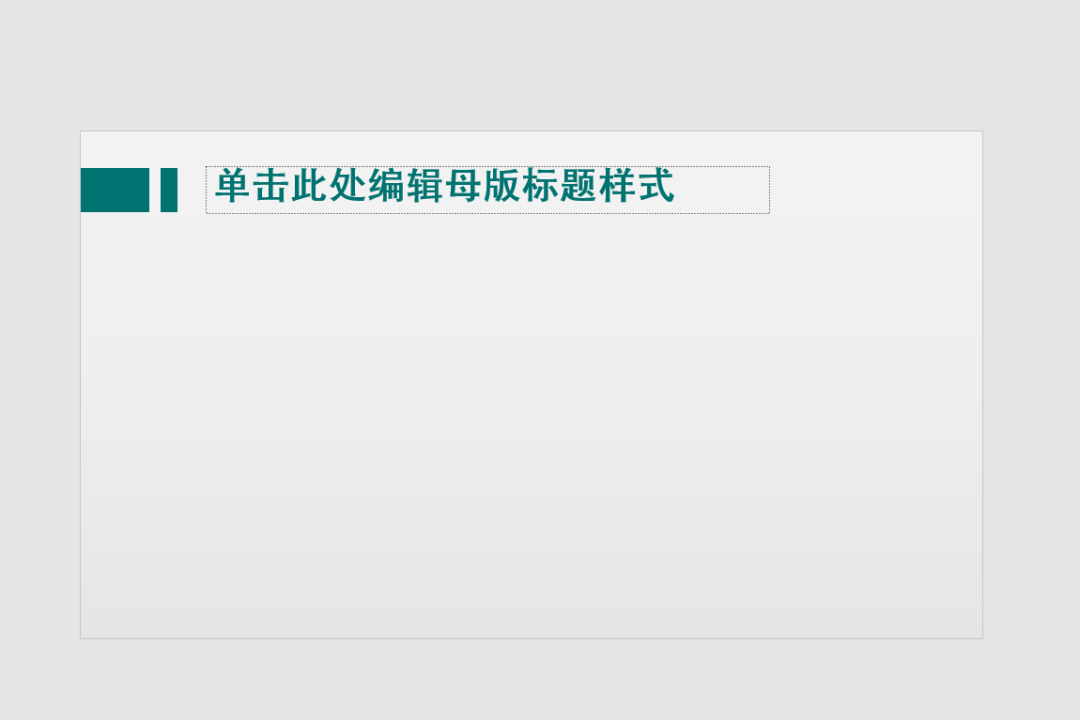
Select the title layout just now, create a new slide, and the title style will be added directly. You can also switch directly on the original PPT. If you need to modify the style, go back to the master version and adjust it directly. For example, let's change it to blue and change the arrow to a rectangle. Returning to the slide, I found that I only changed it once, and the other title styles were updated.
Uniform font
How to unify the fonts? In the master view, click on the font. You can see that there are a variety of font schemes, including fonts for titles and text.
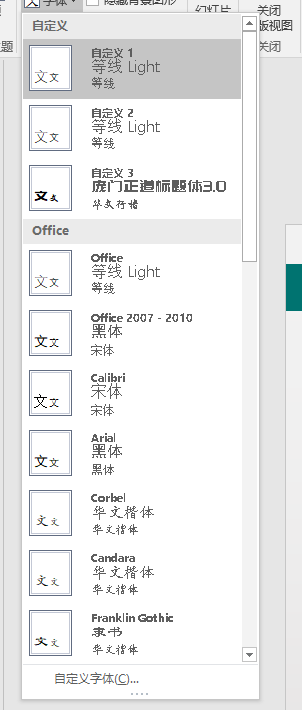
Select one, and the font of the PPT will change accordingly. We can customize the font scheme. For example, we set the title to Pangmenzhengdao title style and the text to Chinese regular script. As you can see, the font in the slide has been changed. The newly created text is also the default font.

03
Quickly replace images and text

When holding class meetings, teachers often use this PPT to commend outstanding students, with avatars and names. If you do it page by page, you need to copy, cut and align it, which is time-consuming and labor-intensive. At this time, PPT master can be of great help.
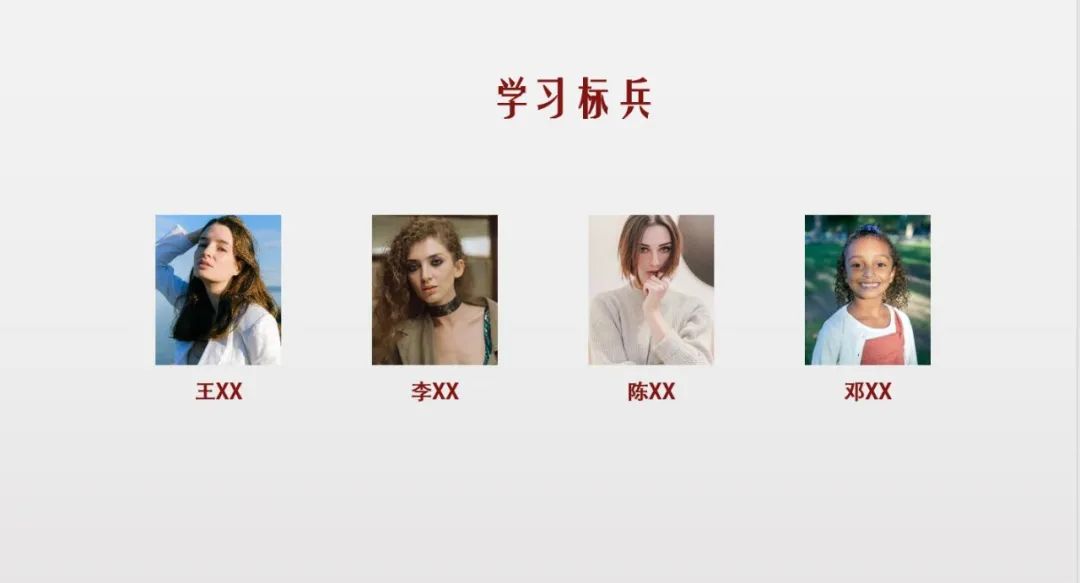
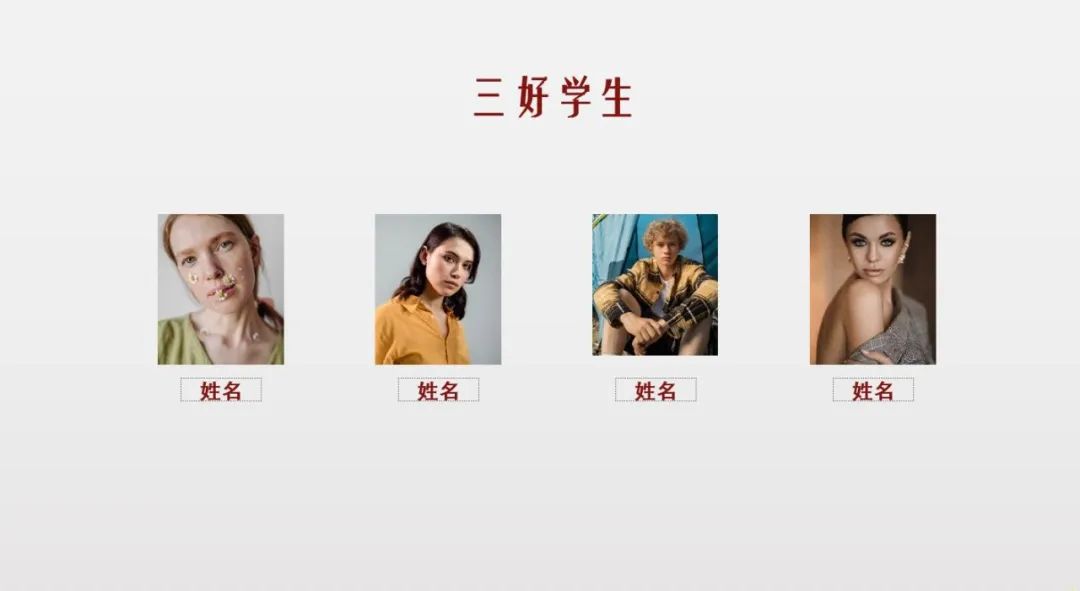
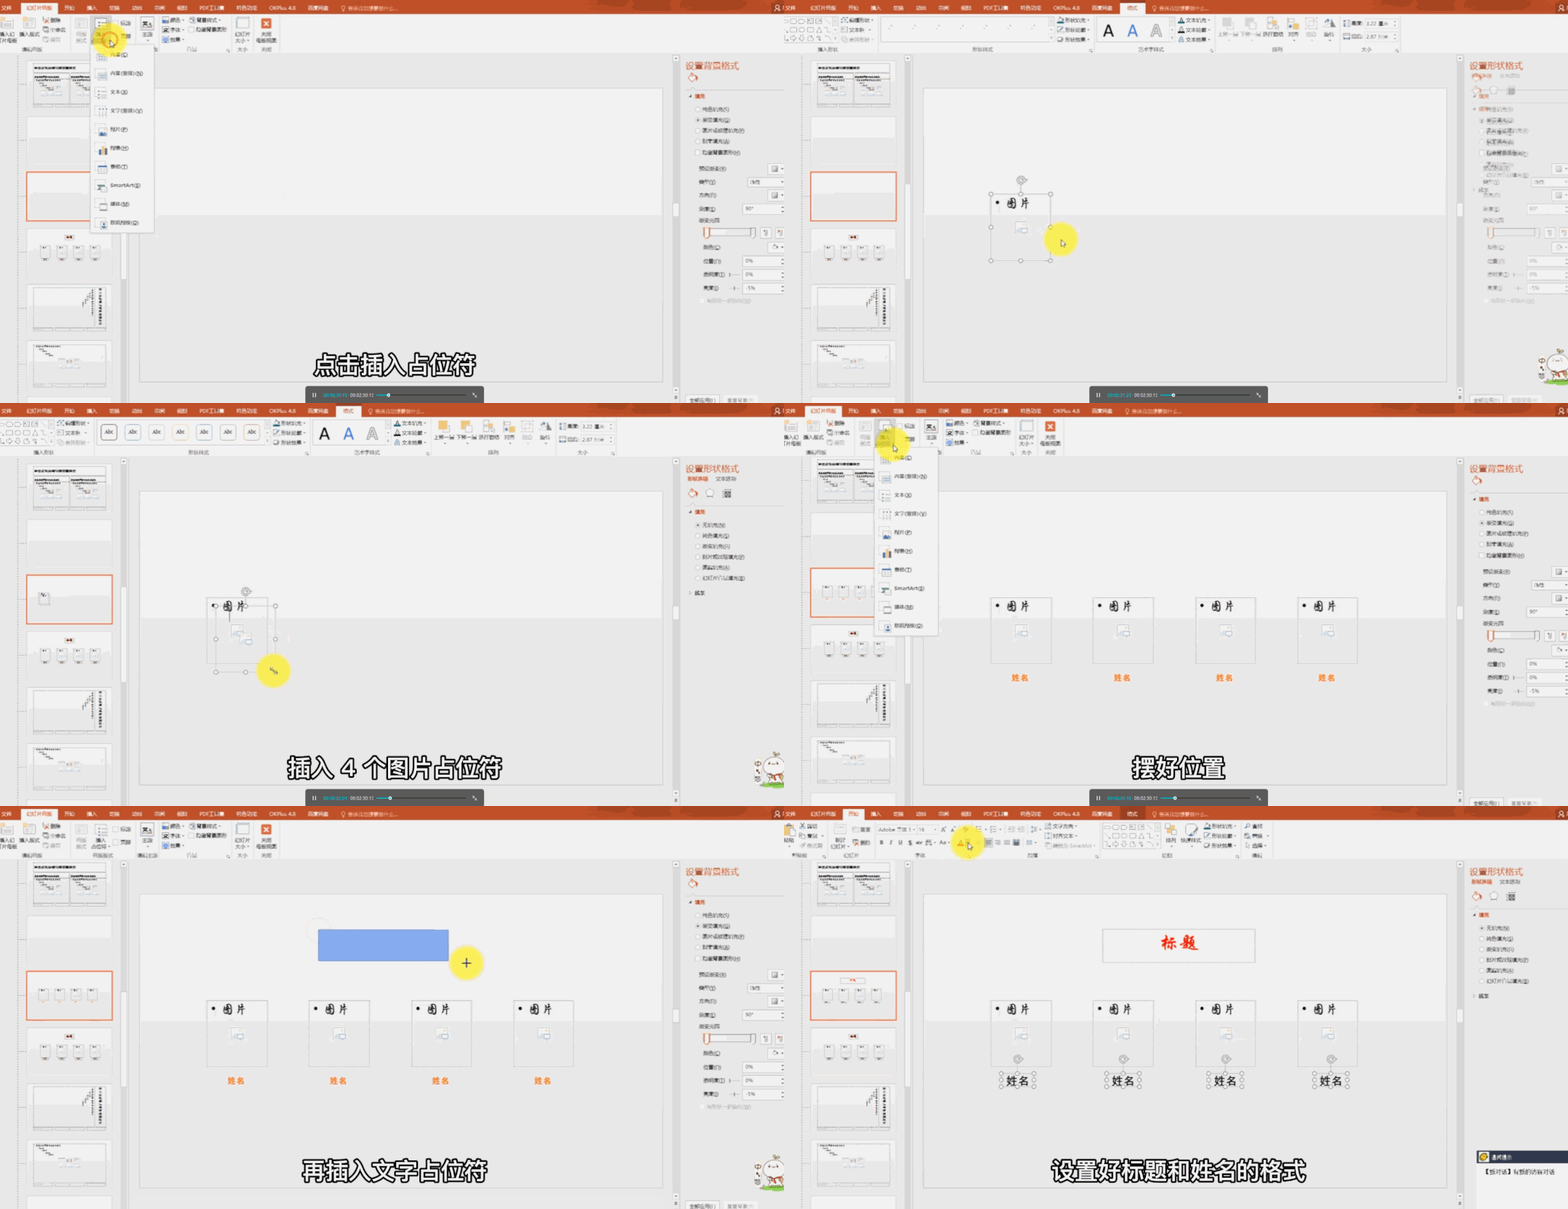
We enter the master view, create a new layout, click the insertion point holder, select the picture, and insert 4 picture placeholders characters, place them, insert text placeholders, and format the title and name.
Close the master, select the layout you just created, create a new PPT, click on the blank space, and select all the photos. All the photos can be filled into the four frames with one click, and the sizes are the same without cropping.
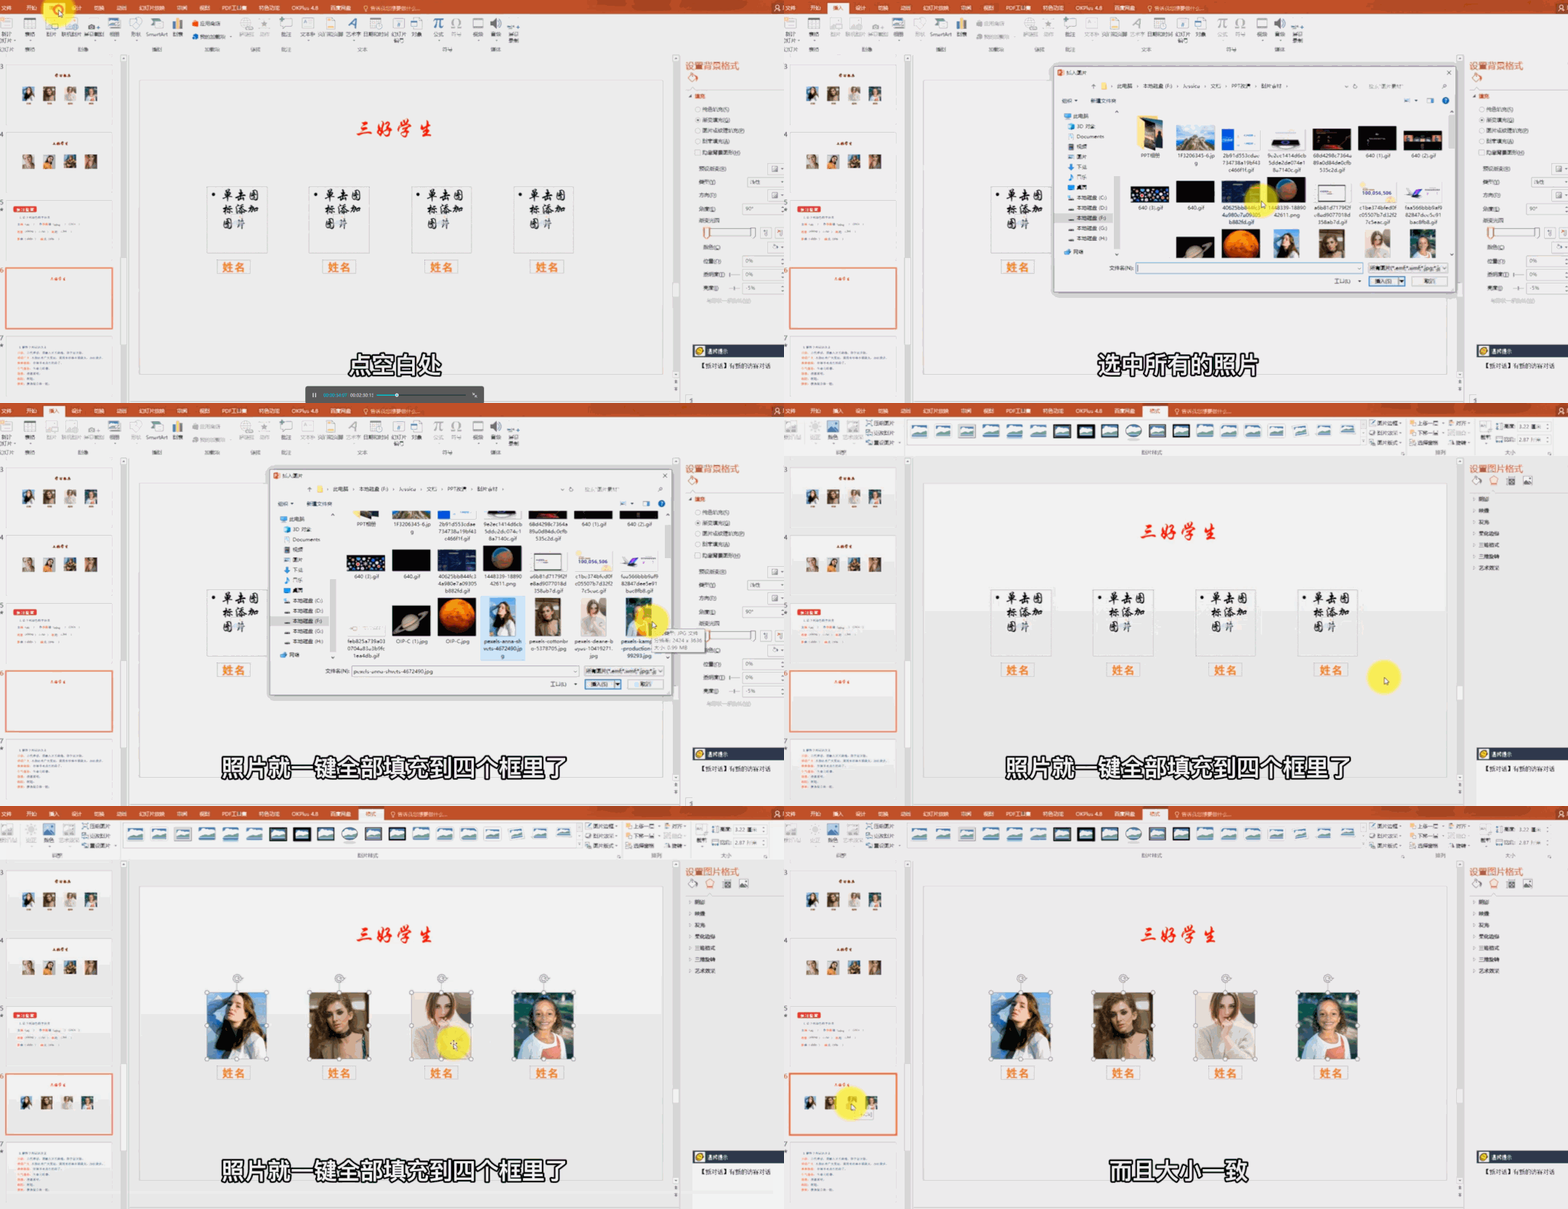
If the image display is not ideal, we can select the image, click Crop, and adjust it.
Sometimes some more designed image display styles are used. Such as circles, puzzles, etc. It takes a lot of time to design these pictures. After finally finishing them, the leader suddenly said that he wanted to change the pictures, and he was very upset. The PPT master can help you fix the designed layout. When you need to use it, you can call it with one click and directly replace a picture.
How to do it? Let's demonstrate them separately.
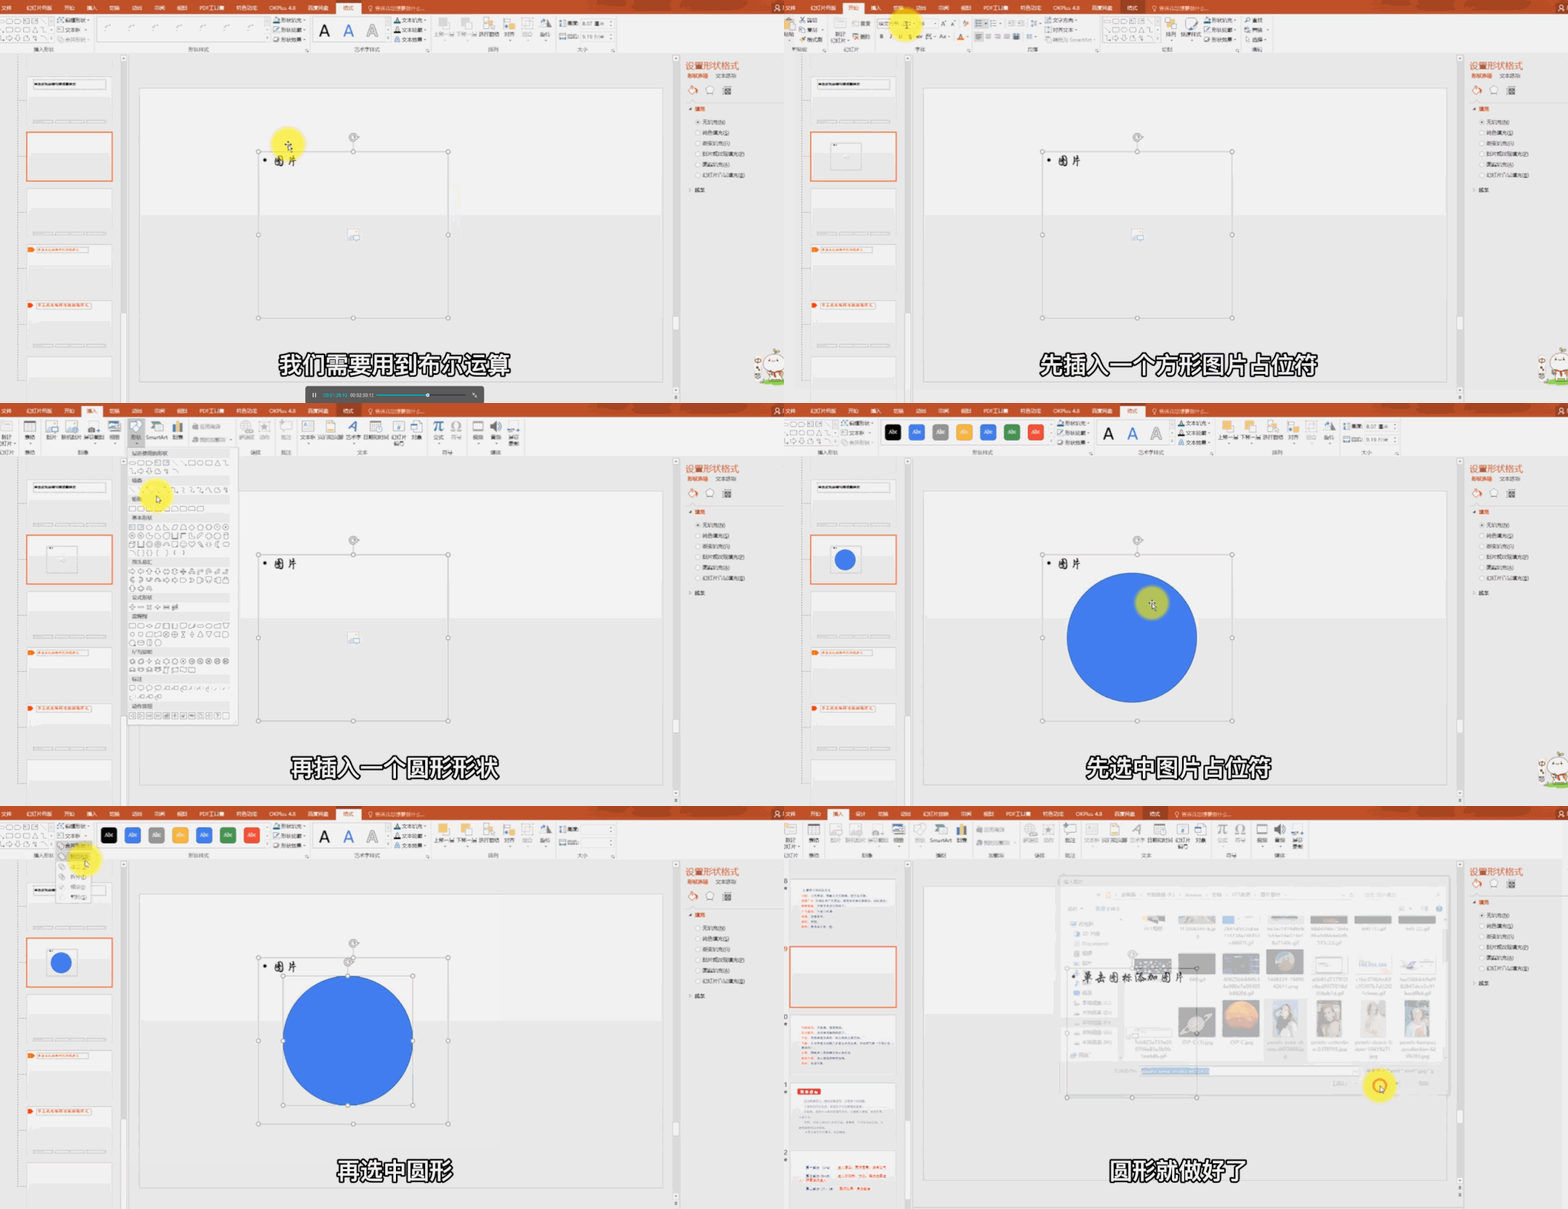
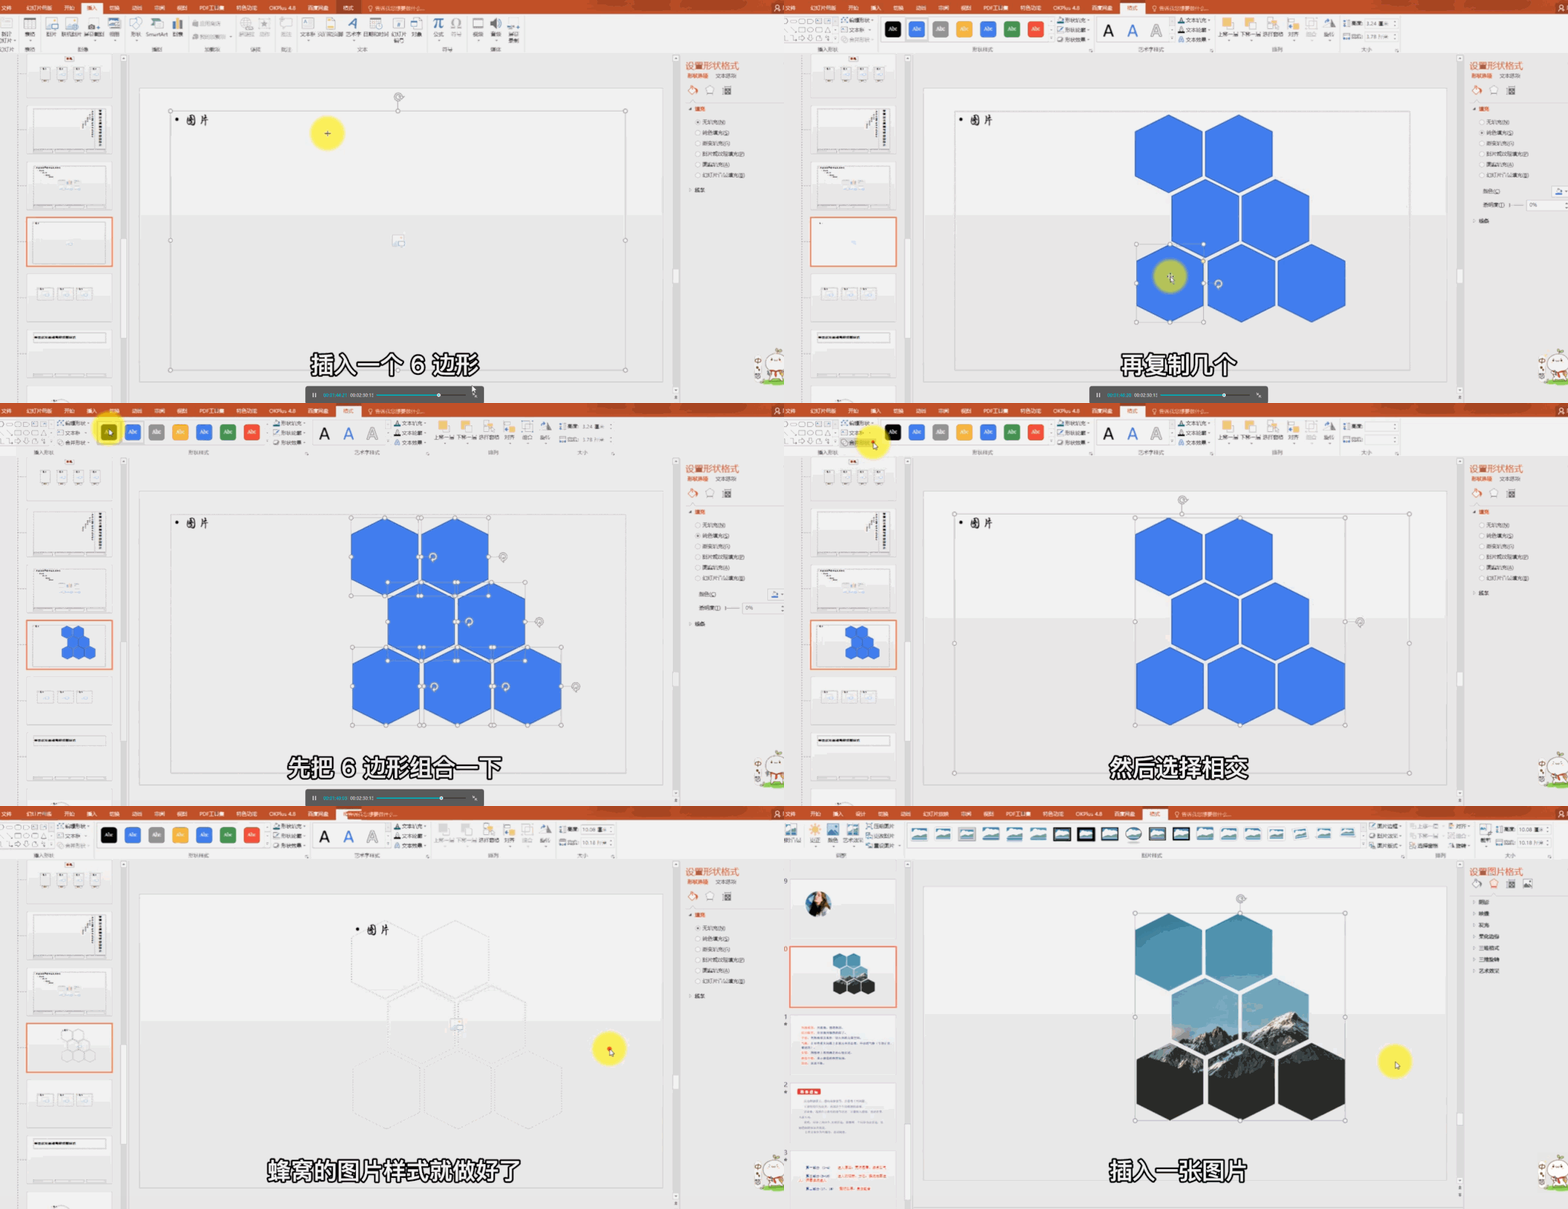
The picture placeholder is square. If we want to use a circle, we need to use Boolean operations. Insert a square image placeholder first, then a circular shape. First select the picture placeholder, then select the circle, select Intersect in the shape format, and the circle is ready.
As another example, the principle is actually the same.
First insert a picture placeholder, insert a 6-sided shape, copy a few more, and adjust the positions. First combine the 6 sides. Then select Intersect. The honeycomb picture style is ready. Insert a picture and see the effect.
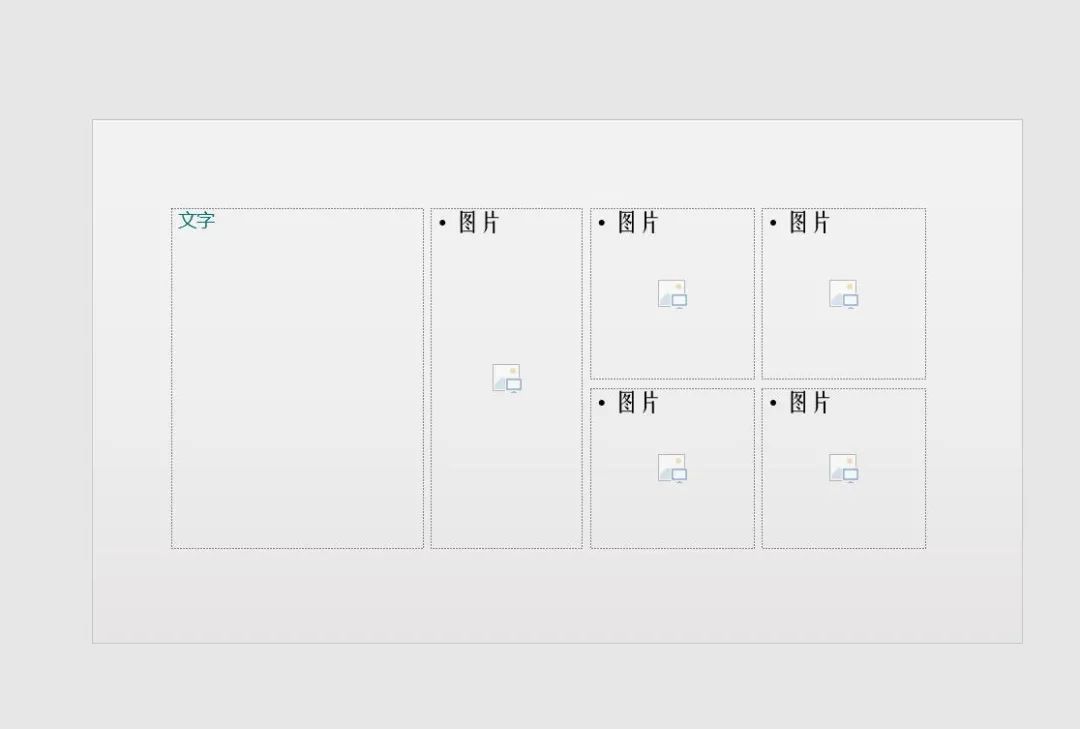
This one has text on the left and a spliced image on the right. Insert a text placeholder, and then insert 5 picture placeholders. Adjust the size and position.

How is this kind of hollow made? Insert a picture placeholder, insert 2 rectangles, and tilt them. Select the placeholder and then the shape and perform the cut in shape format. That's it.

How to change the image in the placeholder? Press the delete key to delete the picture in the placeholder, and then reinsert the picture.
Okay, have you learned how to use the master?
Articles are uploaded by users and are for non-commercial browsing only. Posted by: Lomu, please indicate the source: https://www.daogebangong.com/en/articles/detail/5-fen-zhong-gai-10-ye-PPT-da-shen-dou-ai-yong-PPT-mu-ban-tou-lan.html

 支付宝扫一扫
评论列表(196条)
测试